Schemer's Guide to Hypertext Markup Language
HyperText Markup Language (HTML) is the standard language used to describe web pages.
HTML uses formatting tags to control the display and placement of text and objects. All tags in html are surrounded by < and > signs. Each bit of text that you tag will be surrounded by two tags, one with a "/" in it, and one without.
A subset of HTML is described by this grammar:
Document ::= <html> Header Body </html>
Header ::= <head> HeadElements </head>
HeadElements ::= HeadElement HeadElements
HeadElements ::=
HeadElement ::= <title> Element </title>
Body ::= <body> Elements </body>
Elements ::= Element Elements
Elements ::=
Element ::= <p>Element</p>
Make the inner element a paragraph.
Element ::= <center>Element</center>
Center the element horizontally on the page.
Element ::= <b>Element</b>
Display the element in bold.
Element ::= Text
Note that this is not a complete HTML grammar, but should be enough for you to start making web pages. We will describe a few more Element productions later. The good thing about web pages, is you can see how they are made. In Internet Explorer, select View | Source to see the HTML that was use to produce the web page you are viewing. So, if you want to do something in the pages you generate that is not described in this document, you can look at the source code for a page that does it and figure out how.
Let's make a quick page to illustrate this:
<html>See truth.html to see how the page displays in your browser.
<head>
<title>The Meaning of Truth</title>
</head>
<body>
<p>
I have discovered the <b>meaning of truth!</b> </p>
<center>
<p>
(lambda (x y) x)
</p>
</center>
</body>
</html>
Note that each element has an open (e.g., <center>) and matching close (e.g., </center>). As is clear from the recursive grammar, elements can be nested inside each other. The text element, (lambda (x y) x) is inside the paragraph element, which is inside the center element, which is inside the body element which is inside the html document.
Table of Elements
To make more interesting (but not necessarily more truthful) web pages, here are some more elements you may find useful:
| Production | Description | Example | Appearance |
|---|---|---|---|
| Element ::= <em>Element</em> | Emphasized text (italics) | <em>Scheme Rules!</em> | Scheme Rules! |
| Element ::= <tt>Element</tt> | Typewriter font | <tt>Hello</tt> | Hello |
| Element ::= <font size="Value">Element</font> | Larger (use Value +1, +2, +3) or Smaller (use Value -1, -2) font | <font size=+2>hello</font> | hello |
| Element ::= <font face="Name">Element</font> | Select typeface for Element | <font face="tahoma"> (+ 3 4)</font> |
(+ 3 4) |
| Element ::= <font color="Color">Element</font> | Select color for Element. Color choices include black, white, red, yellow, blue, gray, green and purple | <font color="red"> Halt!</font> |
Halt! |
| Element ::= <br> | Line break (note there is no closing </br> | Go<br>Cavs!</em> | Go Cavs! |
| Element ::= <a href="URL">Element</a> | Make the inner element link to URL (web address) | <a href="http://www.virginia.edu">My University</a> | My University |
| Element ::= <img src="URL" width="Number" height="Number" " border="Number" alt="Text" > | Display a the picture in URL | <img src="uva-logo.gif" width="57" height="56" border="0" alt="UVA"> |
As should be clear from the grammar productions, all of these elements can be nested also. For example,
<a href="http://www.cs.virginia.edu/cs200/problem-sets/ps3/">displays a centered image that is a link:
<img src="http://www.cs.virginia.edu/cs200/cs200-tree.png" width=235
height=207 border=2 alt="Lambda Tree"></a>
<br>
<font face="arial"><font color="purple"><font size="+2"><b>Lambda Tree of Power and Knowledge</b></font></font></font>
</center>
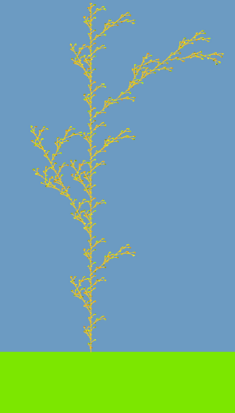
Lambda Tree of Power and Knowledge
Tables
Tables are a very useful tool in html. You can use them to arrange pictures and text across a page.
Element ::= TableThe important thing to note about a table is the columns contain Elements. So, we can put any element we want inside a table column (including, of course, another table).
Table ::= <table TableOptions> TableRows </table
TableOptions ::= TableOption TableOptions
TableOptions ::=
TableOption ::= border="Number"
Width of the lines around the table (0 for no lines)
TableOption ::= cellspacing="Number"
Amount of space between each cell (pixels)
TableOption ::= cellpadding="Number"
Amount of space around the element in a cell (pixels)
TableOption ::= bgcolor="Color"
Background color of the table
TableRow ::= <tr RowOptions> TableColumns </tr>
RowOptions ::= RowOption RowOptions
RowOptions ::=
RowOption ::= valign=" VerticalAlignment"
Line up rows along top, middle or bottom.
TableColumns ::= TableColumn TableColumns
TableColumns ::=
TableColumn ::= <td ColumnOptions> Elements </td>
ColumnOptions ::= ColumnOption ColumnOptions
ColumnOptions ::=
ColumnOption ::= align="HorizontalAlignment"
Align the elements in the column left, right or center.
ColumnOption ::= bgcolor="Color"
Set the background color of the column.
ColumnOption ::= width="Number"
Specify the width of the column.
Here's a simple example:
|
<table border="1"> <tr><td>A</td><td>C</td></tr> <tr><td>B</td><td>D</td></tr> </table> |
produces |
|
Here's a more complicated table using some of the options:
|
Tabla | ||||
| Rosa |
|
<p>
<center>
<table cellspacing="10" cellpadding="5" bgcolor="gray">
<tr valign="middle">
<td bgcolor="orange" width="200" align="center">
    <table border="1">
    <tr><td>A</td><td>C</td></tr>
    <tr><td>B</td><td>D</td></tr>
 	</table>
</td>
<td bgcolor="blue" width="200" align="center">
<font color="orange"><b>Tabla</b></font>
</td>
</tr>

<tr valign="middle">
<td bgcolor="blue" align="center">
<font color="orange"><b>Rosa</b></font>
</td>
<td bgcolor="orange" align="center">
    <table border="1" bgcolor="red")
    <tr><td>1</td><td>2</td></tr>
    <tr><td>3</td><td>4</td></tr>
 	</table>
</td>
</tr>
</table>
</center>
</p>
Note how the simple table is an element one of the columns of the complicated table.
Forms
To get interesting input from visitors, you need most than just links to click on. You've input your address, username, credit card, or a message onto a web page hundreds of time. Each time you do this, you're using an HTML form:There are two parts to any useful form: the page that displays the empty boxes for the user to fill out and the page that does something (processes) the data that the user entered. The URL in the FormAction gives the URL of the page to process the form input. The Schemer's Guide to PHP explains how to use the user input to forms in your PHP programs.Element ::= <form method="post" action="URL"> FormElements </form>
FormElements ::= FormElement FormElements
FormElements ::=FormElement ::= <textarea TextOptions>Element</textarea>
FormElement ::= <input InputOptions>
FormElement ::= <select>Selections</select>
Selections ::= Selection Selections
Selections ::=
Selection ::= <option value="Name">Element</option>
If you have a page called myform.php3, get in the habit of also having a page myform.process.php3 that does the processing. Then your form element would look like this:
<form method="post" action="myform.process.php3">
The Form Elements
There are several types of elements you can use to accept data. The full list is available at http://www.w3.org/TR/html401/interact/forms.html. The most useful ones are textarea, input, and select.textarea
The simplest element, textarea just creates a large blob where you can type a bunch of text. It has two arguments, "cols" and "rows", which control the number of columns and rows the user can enter. Anything between the textarea tags will be input into the blob. Consider this example:<textarea rows="2" cols="30">Input your text here</textarea>
Which will produce the following on an HTML page:
Go ahead and try to change the text in there. Note that the rows and cols parameters just control the display of the text area box; users can enter more text.
input
The input element has a type parameter that can be used to make many different kinds of input elements. Here are some examples:select
The select element constructs a menu of choices. Here's an example, on the left is the code, on the right is the output:
<form method="post" action="language.process.php3">
My favorite language is:
<select>
<option value="default">Select one below...</option>
<option value="scheme">Scheme</option>
<option value="php">PHP</option>
<option value="c++">C++</option>
</select>
<input type="submit" value="Go!"> </form>
Getting Input
The visitor can enter text into the text inputs, select from the menus, and click the checkboxes, but nothing happens until the form is submitted. The form is submitted when the user clicks on a button that is created by <input type="submit">.When the form is submitted, all of the data will get sent to whatever page is specified by the URL in the action="URL" parameter to the form element.
The values entered in the form are accessible in a PHP program. To access then, though, we need to give then names. This is where the name parameter comes into play. In an HTML form, every form element must have a unique string as its name. This is how the form processing page will tell the different pieces of data apart. This name cannot have any spaces and is not case sensitive.
Here is an example:
<FORM METHOD="POST" ACTION="form.process.php3">
First name: <INPUT TYPE="TEXT" NAME="FirstName"><BR>
Last name: <INPUT TYPE="TEXT" NAME="LastName"><BR>
Comments:<BR>
<TEXTAREA ROWS="3" NAME="UserComments"></TEXTAREA><BR>
<INPUT TYPE="SUBMIT"><INPUT TYPE="RESET">
</FORM>
Which produces something like this:
The input will now be avaliable in the PHP code at the processing page. See the PHP guide for how to get it.
| Credits: This guide was created by Stephen Liang, Portman Wills and David Evans. |
