Activity: Angular form and input validation
(no submission)Purpose:
- Practice data binding and directives
- Hands-on experience with form and validation
- Get ready to work on your project / app
For this exercise, you may work alone or with another student in this course.
Imagine you are writing an Angular app for a coffee shop (or any shop of your choice) that allows a user to select a drink (or anything your shop offers). You will implement a simple form and incorporate Angular's features including data binding, directive, and input validation. A sample interface for the Awesome Shop is shown below.
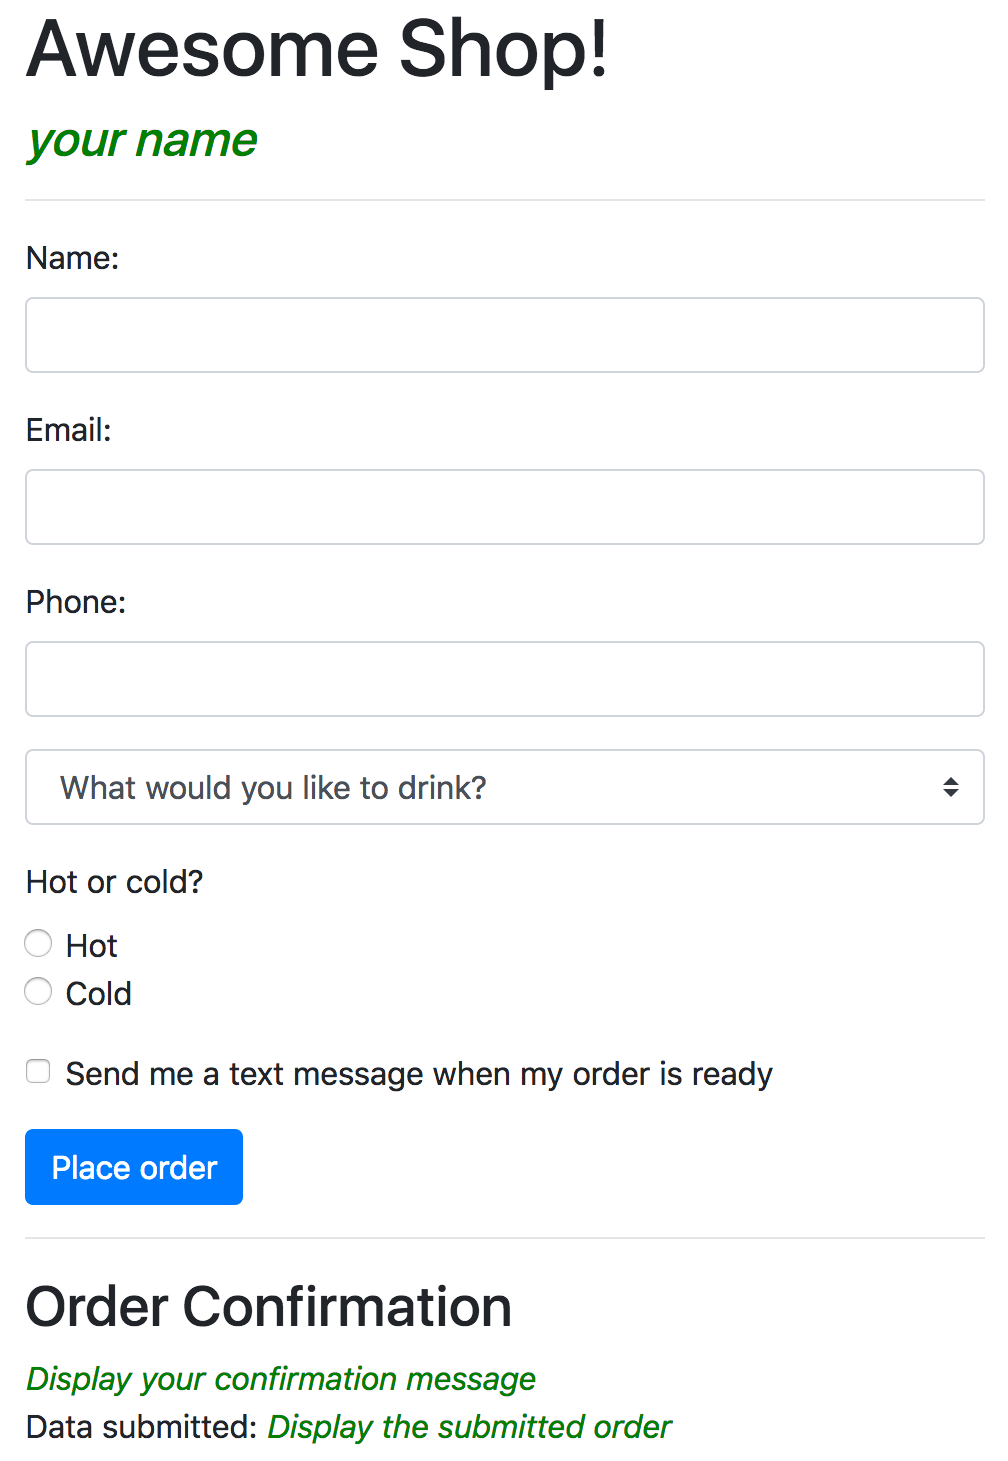
You may modify your interface the way you like. Get creative. Feel free to add additional elements you feel should be included and have fun!
To deploy and test your program, please refer to Angular deployment.
Tasks:
- Create an Angular app
- Create a new app (sometimes referred to as a project), let's name it
ng-form
- Create a new app (sometimes referred to as a project), let's name it
- Start the development server
ng serve
This command will compile and build all files, and then start the server.
- Test access to the app
- Open a web browser, enter a URL
http://localhost:4200
Note: node.js server runs on port 4200, by default.
- Open a web browser, enter a URL
- Modify the <title> tag of the app
- In your src folder, modify the <title> in your index.html.
- Add bootstrap to the app
- Go to https://getbootstrap.com,
select Get started, navigate to CSS,
copy the stylesheet
<link> - In your index.html,
add (paste) the stylesheet
<link>.
- Go to https://getbootstrap.com,
select Get started, navigate to CSS,
copy the stylesheet
- Modify the code
- In app.component.ts file,
update the
titleproperty to include the shop's name (you decide on the name of your shop). - In app.component.ts file, add a property (or properties) to include your name (and all team members).
- In app.component.html file, use the concept of data binding to display the shop's name and your name (and all team members). You may add / update / remove the html code as you wish.
- In app.component.ts file,
update the
- Add a form to app.component.html
- Add HTML code to create your order form.
- You may create a form from scratch or use the provided template as a starting point.
- Create a drink option
- In app.component.ts, add a drink property and assign a pre-defined list of drink options
in a class declaration.
For example,
drinks = ['coffee', 'tea', 'juice'];
- In app.component.html,
use a directive and the concept of data binding
to fill in the drink dropdown menu options.
<option *ngFor="let drink of drinks">{{ drink }}</option>
- In app.component.ts, add a drink property and assign a pre-defined list of drink options
in a class declaration.
For example,
- Work with a form and experience with data binding
- In app.module.ts, import the
FormsModuleinto your app.import { FormsModule } from '@angular/forms';IncludeFormsModulein the@NgModule'simportsarray. - In app.component.html,
attach a template reference to the
<form>tag and assign anngFormdirective to it.<form #yourFormTemplateReference="ngForm">
- Add
ngModelto the form inputs to bind data from the form to view (and also verify the data).
- In app.module.ts, import the
- Create a class representing an order model
- Create a class named order
- Add properties to the class constructor such that
the Order class can be used as a data model of the form (above)
export class Order { constructor( public name: string, public email: string, public phone: number, public drink: string, public tempPreference: string, public sendText: boolean, ){} } - To make the Order class available to the app,
in app.component.ts, import the class
import { Order } from './order'; - Create an instance of an order model in a class declaration of app.component.ts.
- In app.component.html, use the concept of data binding to bind data from the order model to view.
- Bind an order model to the form such that the existing data are populated on form load
- In app.component.html, use a
[ ]to bind property of anngModelof the form controls. For example, for a name input box,[ngModel]="orderModel.name"
- Observe the binding recently added and the binding from step 8. Notice that they are both one-way binding.
Changes to the view do not reflect the model; changes to the model do not reflect the form.
In practice, both view and model should be synchronized; i.e., two-way binding.
- Modify the form controls in app.component.html such that view and model are synchronized.
For example, update the
ngModelof a name input box as[(ngModel)]="orderModel.name"
- In app.component.html, use a
- Perform input validation, using Angular features for input validation
- Angular provides many pre-built classes that can keep track of the app state.
Here are some commonly used classes.
ng-touched— true when the form control has been visitedng-untouched— false when the form control has been visitedng-dirty— true when the form control's value has changedng-pristine— false when the form control's value has changedng-valid— true when the form control's value is valid (w.r.t. some rules)ng-invalid— false when the form control's value has invalid (w.r.t. some rules)
Each of these classes has associated property (with a boolean value):
touched,untouched,dirty,pristine,valid,invalid - Be sure to provide appropriate feedback
- Use class binding or style binding to format the feedback
- A sample regular expression describing general formats of email addresses is provided below
pattern="^([a-zA-Z0-9_\-\.]+)@([a-zA-Z0-9_\-\.]+)\.([a-zA-Z]{2,5})$"
- Angular provides many pre-built classes that can keep track of the app state.
Here are some commonly used classes.
- Add more form elements
- In addition to the provided (very basic) drink options, add something else the shop offers.
- You may add any form elements of your choice
- Be sure to make use of data binding, directive, and input validation. (The more you practice, the more you learn)
Remember to shutdown the server when you are done
You may modify your interface the way you like. Get creative. Feel free to add additional elements you feel should be included and have fun!
 CC-BY-NC-SA 4.0