Basic Web Deployment
(Please tell me if you find any errors or omissions in the document —Upsorn Praphamontripong, 22-May-2022)
Deploy on XAMPP
XAMPP is an open source package that is widely used for PHP development. XAMPP contains MariaDB, PHP, and Perl; it provides a graphical interface for SQL (phpMyAdmin), making it easy to maintain data in a relational database.
If you have not installed XAMPP, please refer to XAMPP-setup to install and set up XAMPP.
Assuming that you have already set up XAMPP
- Start the PHP environment ("Apache Web Server")
Reminder: be sure to stop the server when you are done. Leaving the servers running consumes energy and may later prevent the servers from starting.
To deploy your web page
- Create a directory for your project in
XAMPP/htdocs/folder
Put your HTML files underXAMPP/htdocs/your-project/ - Create a directory called "images" (or assets, or any name of your choice) in
XAMPP/htdocs/your-project/
Put any image files inXAMPP/htdocs/your-project/images/
Think about how you would like to organize your files for future access - Create a directory called "styles" in
XAMPP/htdocs/your-project/
Put any style or CSS files inXAMPP/htdocs/your-project/styles/
Think about how you would like to organize your files for future access - Create a directory called "js" in
XAMPP/htdocs/your-project/
Put any JavaScript files inXAMPP/htdocs/your-project/js/
Think about how you would like to organize your files for future access
To test your web page
- Access your web page via a web browser. Your URL will be similar to
http://localhost/your-project/yourfile.html - Access the
index.htmlfile via a web browser. Your URL should be
http://localhost/your-project/index.htmlor
http://localhost/your-project(to improve the usability)
Deploy on Google Cloud Platform (GCP)
Redeem and use your Google coupon. Do not enter your credit card. (If you have not received an email with the link to redeem a coupon, please notify the course instructor via email.)
To deploy your web page
- Assuming that you already have a Google account. Go to the Google Cloud Console and login to your account
- Create a new project for your web page(s) or website
- Click the "Select a project" dropdown icon (next to "Google Cloud Platform")

- Select New Project
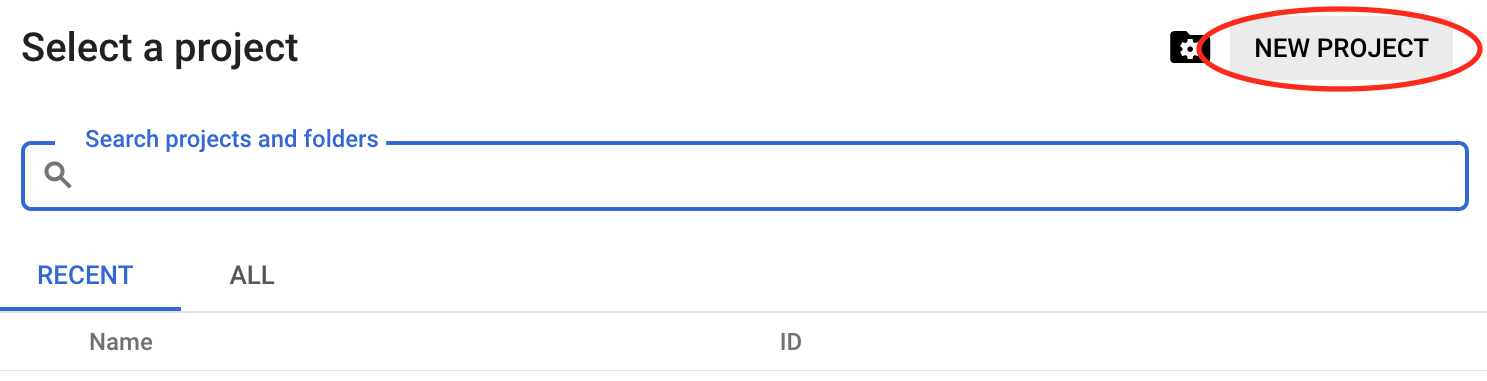
This will prompt a screen allowing you to create a new project. Enter your Project Name (e.g.,webPL) and projectID (e.g.,cs4640webpl). Be sure the Billing account is associated with the Google coupon you redeemed. Then, click CREATE.
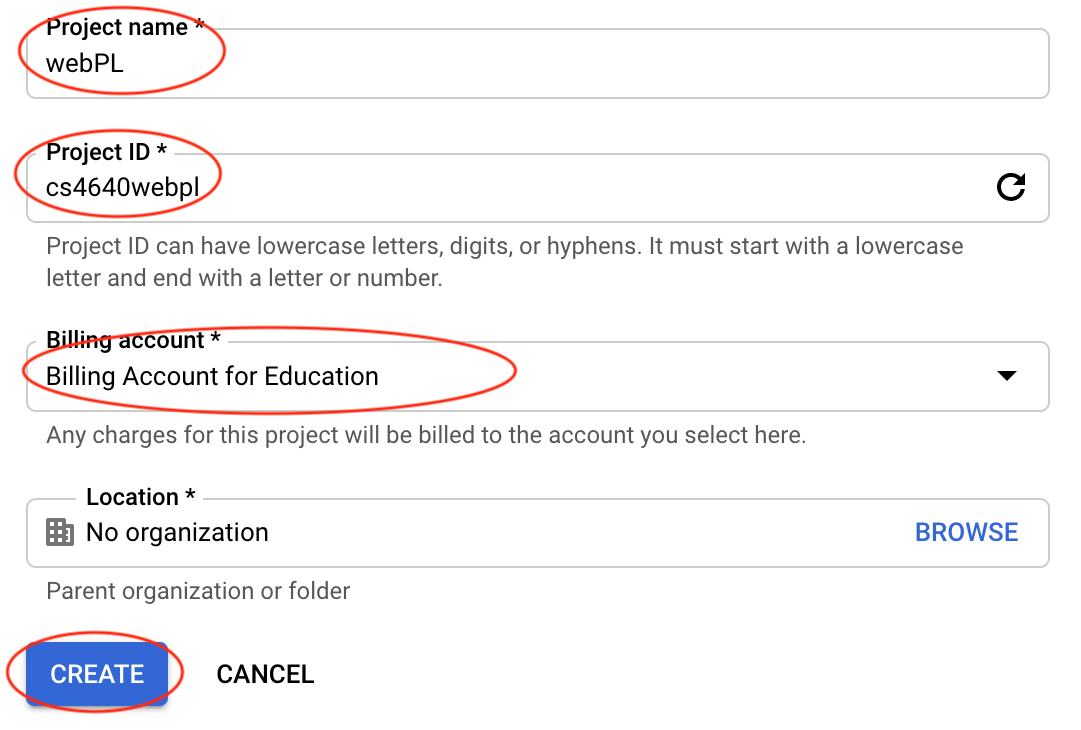
Note: If you use virginia.edu email account, please be sure to select virginia.edu for Location.
- Click the "Select a project" dropdown icon (next to "Google Cloud Platform")
- Create a Google Storage Bucket
- Access the project you just created
- Click the Navigation Menus (a "hamburger menu" icon, top left of the screen),
then select Storage
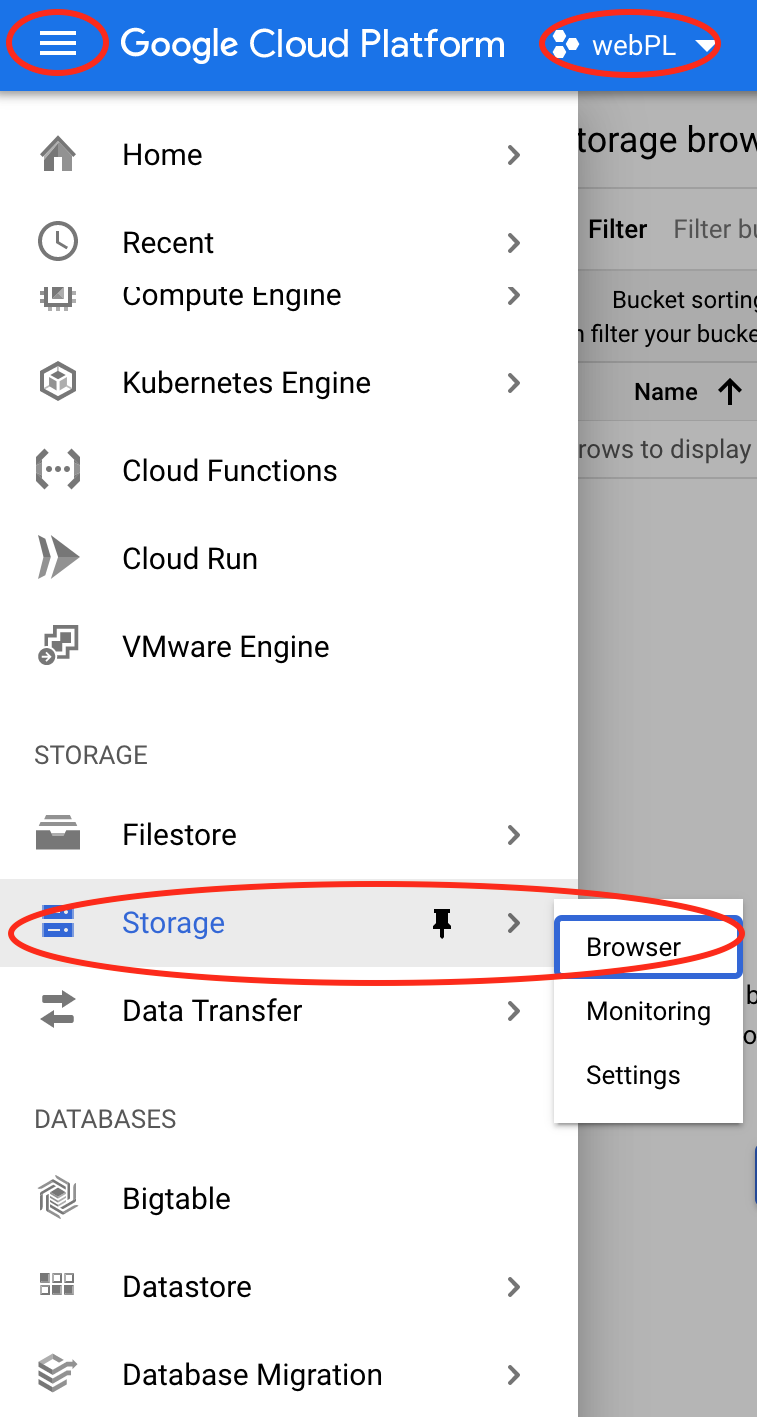
- On the Storage/Browser screen, click Create bucket option
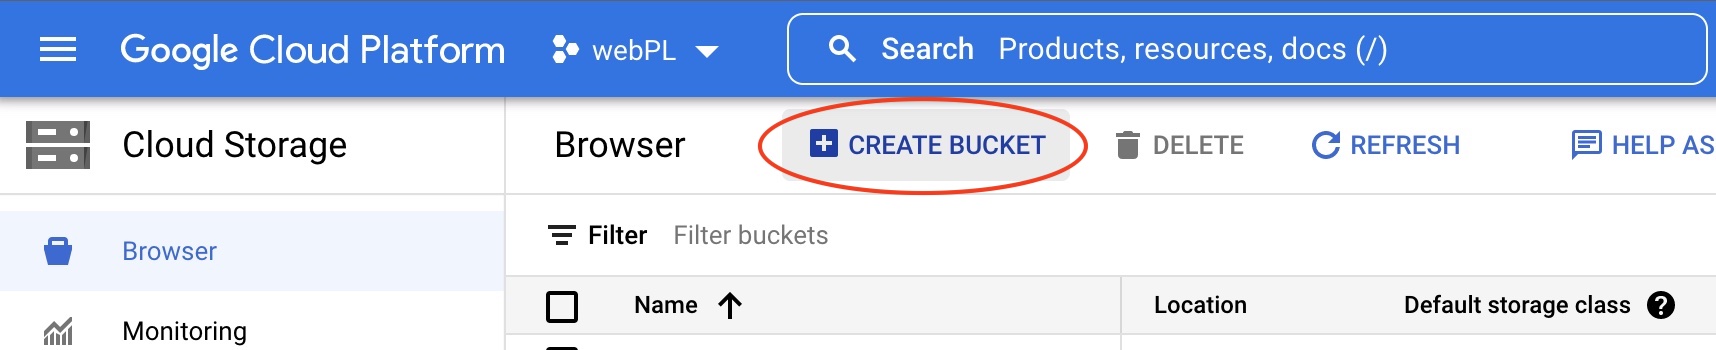
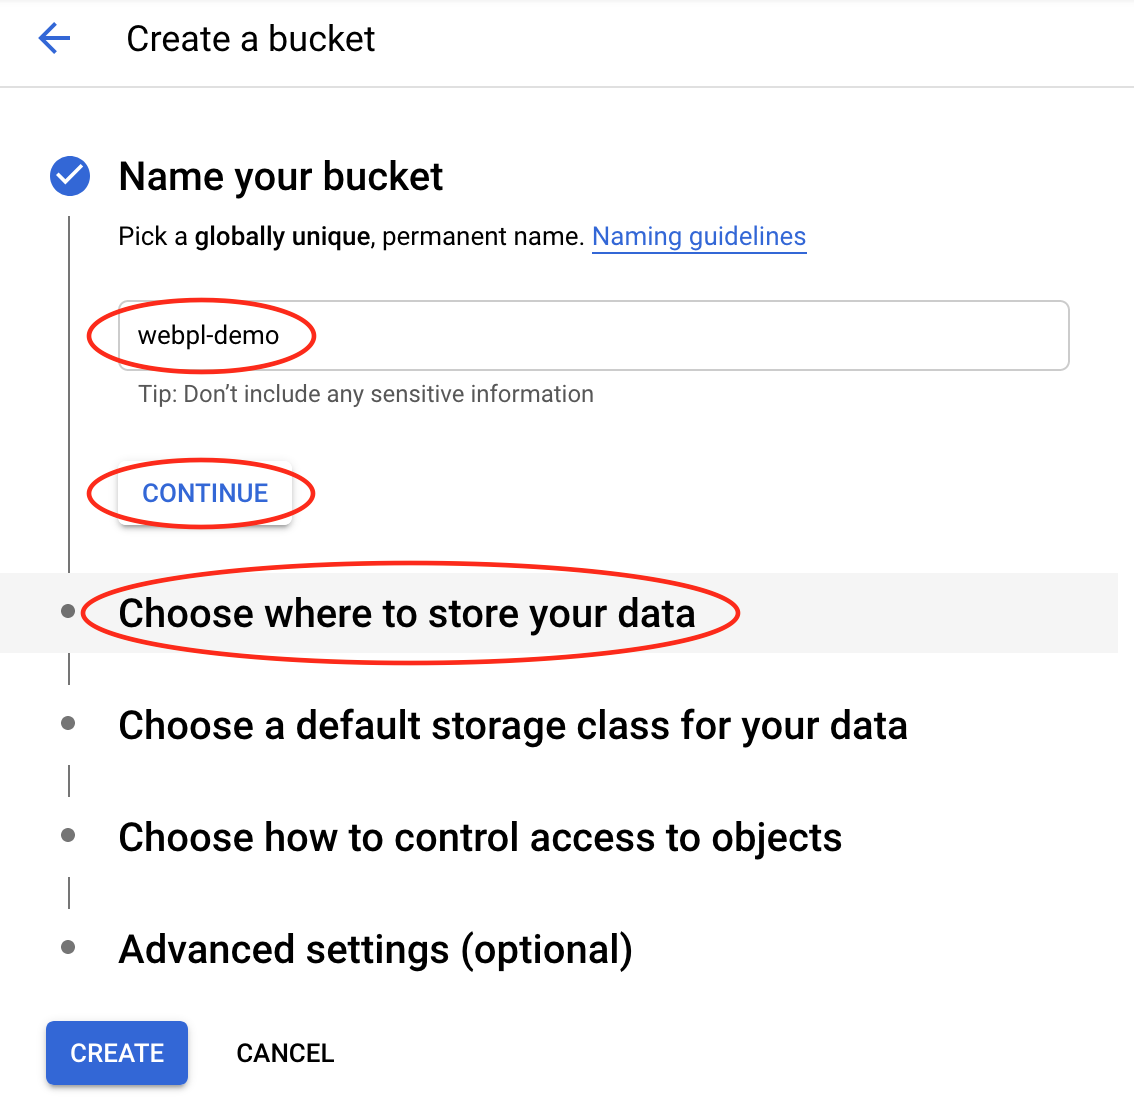
- On the Create a bucket screen,
enter your bucket's name (for example,
webpl-demo). The bucket serves as your root folder; i.e., the main context directory of your web app / website. Click continue. You may need to click Choose where to store your data to expand the option.
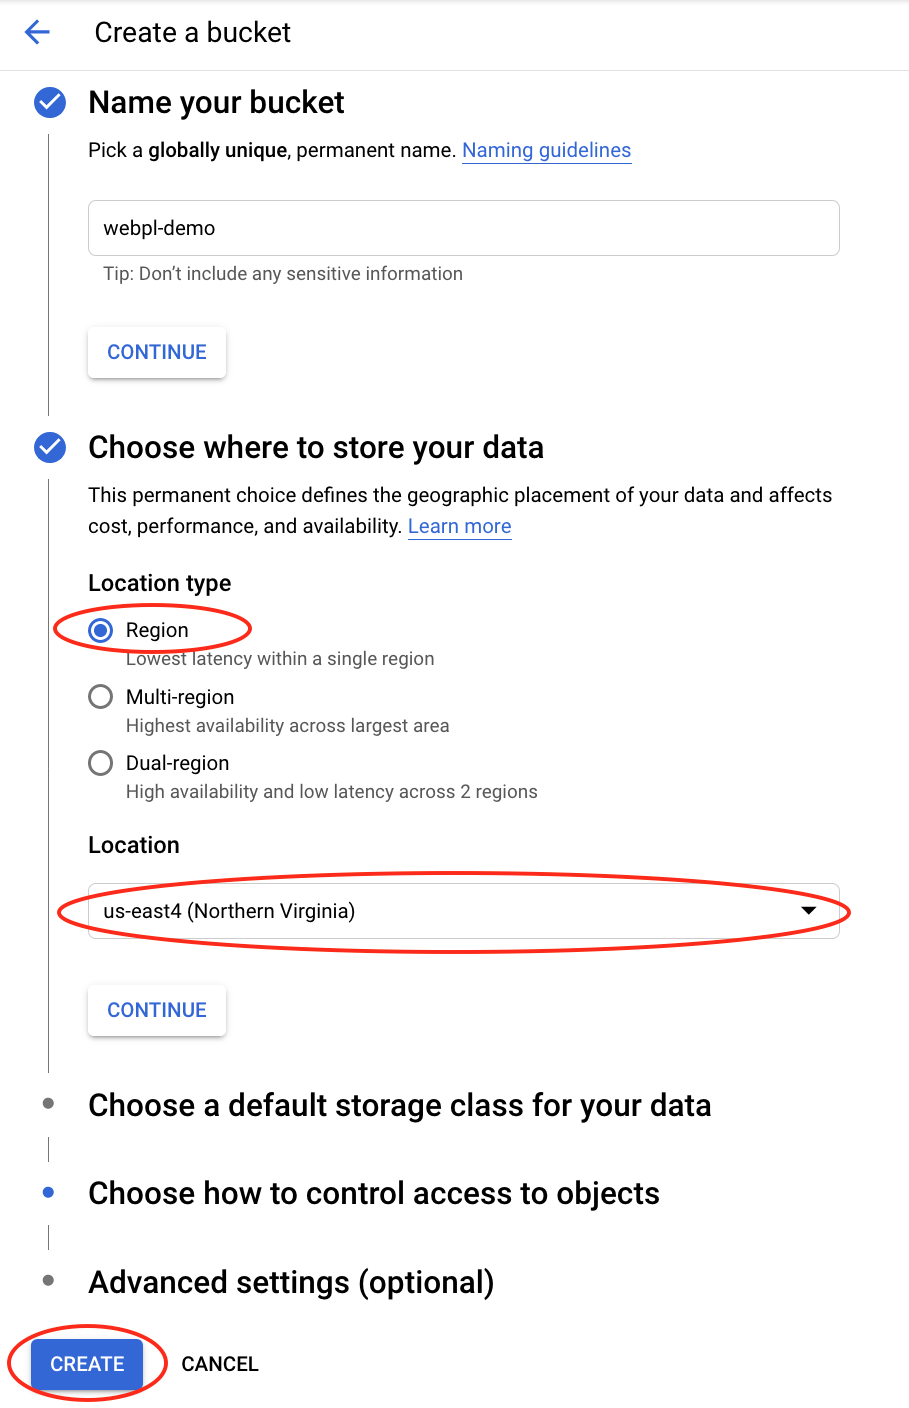
- Select Region for Location type,
and select us-east4 for Location;
then click the Create button
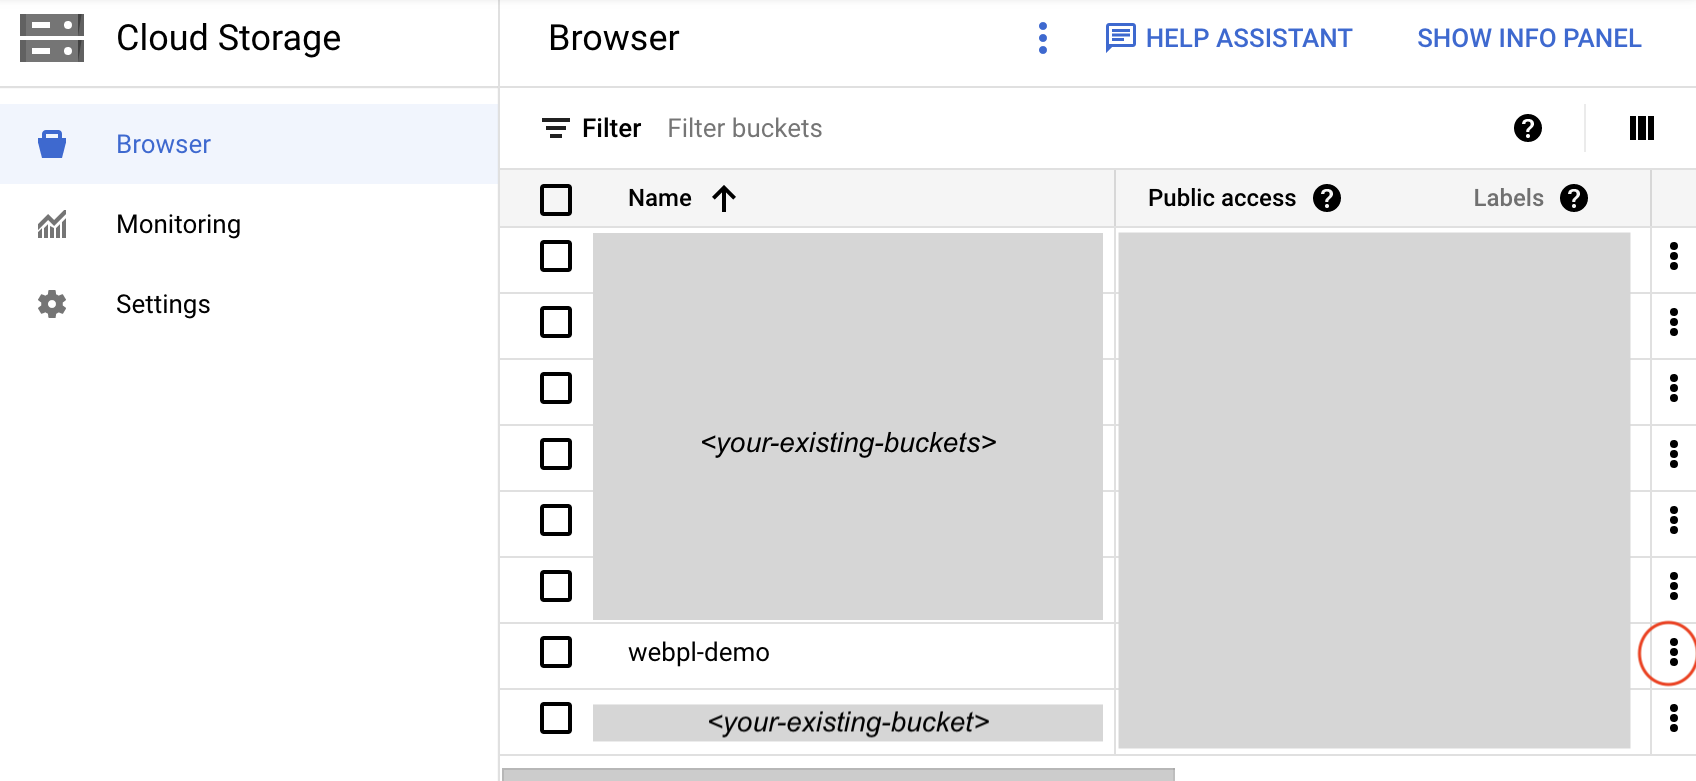
- You may access the bucket you just created from the Browser screen
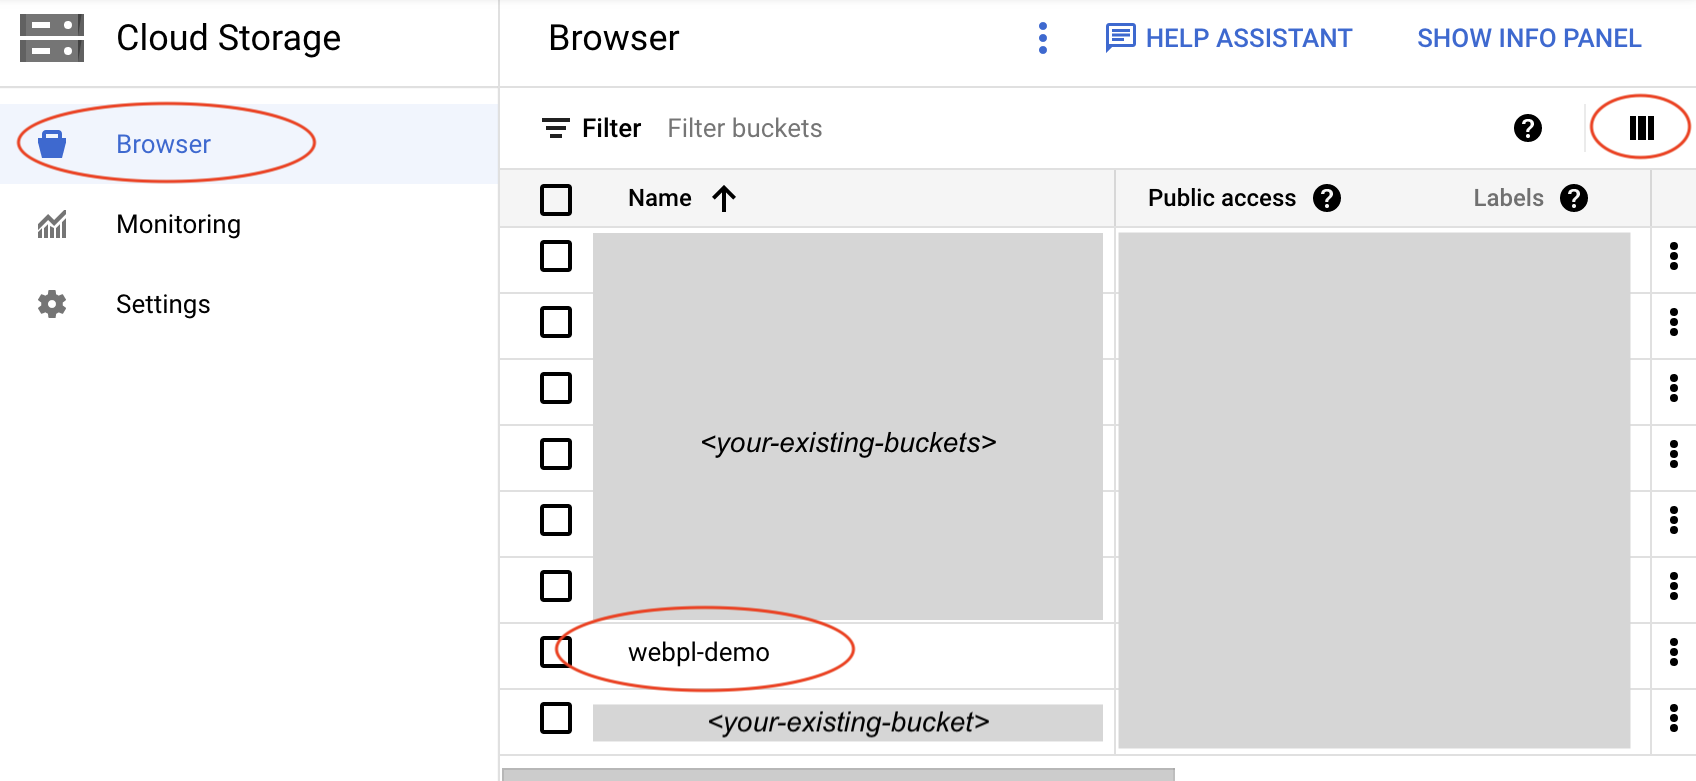
You may use to select columns to be displayed.
- Deploy web page(s)
- Go to the bucket you just created (click on the bucket name,
webpl-demo) - Select the Upload Files option to upload your file(s)
or the Upload folder option to upload your folder(s).
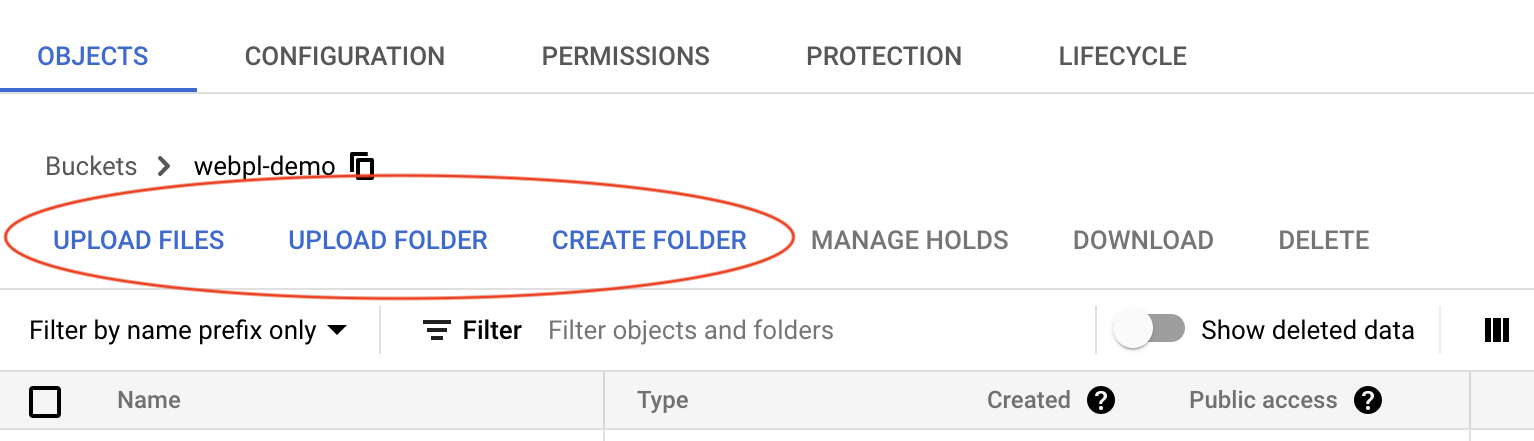
The folder structure should be consistent with how your web resources (html, css, js, images, media, data files) are organized.
- Go to the bucket you just created (click on the bucket name,
To test your web page
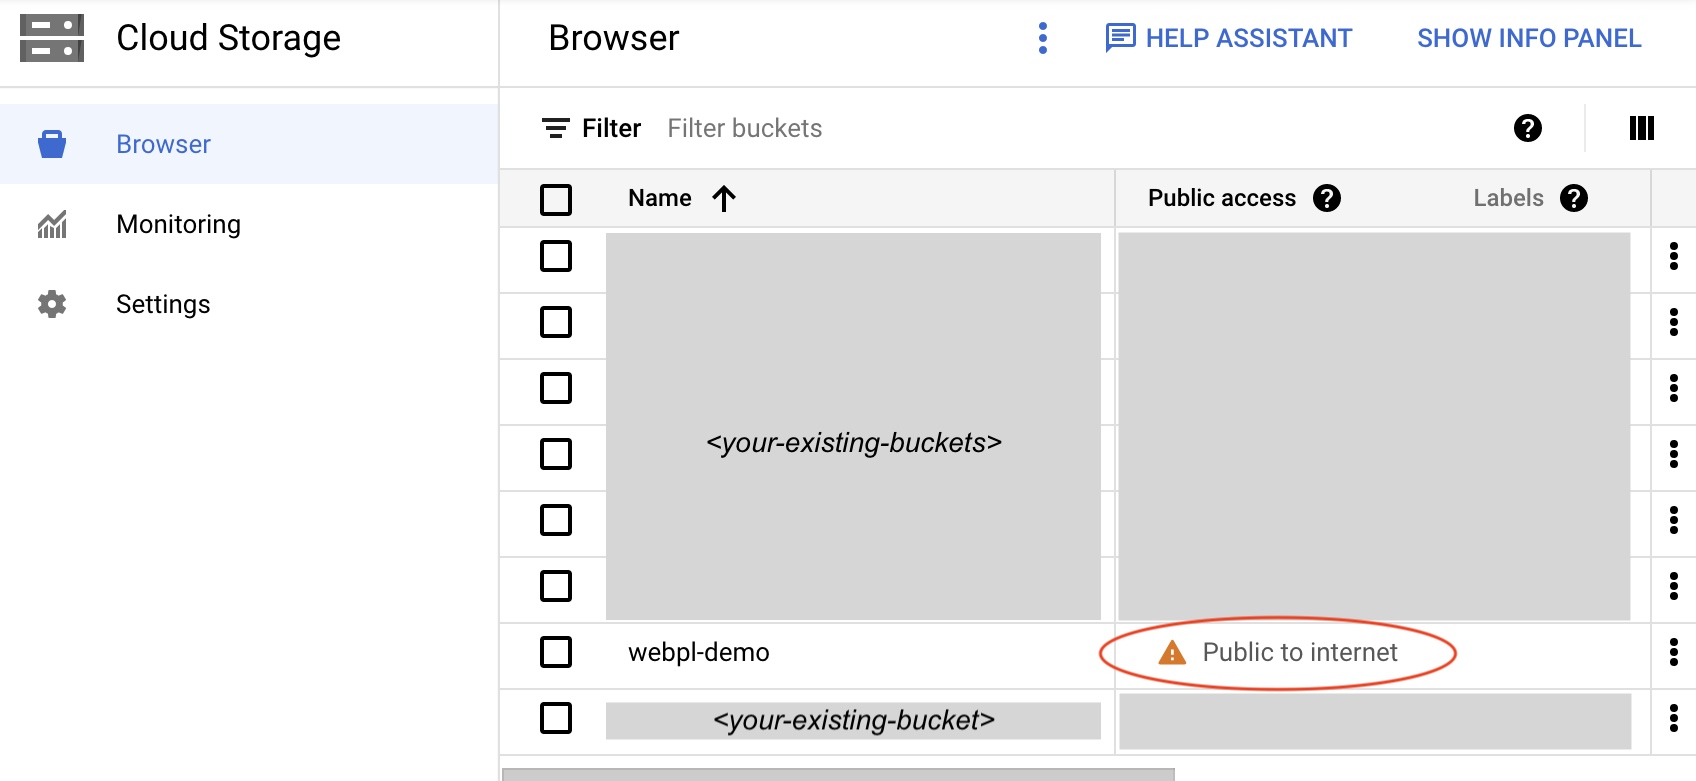
- To make your page(s) publicly available, you need to set the bucket's permissions.
On the Browser screen, locate your bucket.
To set "Public" access, click the "three-veritical dots" option on the right,
Select Edit access
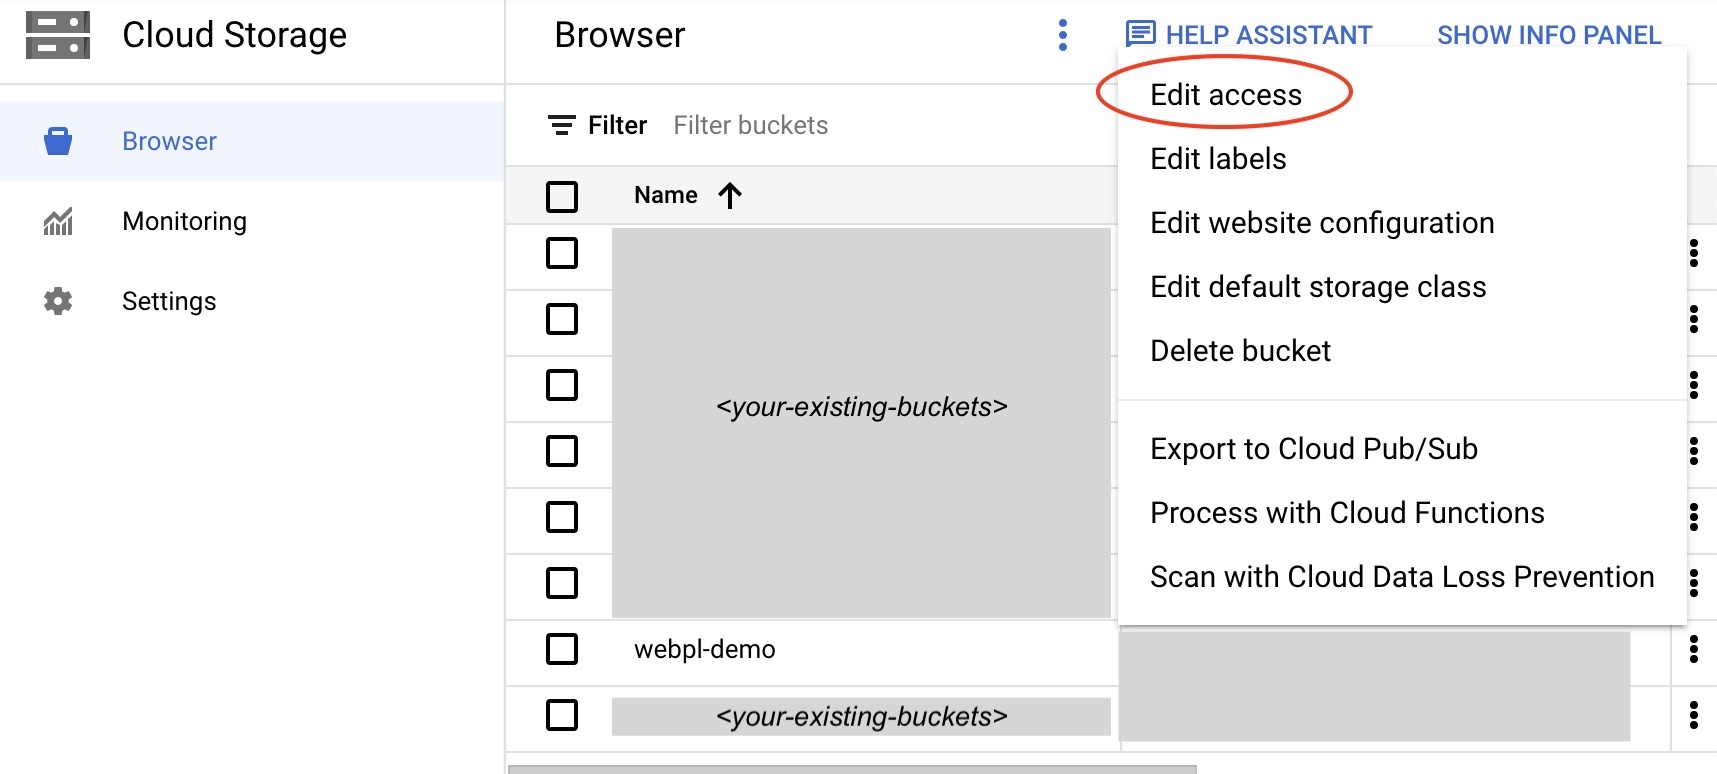
**Do not export to cloud**
On the PERMISSIONS screen, click the REMOVE PUBLIC ACCESS PREVENTION button
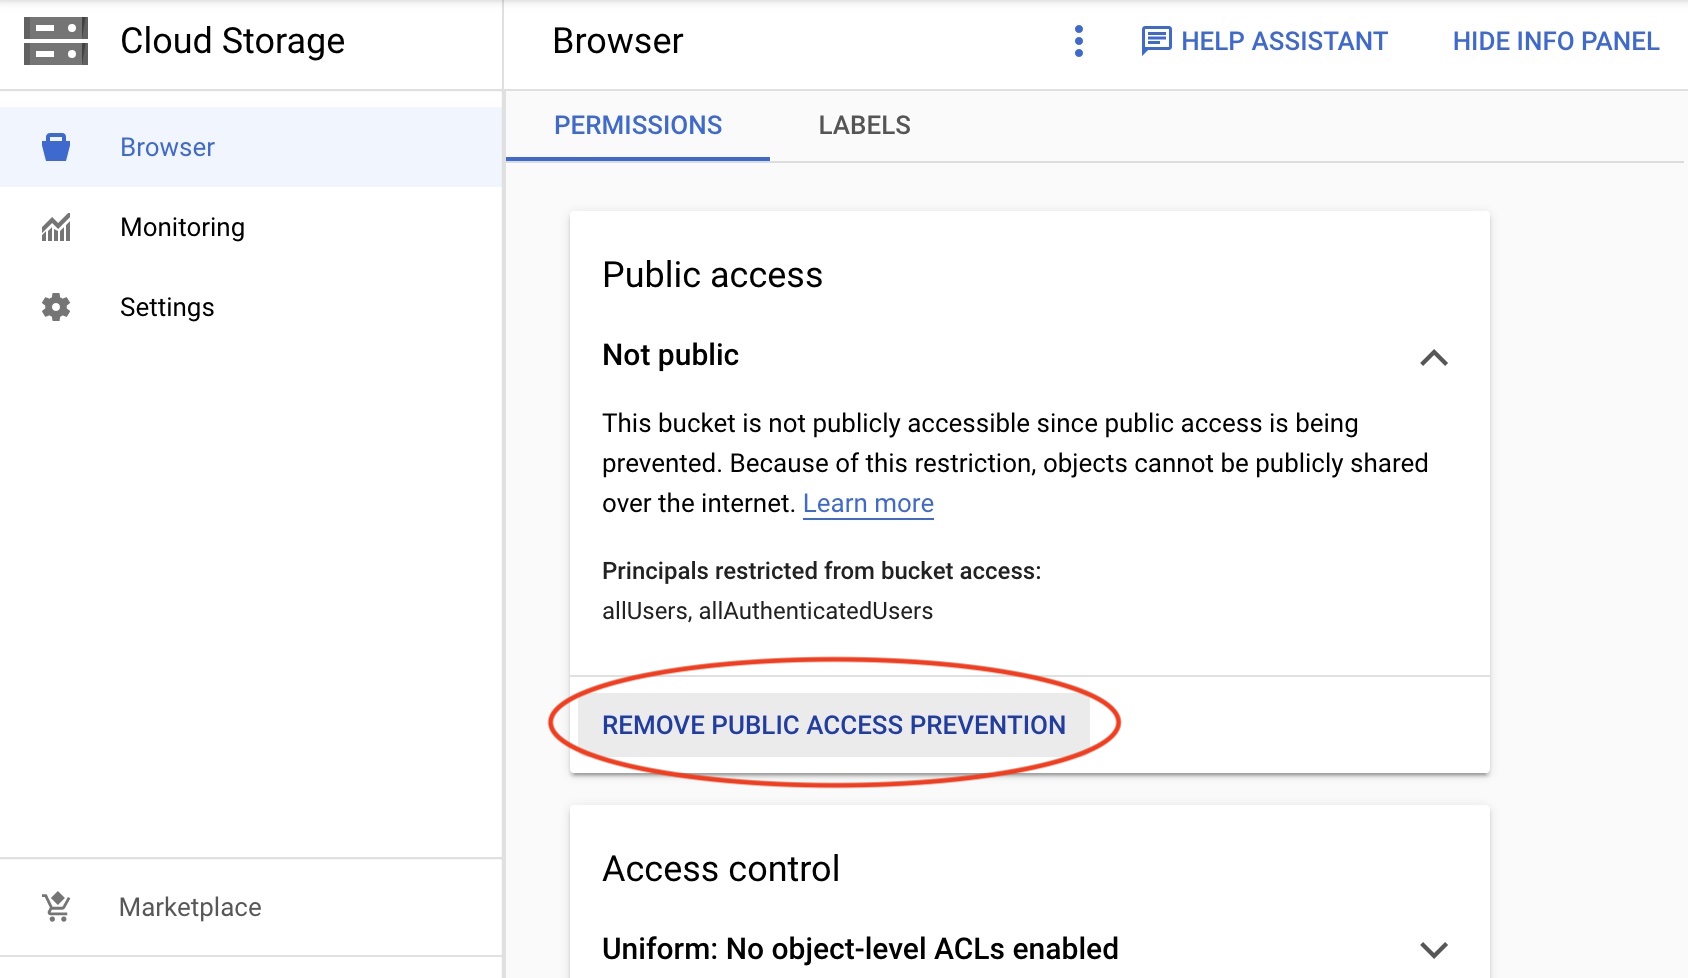
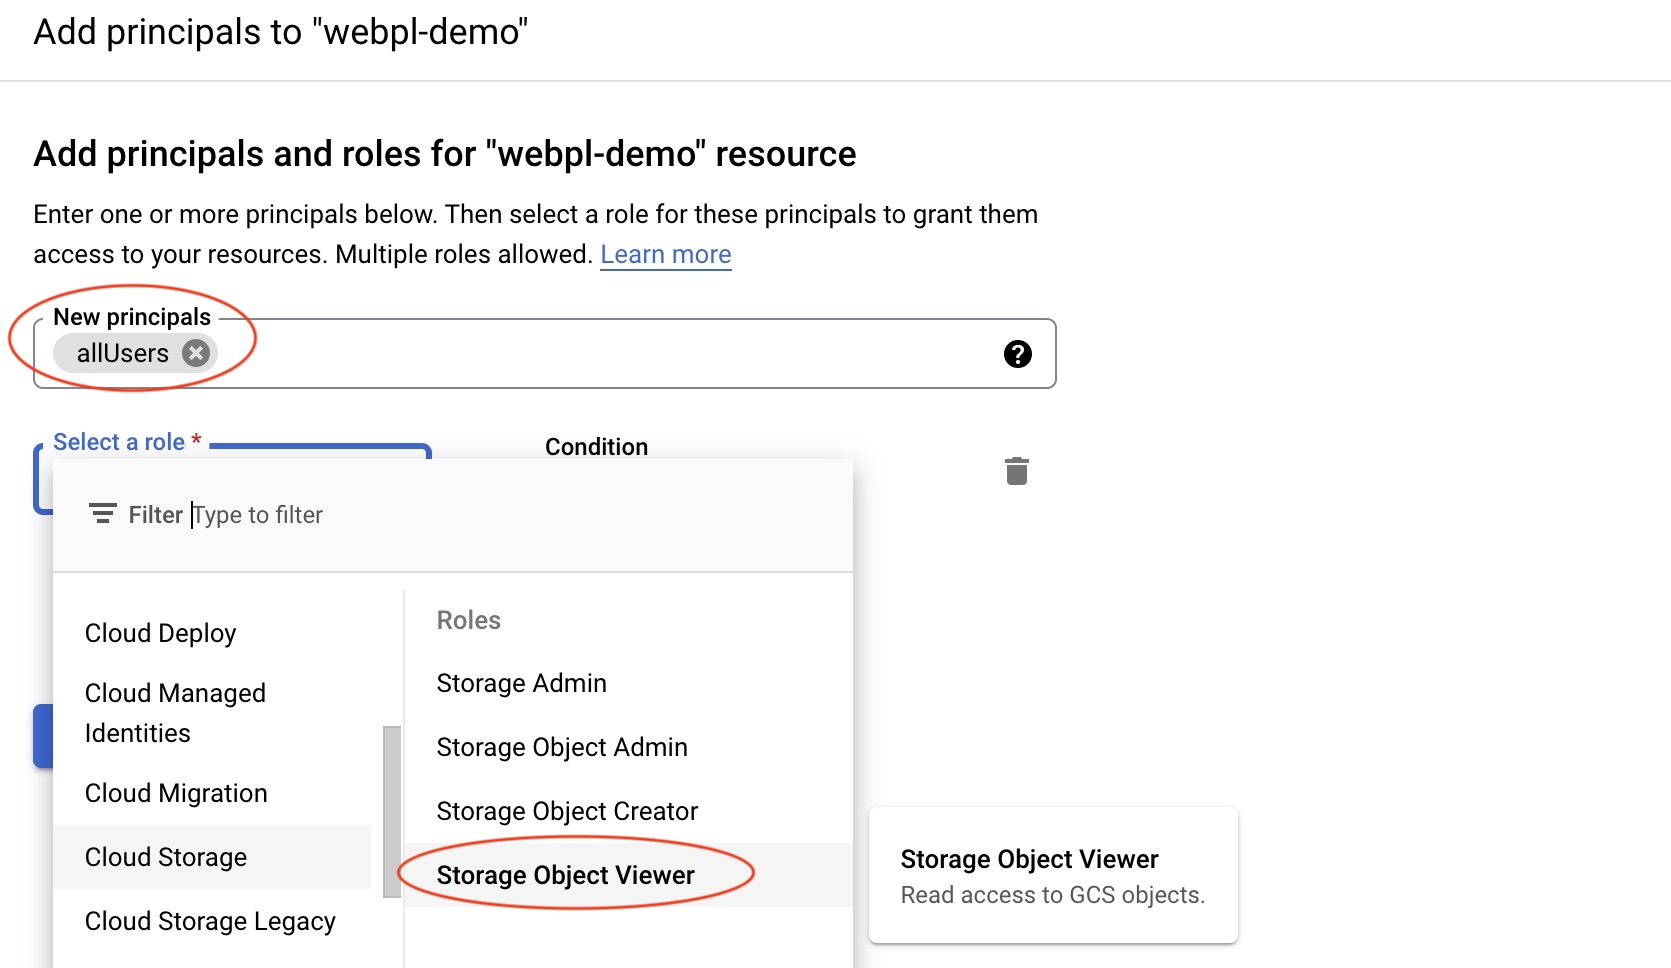
Select the ADD PRINCIPAL button
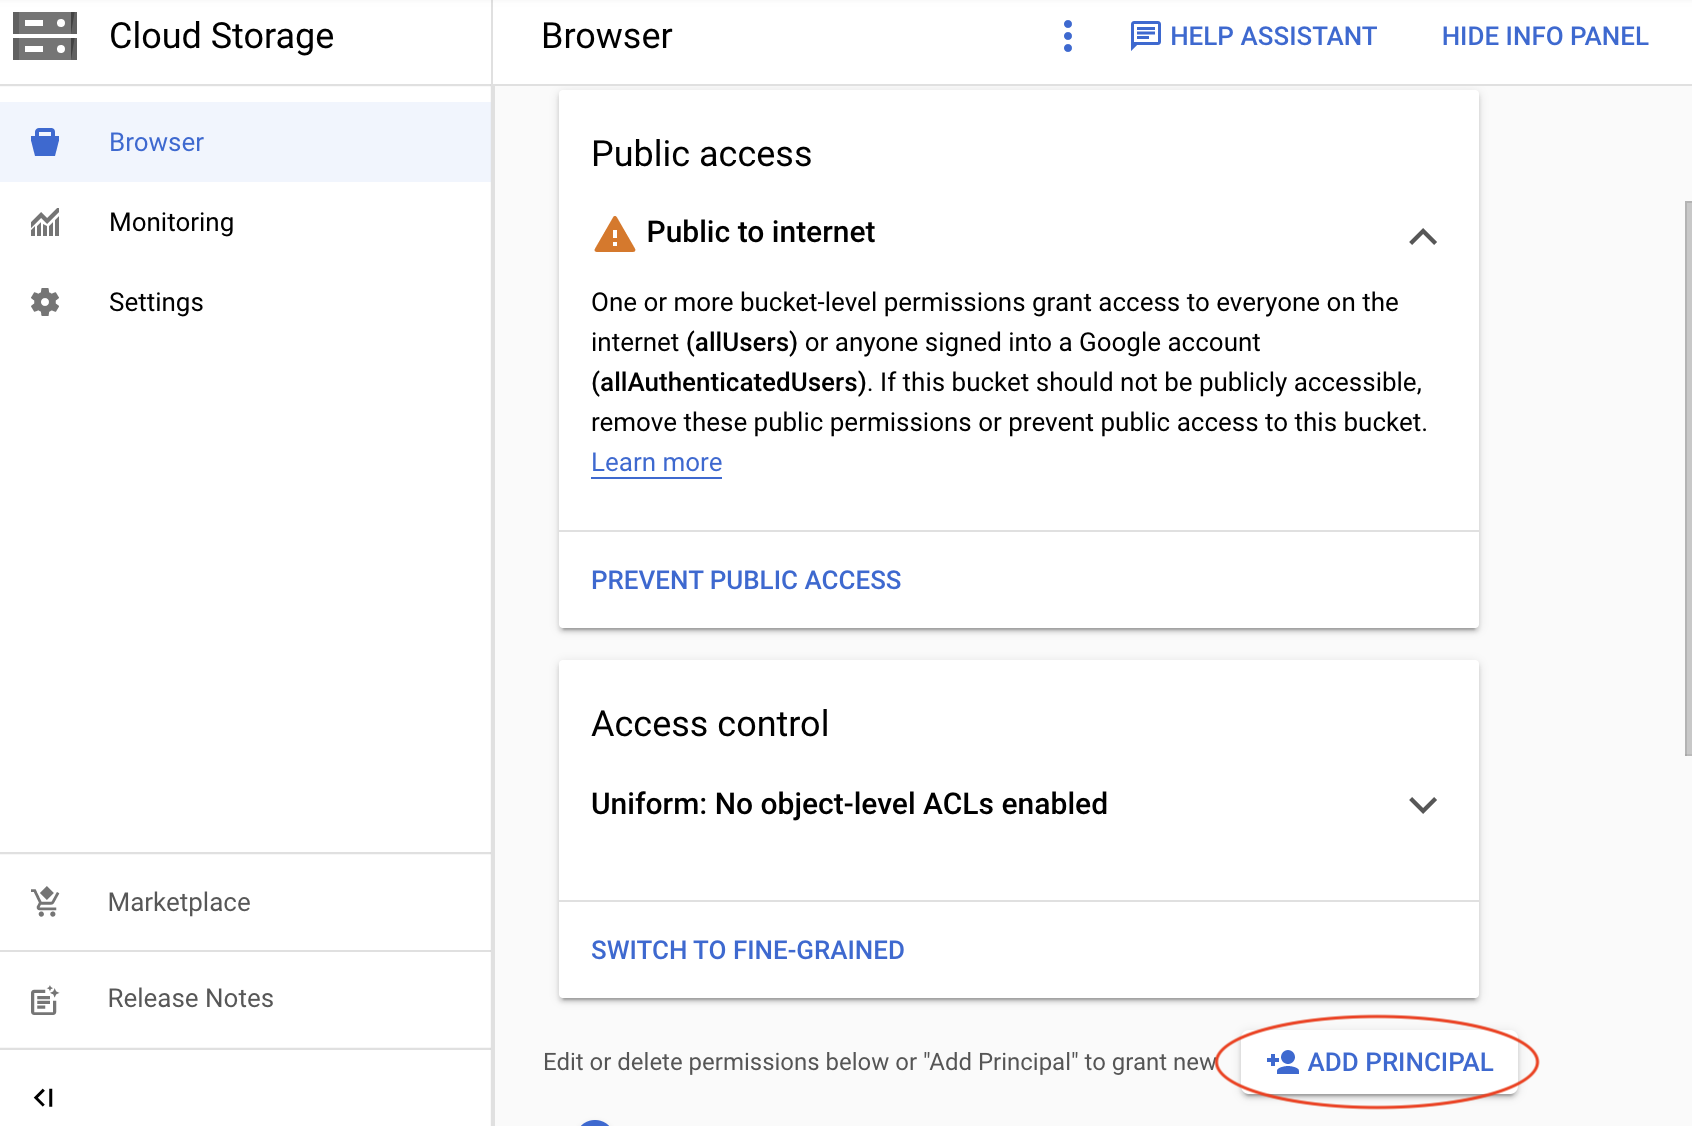
Enter allUsers in the New principals textbox and select a role Cloud Storage, Storage Object Viewer, then click the Save button.
Now, your bucket is publicly available
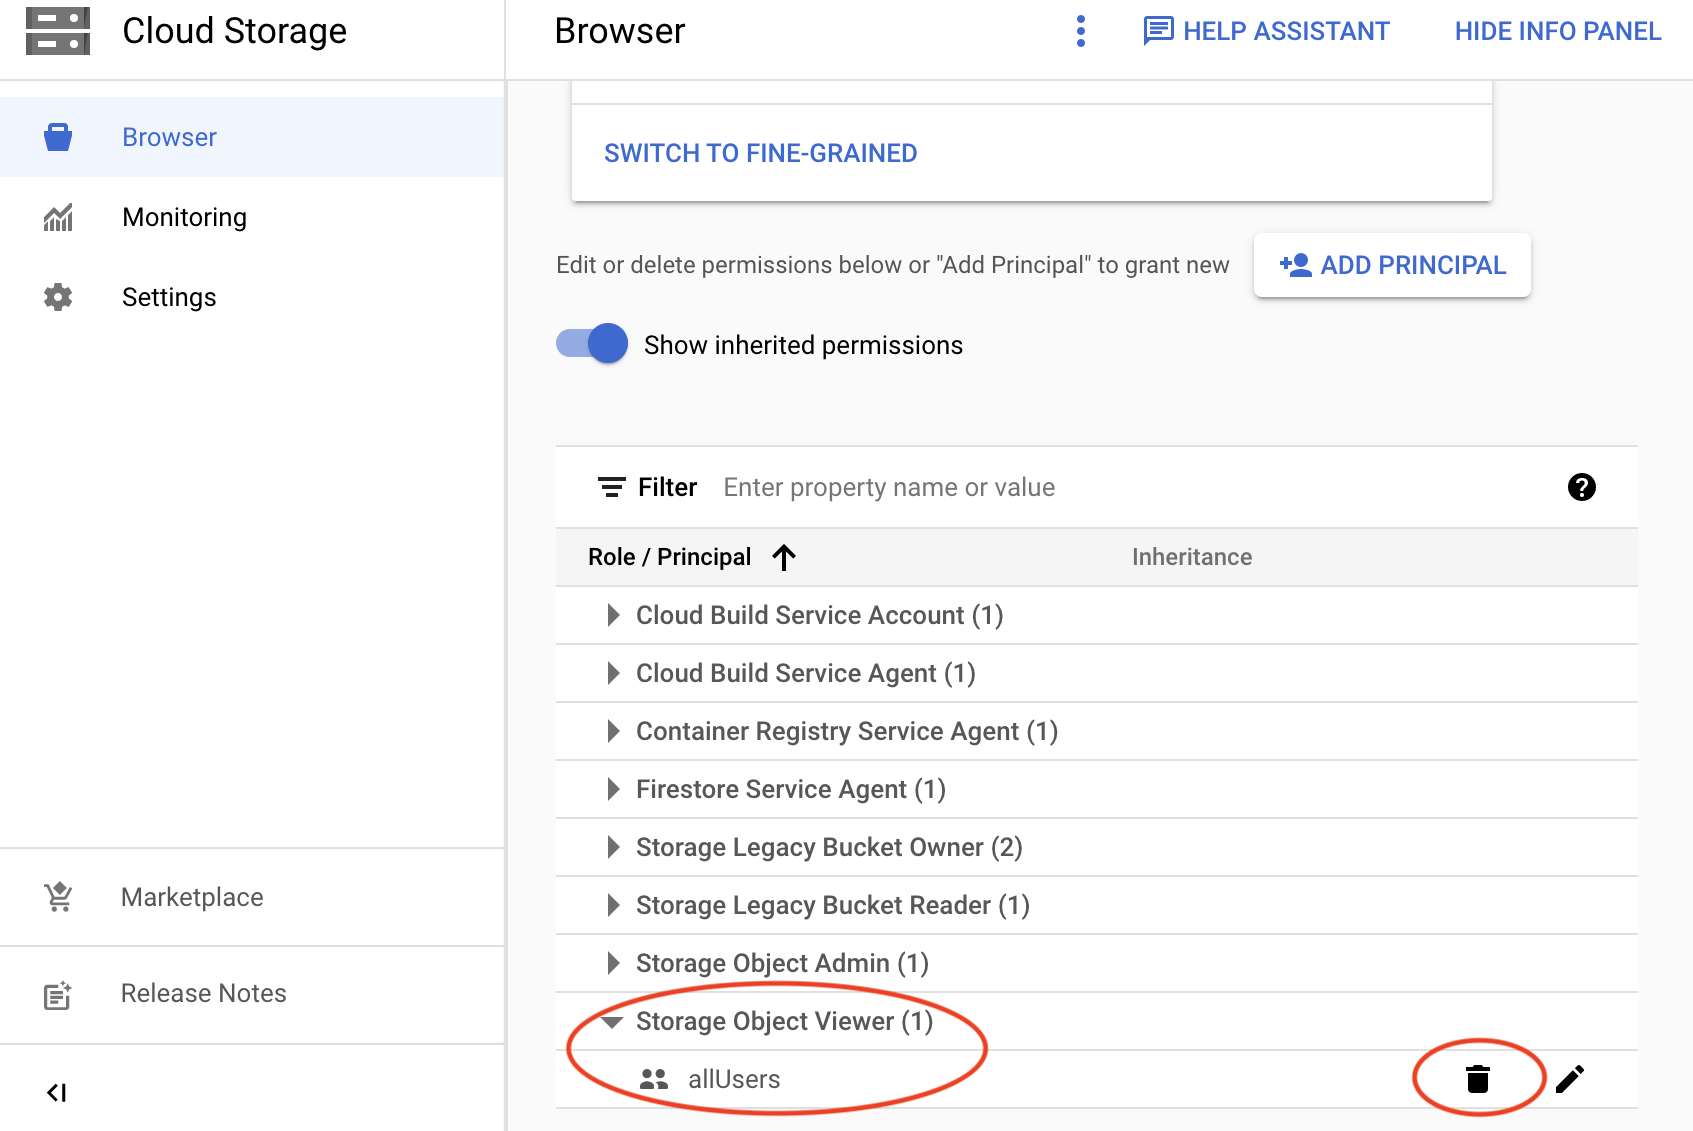
If you need to delete members, for example, enter allUsers in the Filter textbox. Once the member is found, click a "trash" icon. Alternatively, you may select the Role / Principal >> Storage Object Viewer to locate the members to be deleted.
- Get the URL to your web page by clicking
Public to internet or Copy URL.
Then, open the page on a web browser.
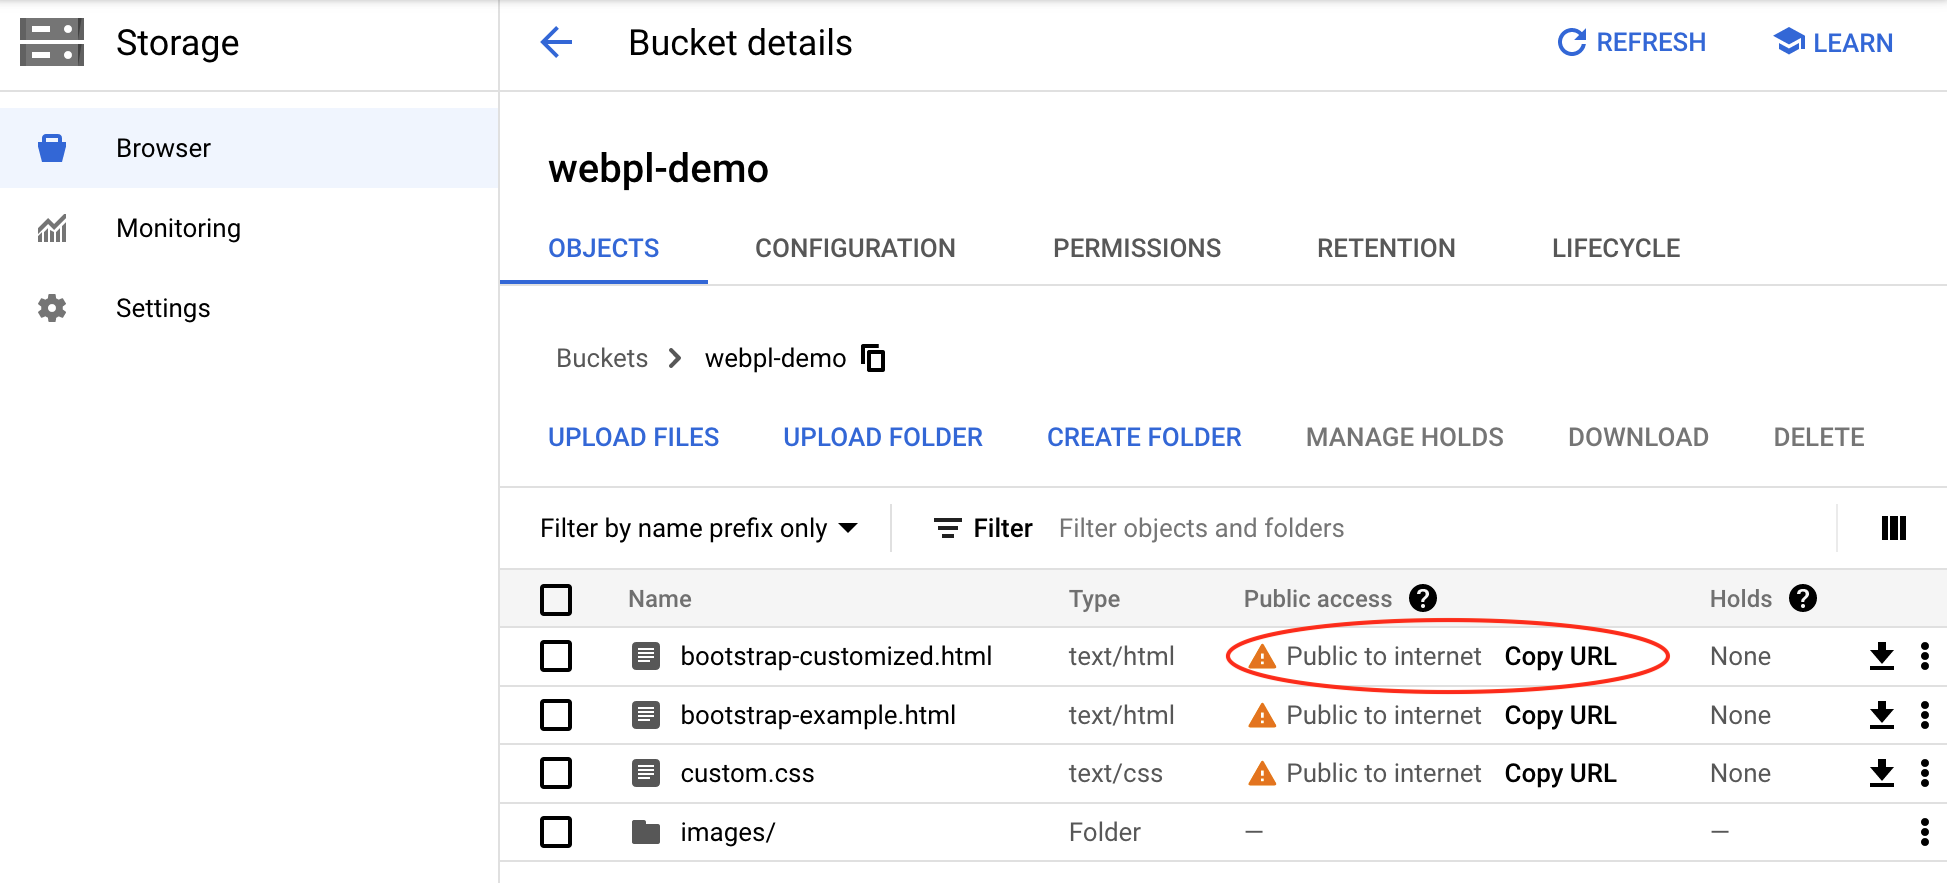
Alternatively, you may click the file name. This will lead to another page containing the URL. - Access your web page via a web browser. Your URL will be similar to
https://storage.googleapis.com/your-bucket-name/yourfile.html
(for example, https://storage.googleapis.com/webpl-demo/bootstrap-customized.html)
Deploy on UVa Home Directory
To deploy your web page
- Login to your account (UVa Home Directory)
- Upload all your files to
myweb/htmlfolder
To test your web page
- Access your web page via a web browser. You URL will be similar to
http://people.virginia.edu/~Your-UVA-ComputingID/your-project/yourfile.html
Note: This option is simple and your web site/page will be attached to the UVA domain (which can help with the search result page). However, it is not recommended for your web app as its support is very limited.
 CC-BY-NC-SA 4.0