JSP Deployment
This is a short introduction to help you set up Tomcat and deploy Java Server Pages (JSPs). For more information, please refer to Apache Tomcat.
The first two sections help you setup a container engine (Tomcat) that supports JSPs. If you already set up Tomcat, please proceed to Working with JSP
(Please tell me if you find any errors or omissions in the document —Upsorn Praphamontripong, 11-January-2018)
Getting Started With Tomcat
- If you do not alreaady have Java on your machine, download and install Java Development Kit.
Note: You should verify which JDK version is supported by
the version of Tomcat you are using.
- Download Java EE from http://java.sun.com/
- Install JDK and JRE according to the instructions included with the release.
- Set the environment variable JAVA_HOME to the directory where you installed the JDK release:
- You may need to restart your computer.
- Download Tomcat "Core" zip file from:
http://tomcat.apache.org/.
- Unzip the
apache-tomcatzip file- (for Window) Assuming you unzipped it on drive C, the path is
C:\apache-tomcat - (for Mac) Assuming you unzipped it in Applications folder, the path is
Applications/apache-tomcat
- (for Window) Assuming you unzipped it on drive C, the path is
- Startup Tomcat
- (for Window)
- Double click
C:\apache-tomcat\bin\startup.bat, or - Use a terminal, go to
C:\apache-tomcat\bin\then executestartup.bat
- Double click
- (for Mac)
- Use a terminal, go to
Applications/apache-tomcat/bin/then execute./startup.sh
- Use a terminal, go to
http://localhost:8080/
- (for Window)
- Shutdown tomcat
- (for Window)
- Double click
C:\apache-tomcat\bin\shutdown.bat, or - Use a terminal, go to
C:\apache-tomcat\bin\then executeshutdown.bat
- Double click
- (for Mac)
- Use a terminal, go to
Applications/apache-tomcat/bin/then execute./shutdown.sh
- Use a terminal, go to
- (for Window)
Setup Tomcat in Eclipse environment
Note: This is optional. You may use any IDEs of your choice with tomcat installation from the previous step.
Requirements: Tomcat, Eclipse, JDK, and JRE
- Open Eclipse
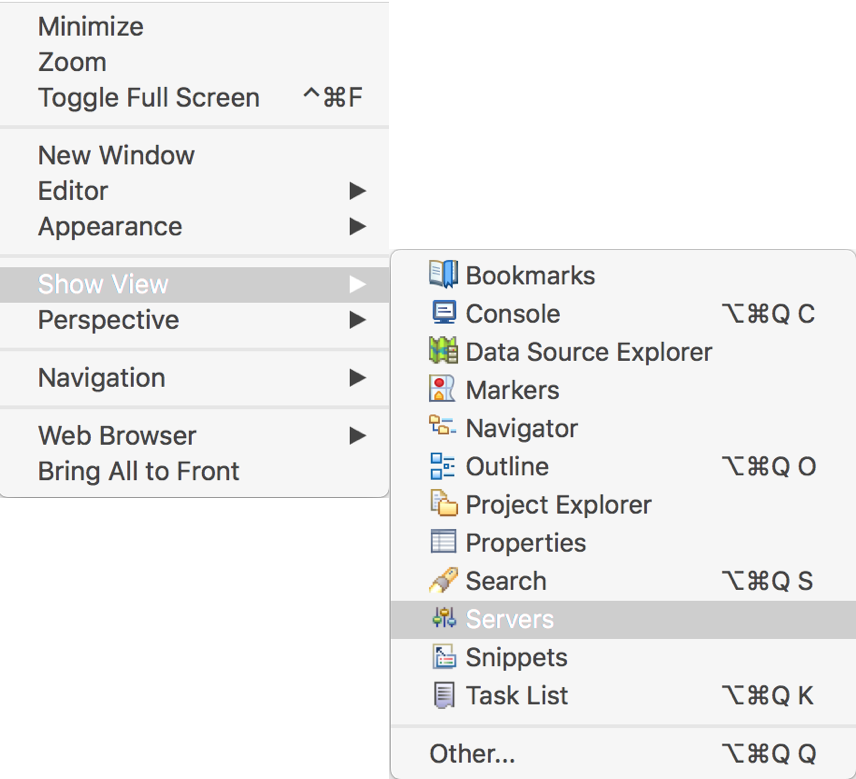
- Go to the
Serverstab.
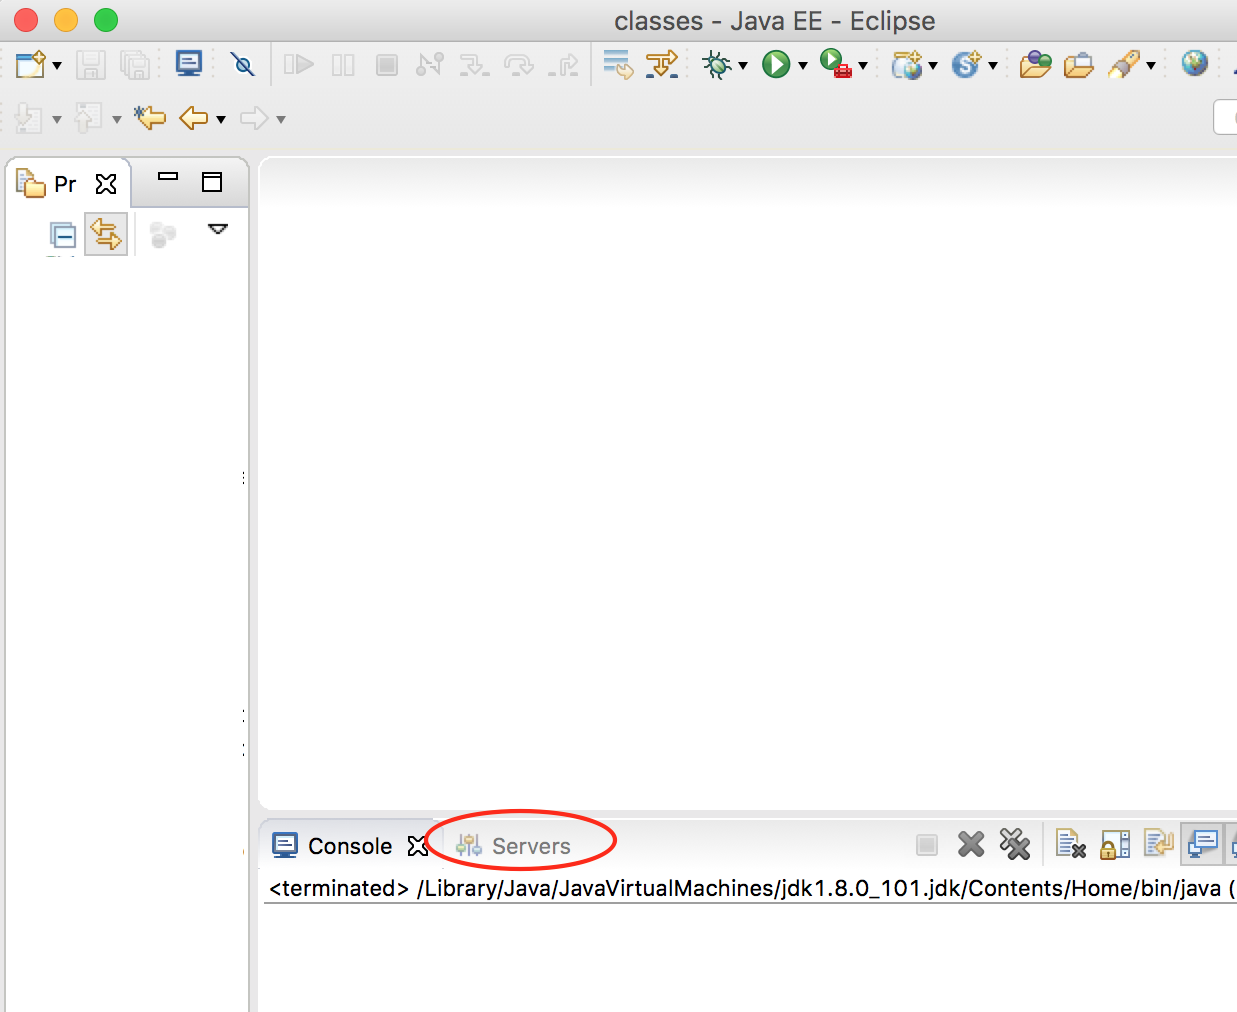
If theServerstab does not appear on the screen, open the view using menu barWindow > Show View > Servers
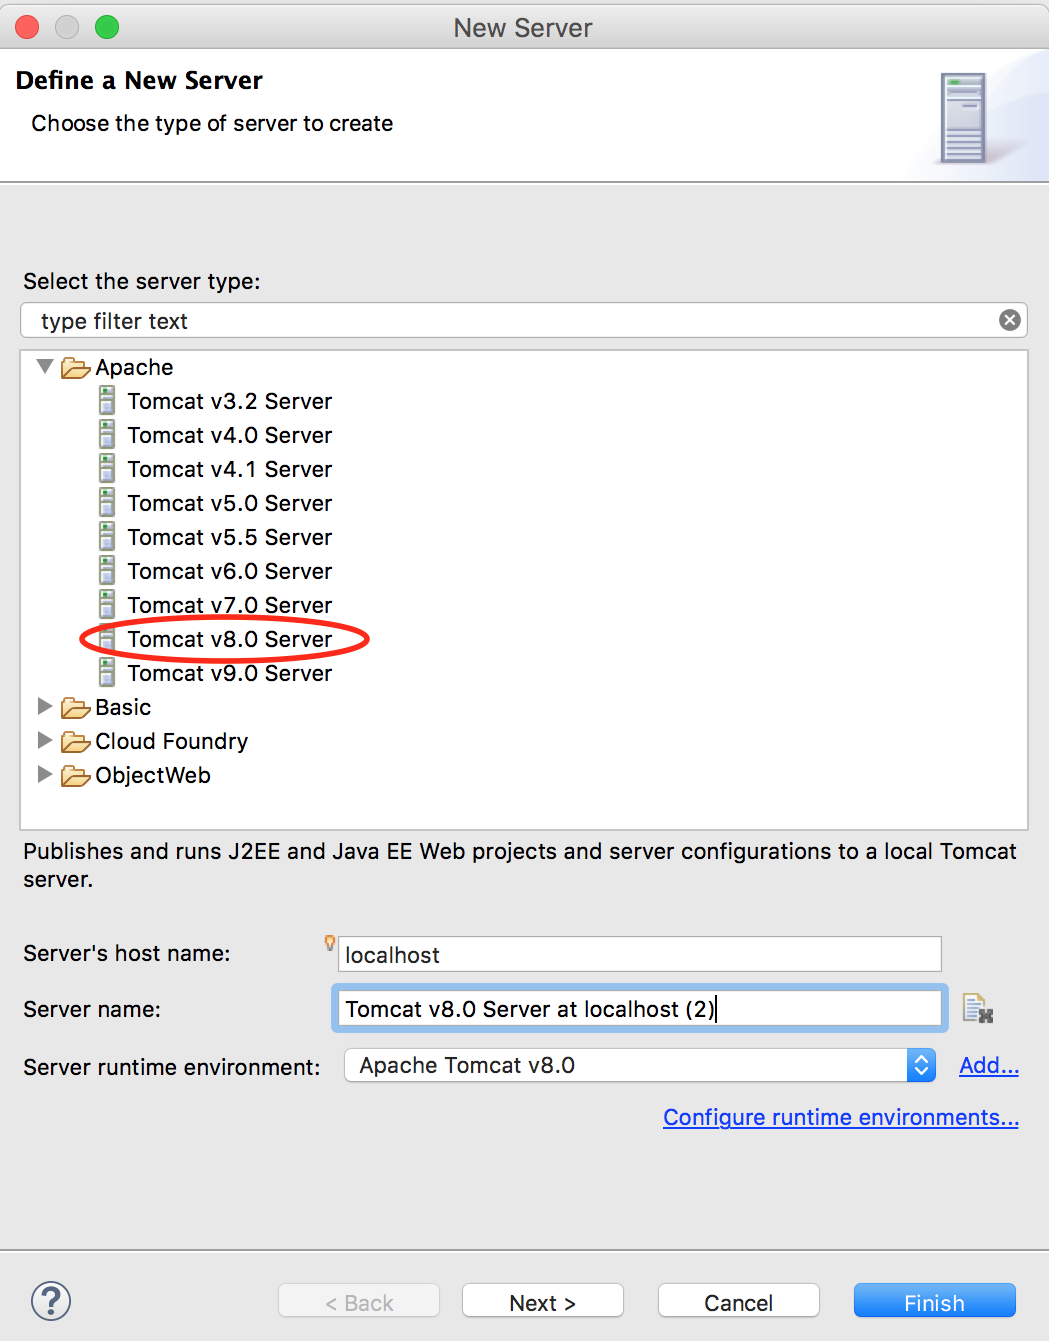
- Under the
Serverstab, right click and selectNew > Server - Select the version of your Tomcat. You may use the default server name or change it.
Then click
Finish
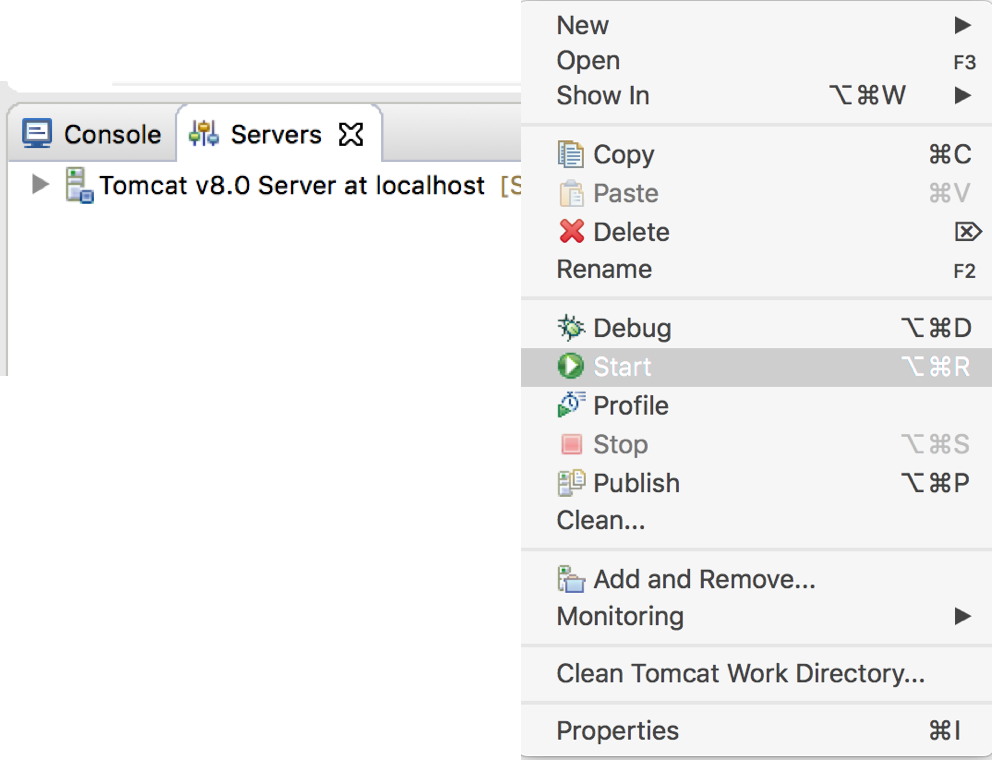
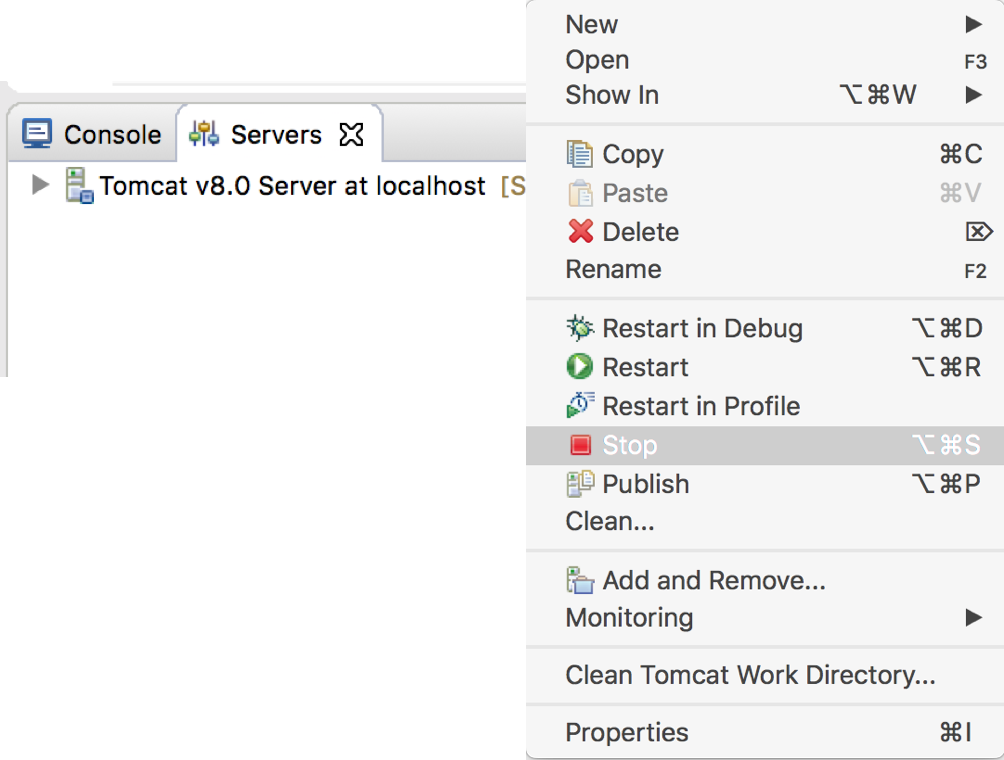
- Once the server is setup, to start the server, right click on the server name,
then select
Start
Note: When you right click on the servlet.javafile and selectRun As > Run on Server, Eclipse will prompt a window to start the server. You can also choose to have the server starts automatically as you run the servlet.
- To stop the server, right click on the server name,
then select
Stop
Working with JSP
- Creating a JSP (
.jspfile)- You may use any IDEs that support Java web develoment such as Eclipse WTP, IntelliJ, and NetBeans.
-
Because a JSP is built on top of a Java servlet, it is necessary to include
sevlet-api.jarin classpath. Some IDEs automatically include a path toservlet-api.jarwhile some require that you set class path toservlet-api.jar
- For Eclipse user
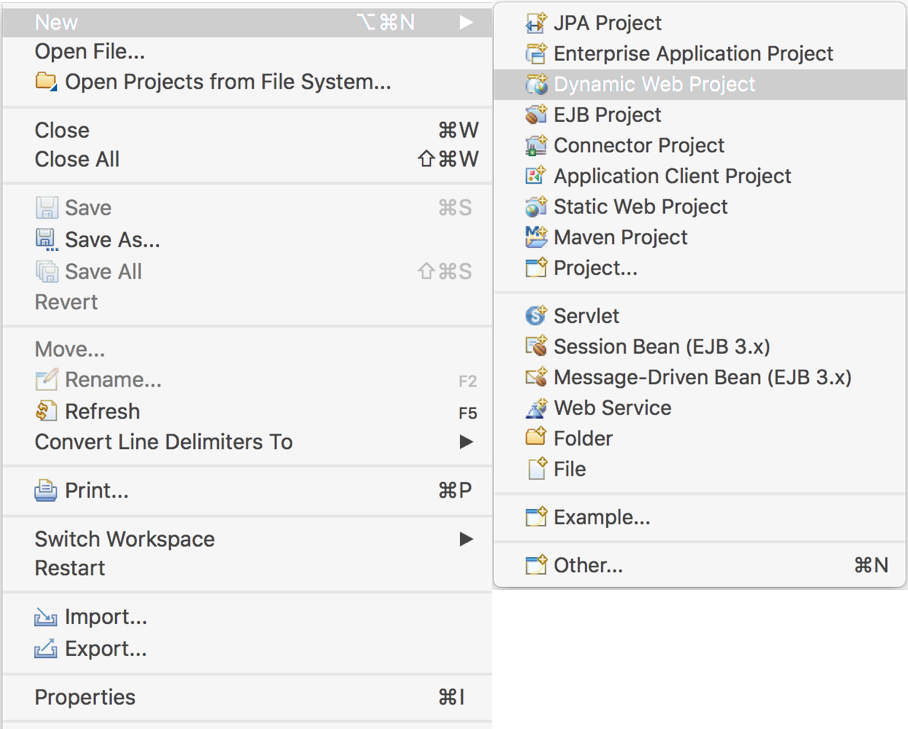
- Create a dynamic web project (depending on the version of your Eclipse) by
selecting
Create a new Java EE Web Projector using the menu barFile > New > Dynamic Web Project
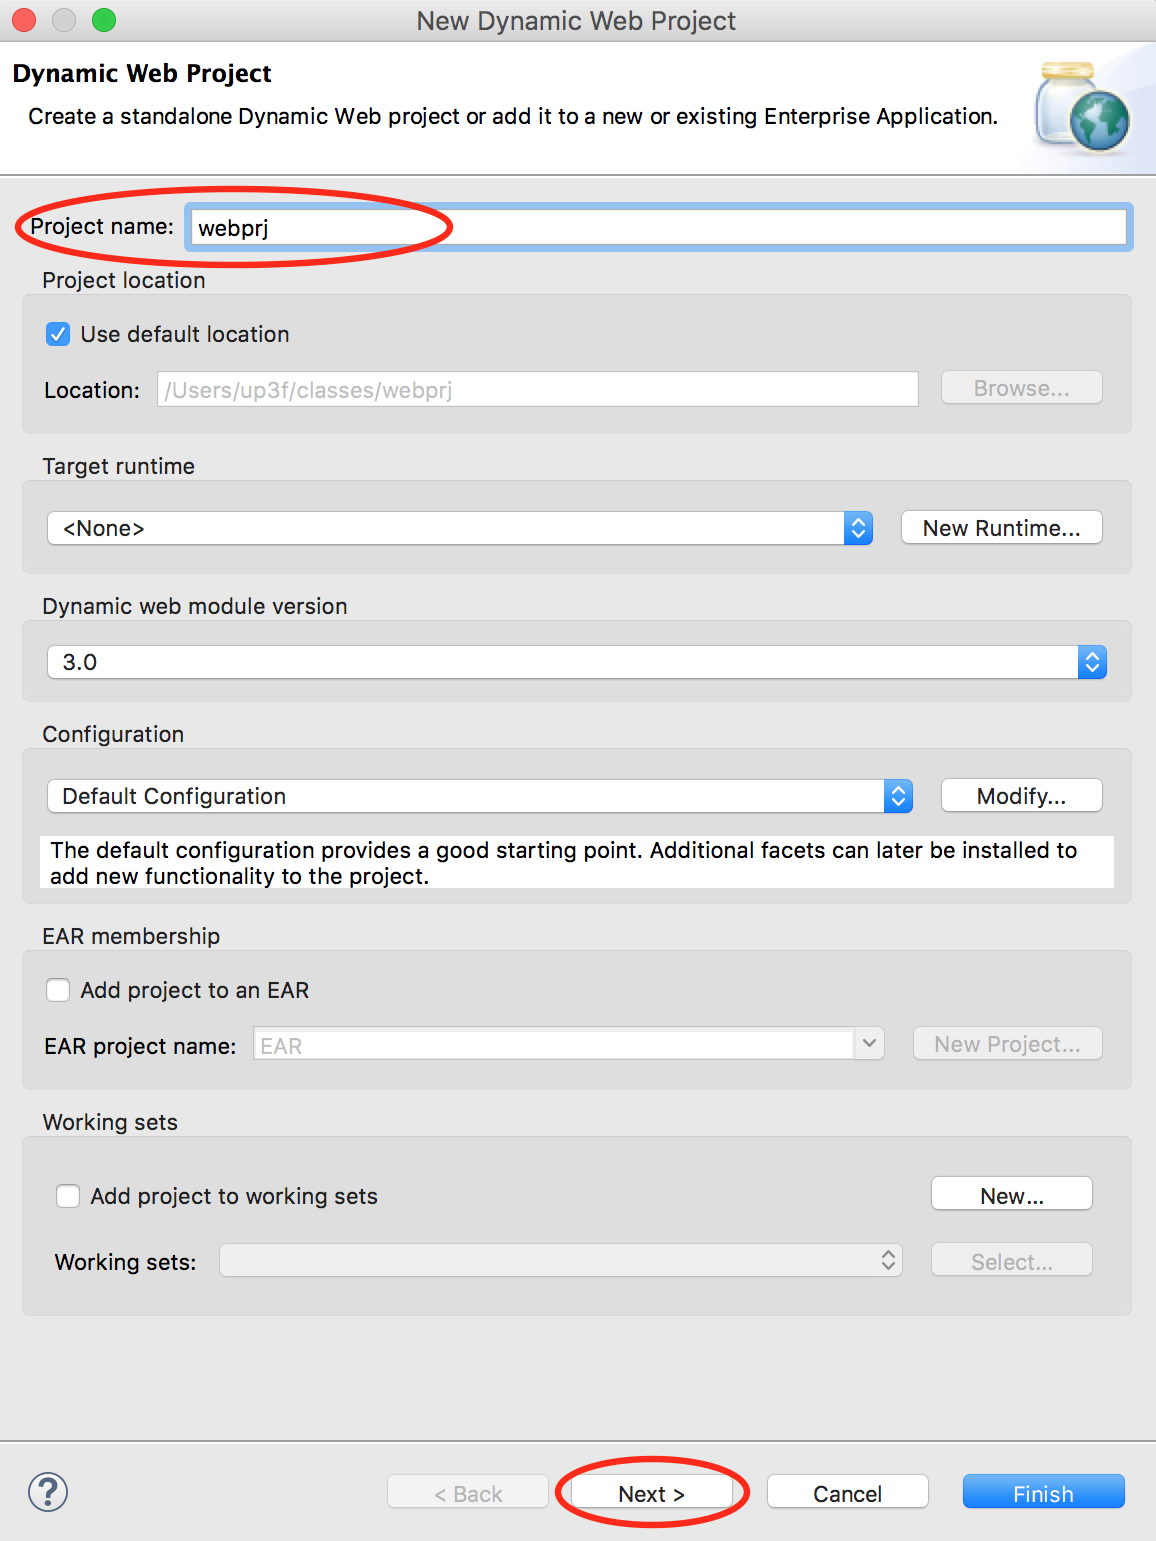
- Enter your project name (let's keep default configuration),
then click
NextandNextto configureWeb Module. Note: You may choose to clickFinishand generateweb.xmlto configureWeb Modulelater.
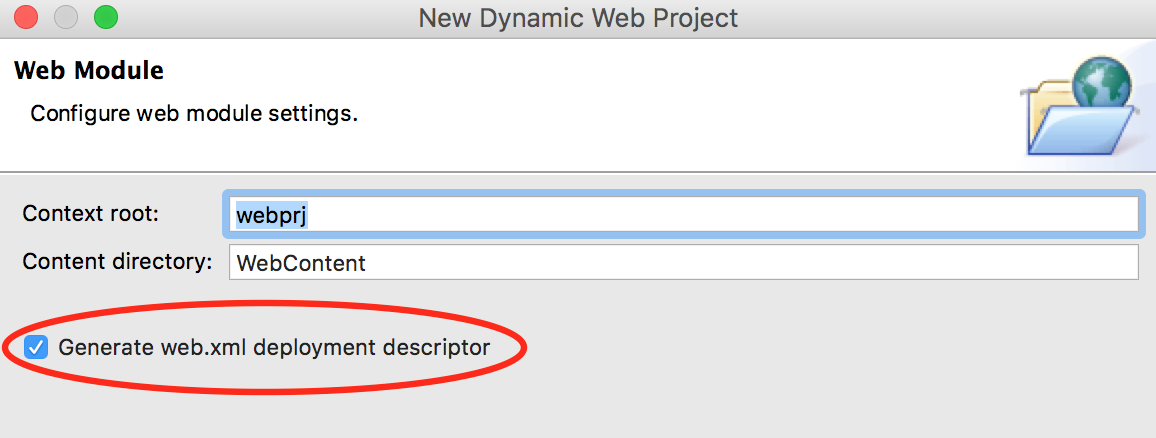
On theWeb Modulewindow, selectGenerate web.xml deployment descriptor. Note: If you choose to manually createweb.xmllater, you may leave the checkbox blank.
- Under your newly created project,
right click on the
WebContentfolder, selectNew > JSP fileto create a new.jspfile.
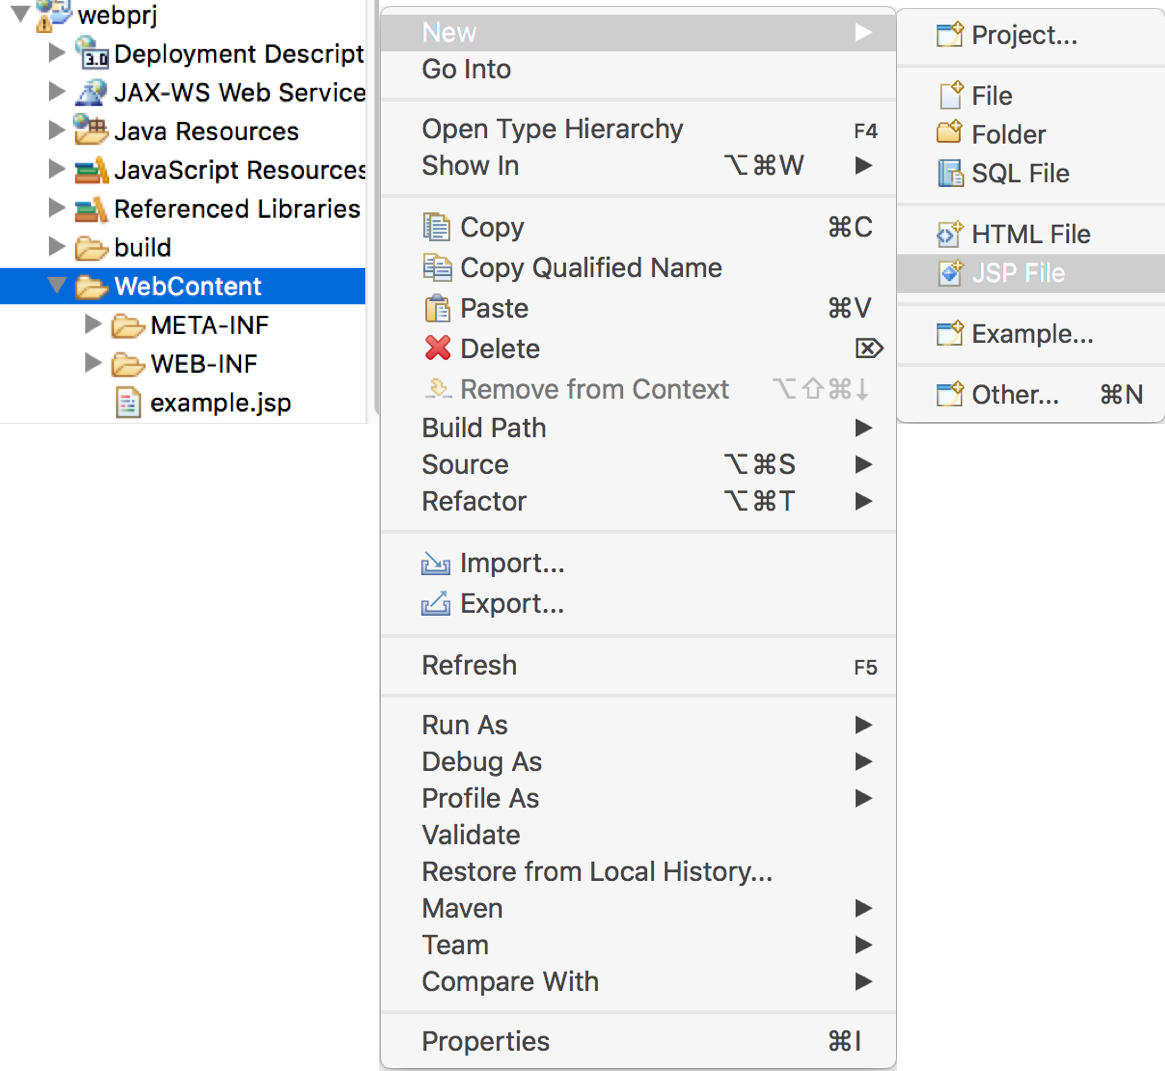
Enter the name of your JSP inFile name. If you choose to have a package for your JSPs, right click on theWebContent, selectNew > Folder, enter the folder (or package) name in theFolder name.
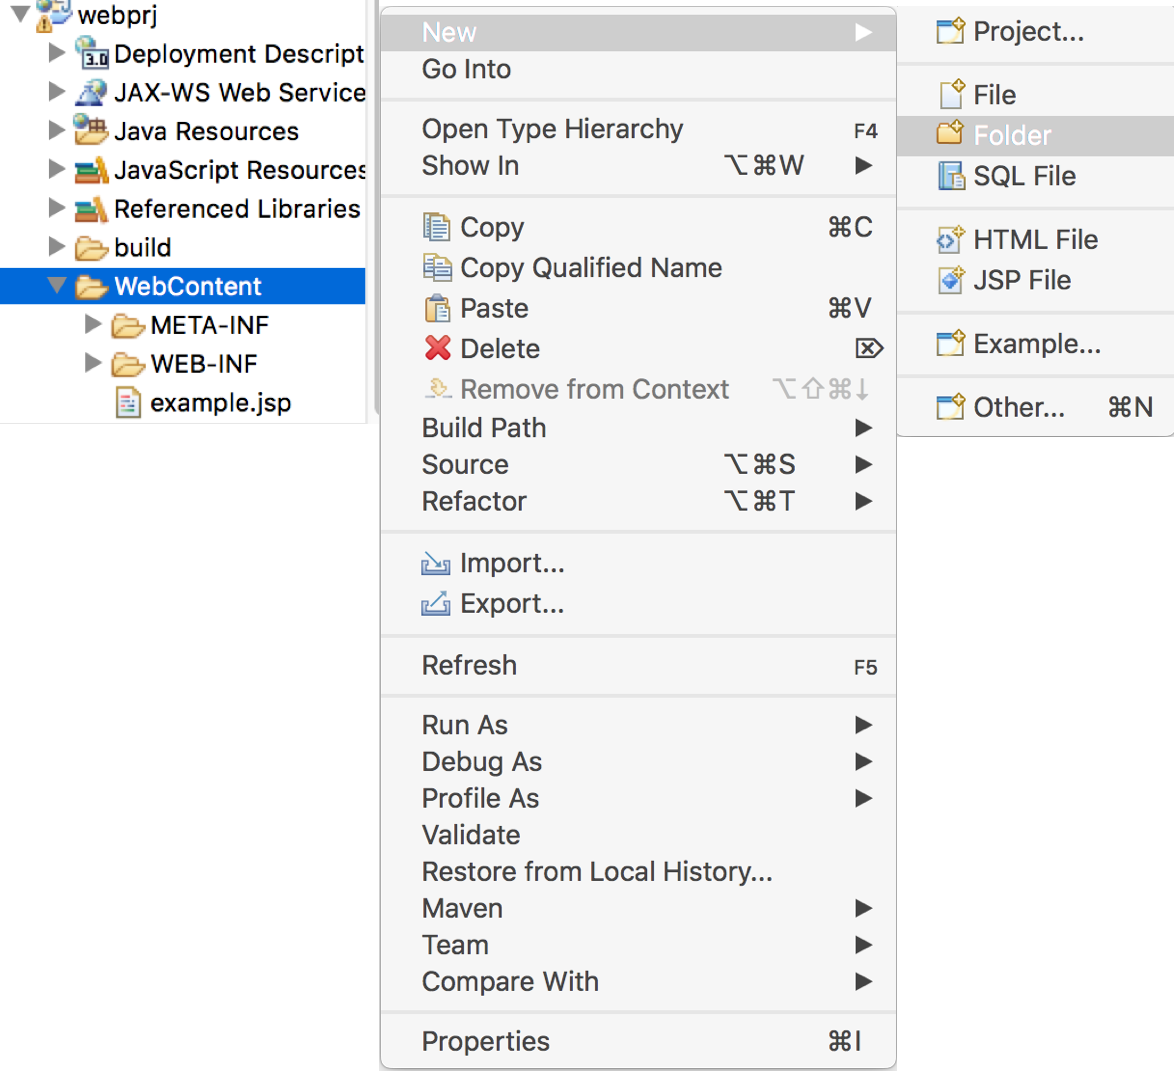
Then, right click on the newly created folder, selectNew > JSP fileto create a new.jspfile.
Open the newly create JSP, if there are errors (for example, as shown in the following figure), you need to addservlet-api.jarto your project.
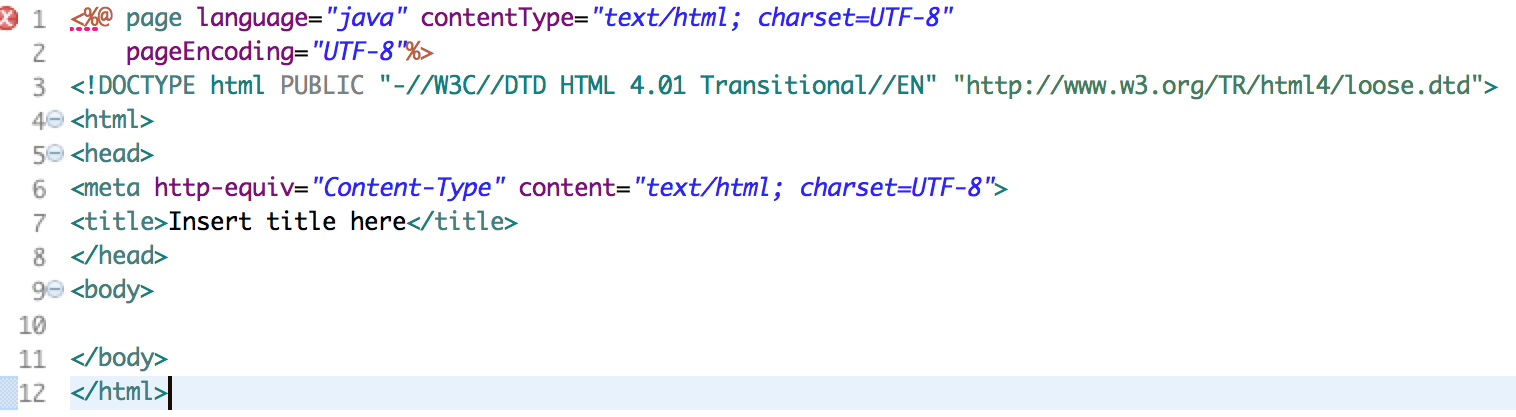
- To add
servlet-api.jarto your project- Open Project Properties by
- Right click on the project name and then
Properties, or - Use a menu bar
Project > Properties
- Right click on the project name and then
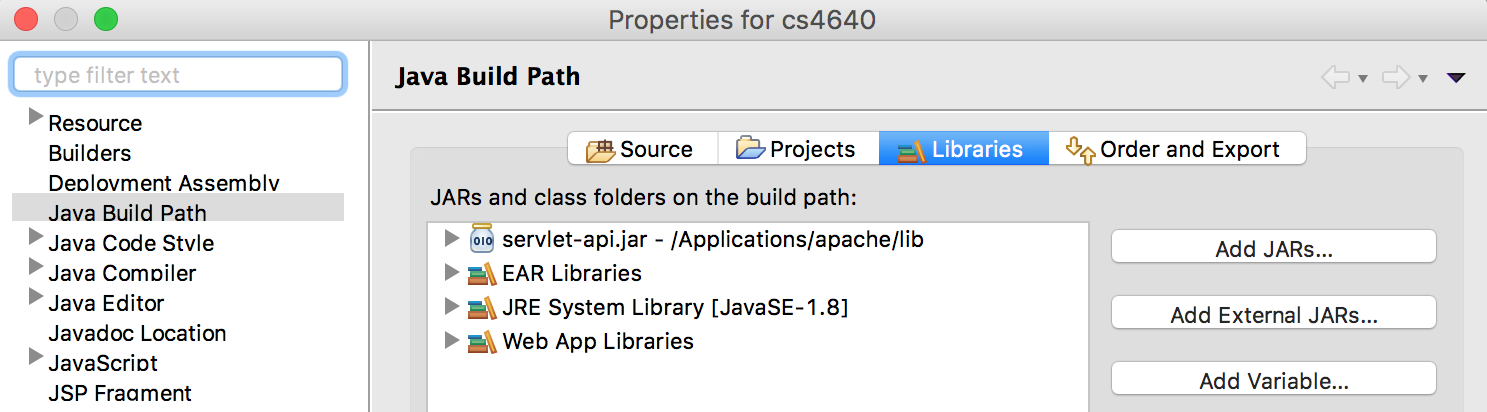
- Select
Java Build Path - Select
Librariestab - Press
Add External JARs...button
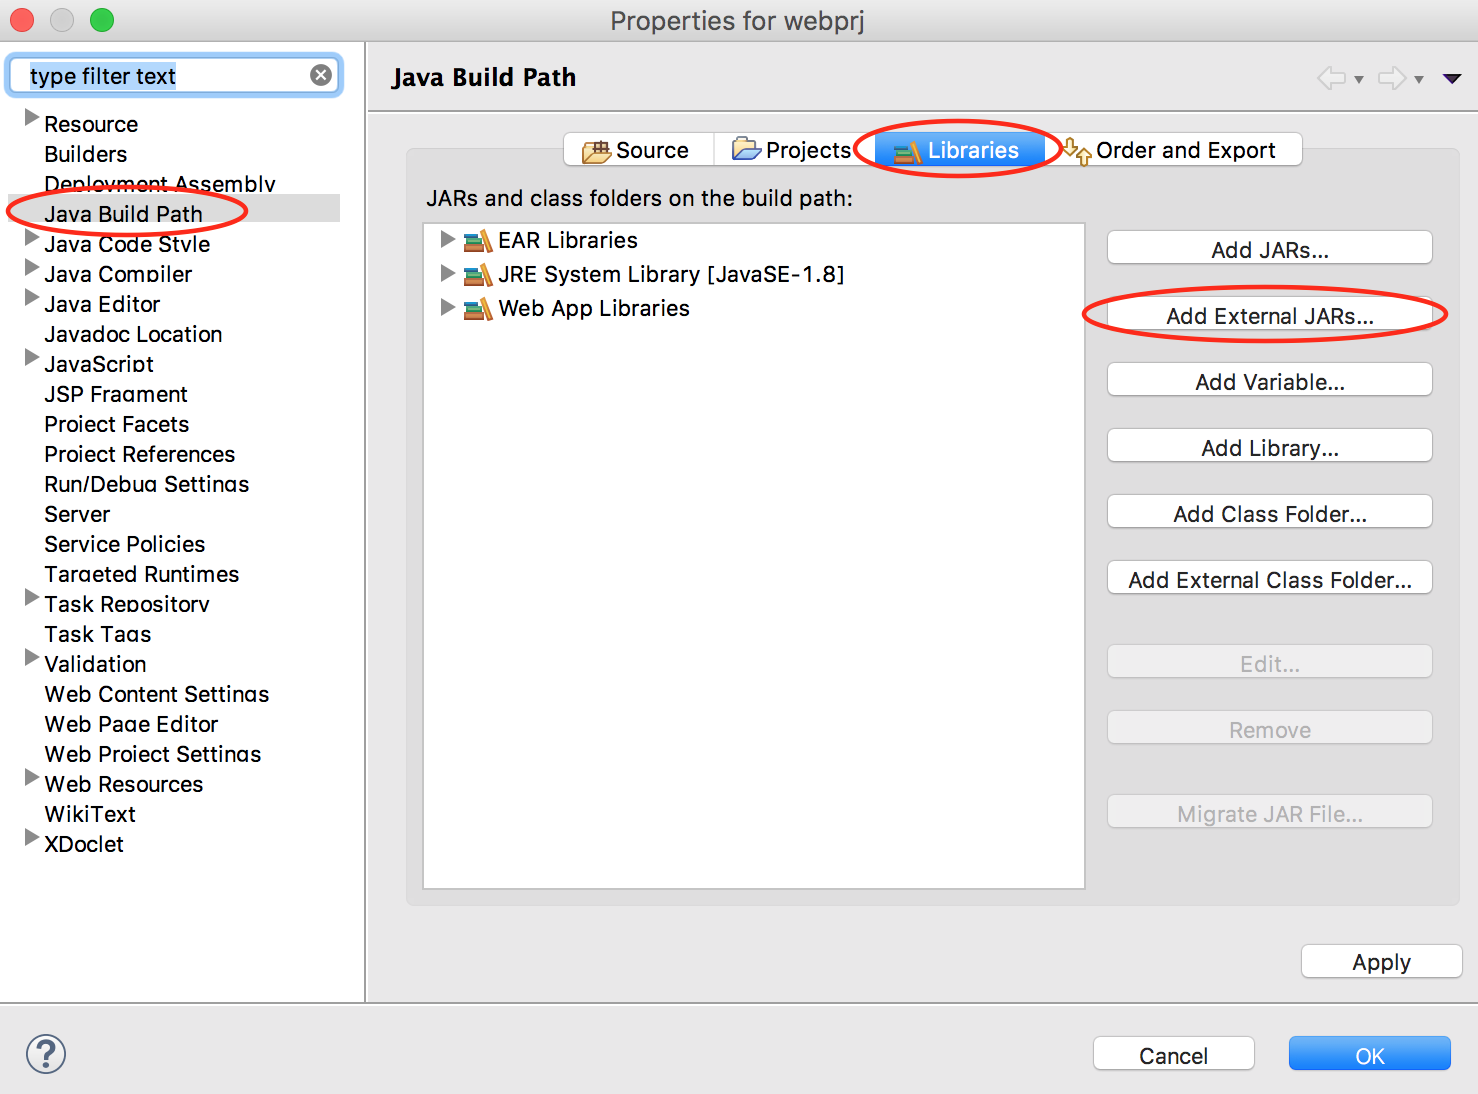
- Navigate to the location where you save
servlet-api.jar. Note: By default,servlet-api.jaris part of Apache Tomcat and is usually in- (for Window)
C:\apache-tomcat\lib - (for Mac)
Applications/apache-tomcat/lib
- (for Window)
- Select
servlet-api.jar - Press
Openbutton.servlet-api.jarshould appear under JARs and class folders on the build path panel
- Open Project Properties by
- Create a dynamic web project (depending on the version of your Eclipse) by
selecting
- Writing code / implementing your JSP
JSP syntax:<% X ... %>where X is one of the following:- Directive: Global information for page, language, import statement, etc.
- Scripting elements (Java code): Declarations, Scriptlets, Expressions
- Actions: To modify runtime behavior
If you choose to deploy your JSP in a package, you do not need to add apackagecommand in your code (unlike a Java program where you explicitly addpackage package-name;at the beginning of the file). Tomcat will add that for you when it converts the JSP to a Java servlet.
Note: When a JSP is accessed through a web browser, Tomcat decides whether to transforms a JSP into its Java servlet version (.javafile) and then compiles the Java servlet (i.e., resulting in a.classfile). We do not need to compile a JSP file.
- Deploying a JSP
To deploy your JSP, follow these steps:- (for Window) Go to
C:\apache-tomcat\webapps - (for Mac) Go to
Applications/apache-tomcat/webapps - Create a project (i.e., context) directory for your JSPs the same way you did for servlets,
/tomcat/webapps/project-name/. You may create a directory the way you normally do, using the features available on your machine. Alternatively, if you use a terminal,- create your project directory:
mkdir /tomcat/webapps/project-name/ - then copy your JSP file (e.g.,
file-name.jsp) into that directory:
cp file-name.jsp /tomcat/webapps/project-name/ - (optional) You can create a symbolic link from your home directory to your context
cd
ln -s /tomcat/webapps/project-name/
                  name-of-link
- create your project directory:
-
Assume you give your context name as
cs4640:
Directory Contains \cs4640This is the root directory of the web application. All JSP and HTML files are stored here. \cs4640\WEB-INF\classesThis directory is where servlet and utility classes are located. \cs4640\WEB-INFThis directory contains all resources related to the application that are not in the document root of the application. This is where your web application deployment descriptor ( web.xml) is located. Note that the WEB-INF directory is not part of the public document. No files contained in this directory can be served directly to a client.\cs4640\WEB-INF\libThis directory contains Java Archive (JAR) files that the web application depends upon. For example, this is where you would place a JAR file that contains a JDBC driver.
For Eclipse user:- Simply put the JSP files in WebContent. When you run the JSP file,
Eclipse automatically deploys and runs it.
- (for Window) Go to
- Accessing / running a servlet
- To access via a web browser
- Enter a URL similar to
http://localhost:8080/project-name/file-name.jsp
- Enter a URL similar to
- To access through Eclipse
- Right click on the JSP name (
.jspfile), selectRun As > Run on Server. Eclipse will access the servlet using a virtual browser.
- Right click on the JSP name (
Remember that the first time you access the URL, the servlet engine will translate your JSP file into a Java servlet class, compile the class, then run it as a servlet. You will see a noticeable delay. The servlet engine also translates and compiles if you change the JSP file (if the timestamp of the .jsp is newer than the timestamp of the .class file).
- To access via a web browser
- Locating a Java servlet of the JSP
- Assume your JSP is
X.jsp, typically the servlet Java file (X_jsp.java) and servlet class file (X_jsp.class) are in/tomcat/work/Catalina/localhost/project-name/org/apache/jsp/ - However, depending on your configuration
(e.g., if you run new versions of Tomcat from Eclipse, assuming you rely on the default configuration),
X_jsp.javaandX_jsp.classmay not be in the default Catalina directory. You may use a terminal to find the file:
find . | grep "X_jsp.java"
- Assume your JSP is
- Working with Java Beans or Other Java classes
-
JSPs often need to interface with Java Beans or other Java classes,
and you need to put the classes in the right directory.
The key to the linking is that the JSP is converted to a Java servlet,
which is then compiled by the servlet engine.
Therefore the bean's package directory
has to be in a directory that is in the Java CLASSPATH
of the servlet engine,
or else it will not be found when the JSP is compiled.
Conveniently, you can put Java classes in the same directory
with your servlets:
/tomcat/webapps/project-name/WEB-INF/classes/
-
The bean class has to be in a package, so you need to create one.
(If you have already done this for your servlets, just skip this step.)
Each Java package has its own subdirectory,
so create a subdirectory with your
package-nameunder theclasses/directory. Assume your package name isexamples, your bean class is namedmybean.java, and it is in your home directory. Modifymybean.javato add the statementpackage examples;in the first line. Then create the package:
cd /tomcat/webapps/project-name/WEB-INF/classes
mkdir examples
cp ~/mybean.class examples
- Please note that you can access any Java class from a JSP
-
With that set up,
you need to do the following to use a Java bean from a JSP.
Again, assume your bean is called "
mybean", and the JSP is called "myUseBean.jsp":- Import the bean into
myUseBean.jsp:
<%@ page import="examples.mybean" %> - Declare an object of type
mybeannamedVal, set the scope (based on the nature of your web application):
<jsp:useBean id="Val" class="examples.mybean" scope="page" /> - Copy your JSP file into the JSP directory above.
- Import the bean into
-
JSPs often need to interface with Java Beans or other Java classes,
and you need to put the classes in the right directory.
The key to the linking is that the JSP is converted to a Java servlet,
which is then compiled by the servlet engine.
Therefore the bean's package directory
has to be in a directory that is in the Java CLASSPATH
of the servlet engine,
or else it will not be found when the JSP is compiled.
Conveniently, you can put Java classes in the same directory
with your servlets: