Tomcat Installation and Servlet Deployment
This is a short introduction to help you set up Tomcat and deploy Java servlets. For more information, please refer to Apache Tomcat.
(Please tell me if you find any errors or omissions in the document —Upsorn Praphamontripong, 11-January-2018)
Getting Started With Tomcat
- If you do not alreaady have Java on your machine, download and install Java Development Kit.
Note: You should verify which JDK version is supported by
the version of Tomcat you are using.
- Download Java EE from http://java.sun.com/
- Install JDK and JRE according to the instructions included with the release.
- Set the environment variable JAVA_HOME to the directory where you installed the JDK release:
- You may need to restart your computer.
- Download Tomcat "Core" zip file from:
http://tomcat.apache.org/.
- Unzip the
apache-tomcatzip file- (for Window) Assuming you unzipped it on drive C, the path is
C:\apache-tomcat - (for Mac) Assuming you unzipped it in Applications folder, the path is
Applications/apache-tomcat
- (for Window) Assuming you unzipped it on drive C, the path is
- Startup Tomcat
- (for Window)
- Double click
C:\apache-tomcat\bin\startup.bat, or - Use a terminal, go to
C:\apache-tomcat\bin\then executestartup.bat
- Double click
- (for Mac)
- Use a terminal, go to
Applications/apache-tomcat/bin/then execute./startup.sh
- Use a terminal, go to
http://localhost:8080/
- (for Window)
- Shutdown tomcat
- (for Window)
- Double click
C:\apache-tomcat\bin\shutdown.bat, or - Use a terminal, go to
C:\apache-tomcat\bin\then executeshutdown.bat
- Double click
- (for Mac)
- Use a terminal, go to
Applications/apache-tomcat/bin/then execute./shutdown.sh
- Use a terminal, go to
- (for Window)
Setup Tomcat in Eclipse environment
Note: This is optional. You may use any IDEs of your choice with tomcat installation from the previous step.
Requirements: Tomcat, Eclipse, JDK, and JRE
- Open Eclipse
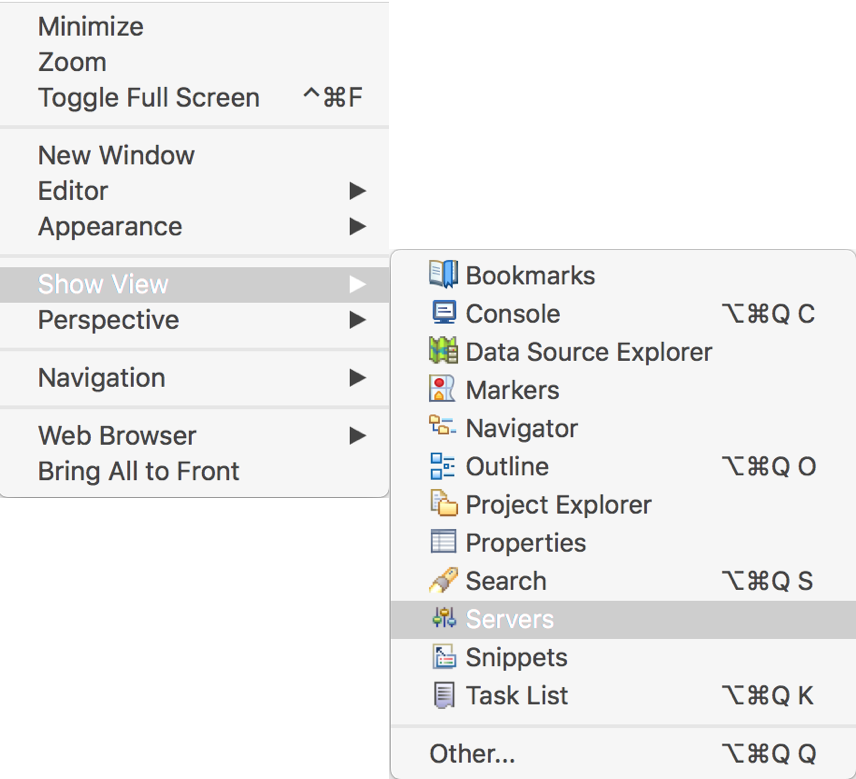
- Go to the
Serverstab.
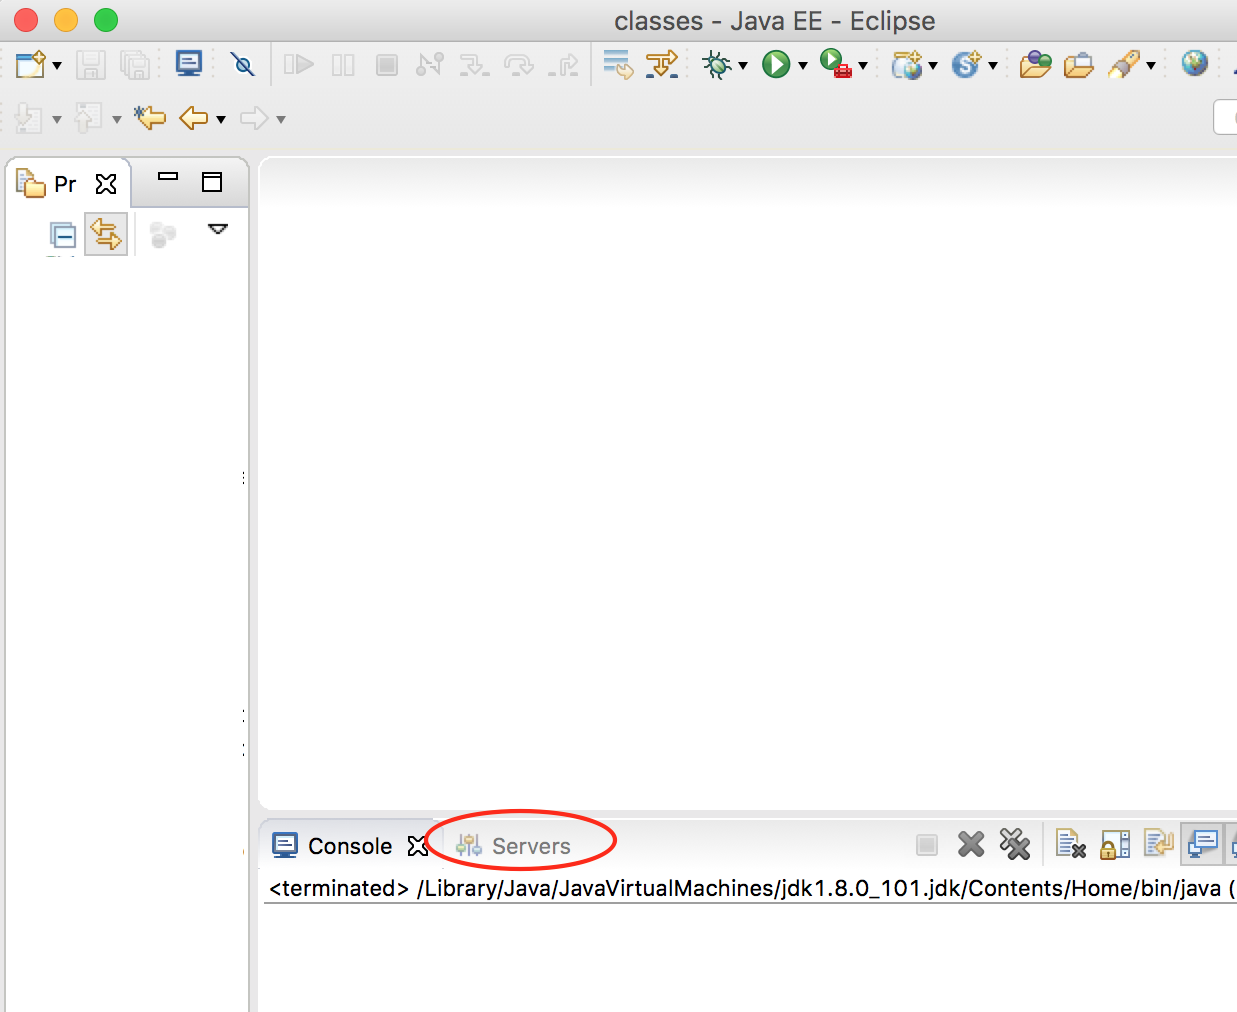
If theServerstab does not appear on the screen, open the view using menu barWindow > Show View > Servers
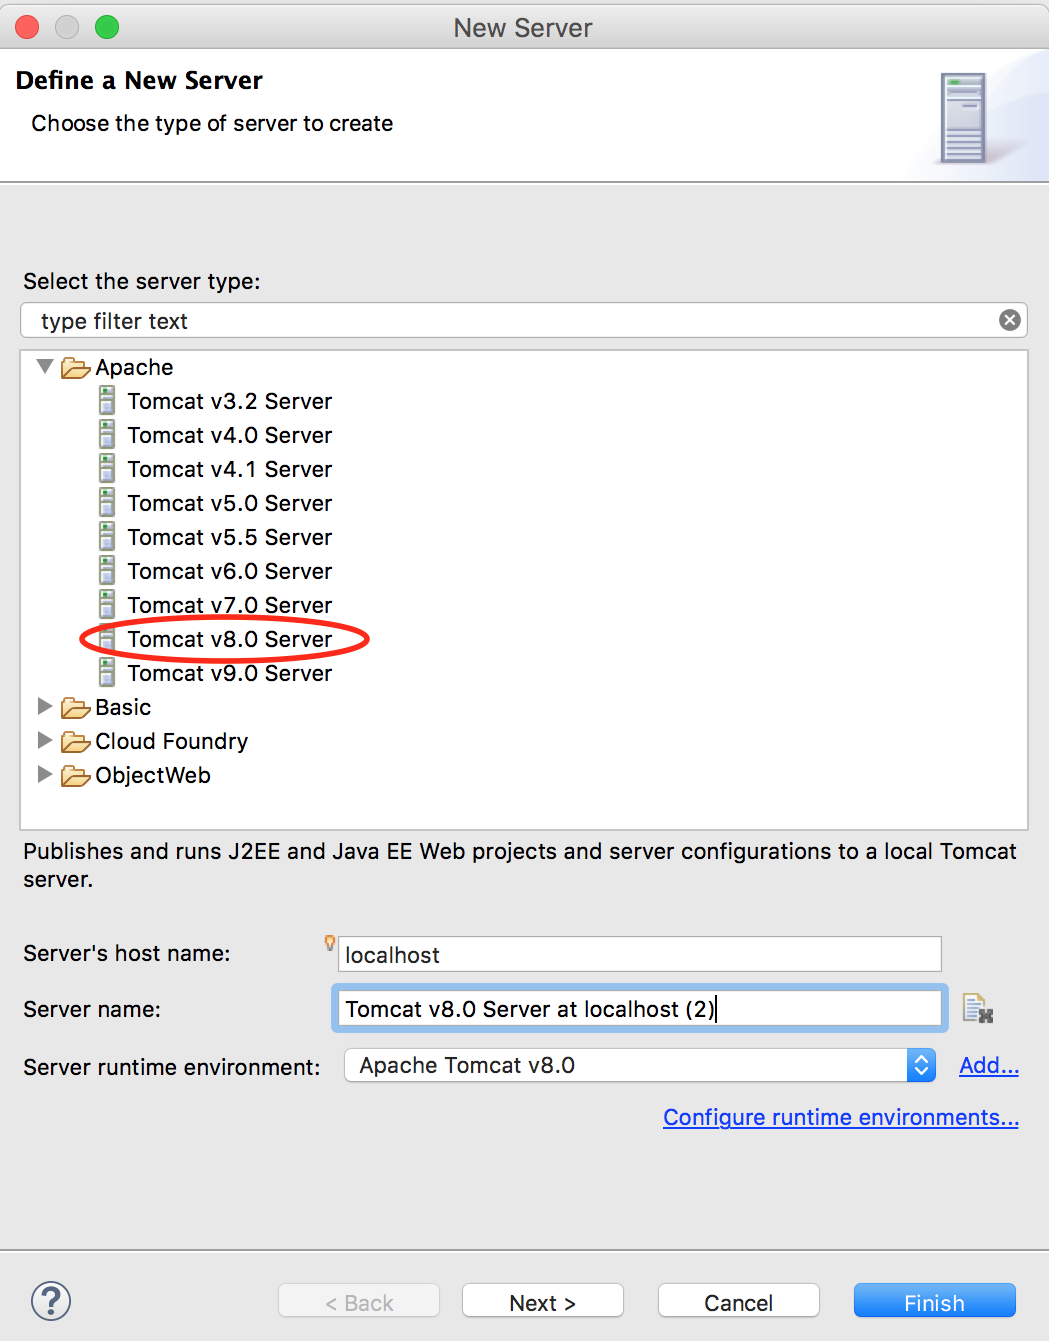
- Under the
Serverstab, right click and selectNew > Server - Select the version of your Tomcat. You may use the default server name or change it.
Then click
Finish
- Once the server is setup, to start the server, right click on the server name,
then select
Start
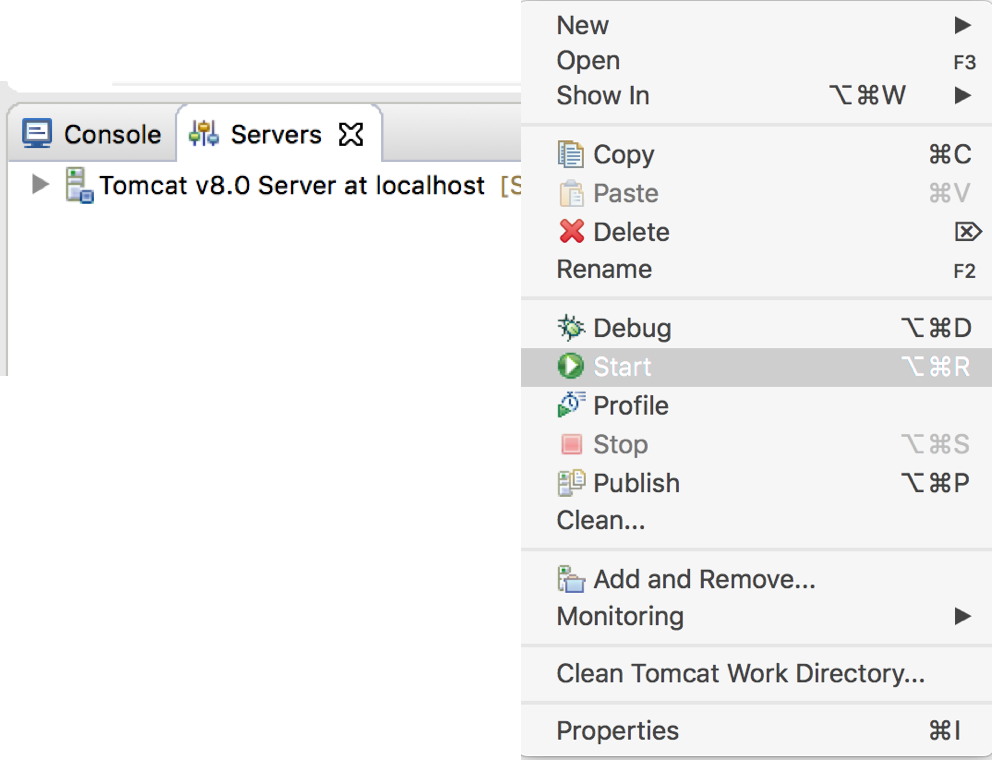
Note: When you right click on the servlet.javafile and selectRun As > Run on Server, Eclipse will prompt a window to start the server. You can also choose to have the server starts automatically as you run the servlet.
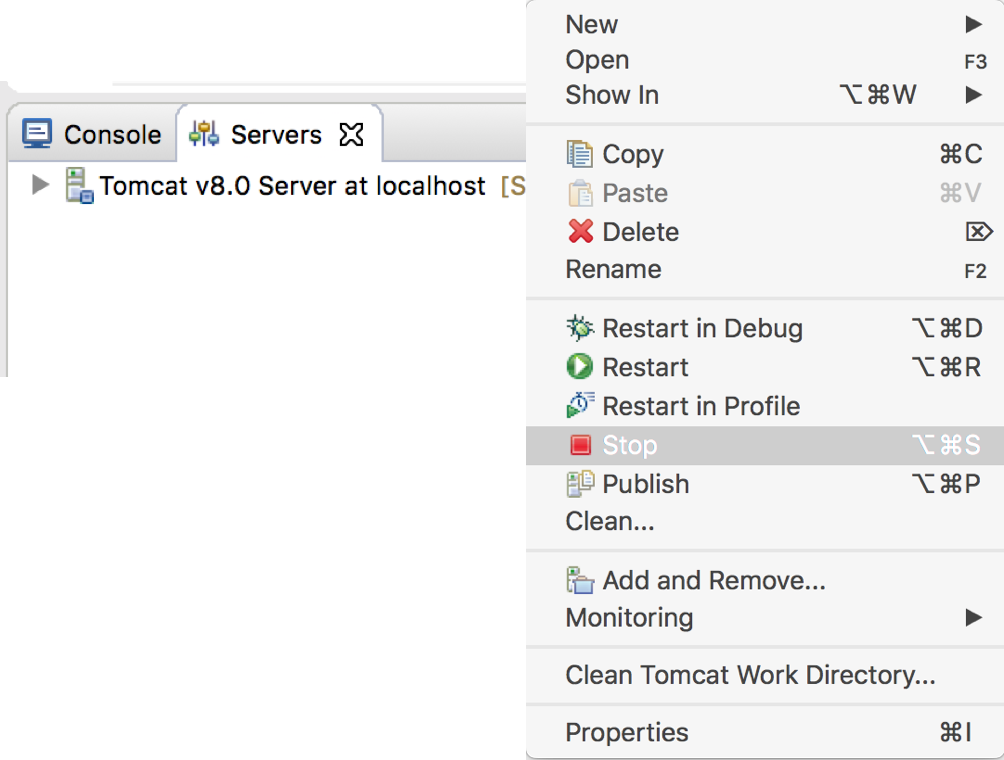
- To stop the server, right click on the server name,
then select
Stop
Working with Java Servlet
- Create a Java servlet (
.javafile)- You may use any IDEs that support Java web develoment such as Eclipse WTP, IntelliJ, and NetBeans.
-
Some IDEs automatically include a path to
servlet-api.jarwhile some require that you set class path toservlet-api.jar
- For Eclipse user
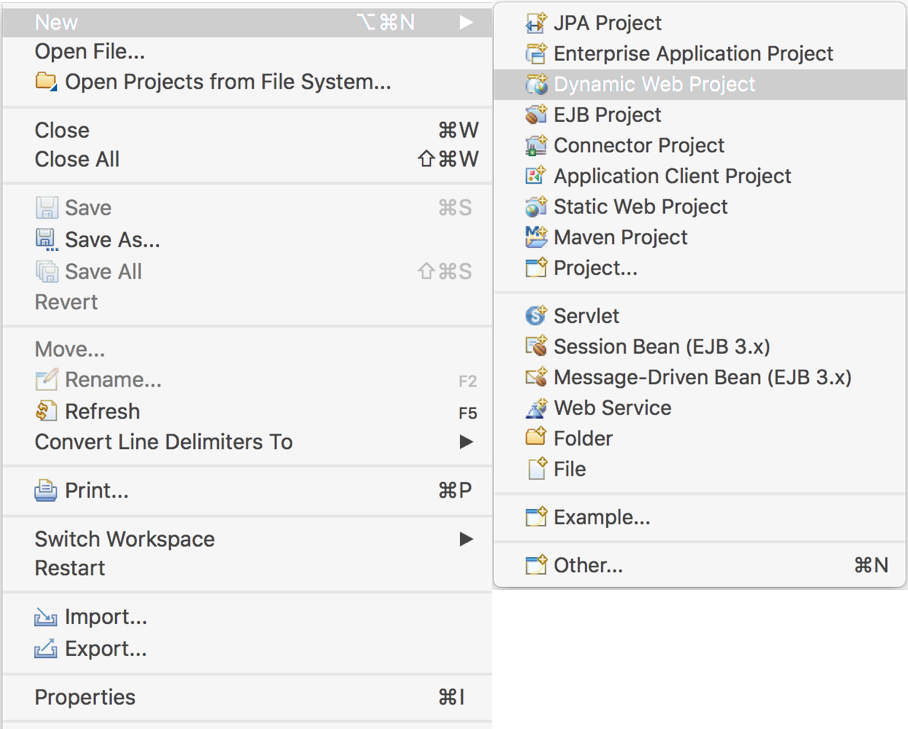
- Create a dynamic web project (depending on the version of your Eclipse) by
selecting
Create a new Java EE Web Projector using the menu barFile > New > Dynamic Web Project
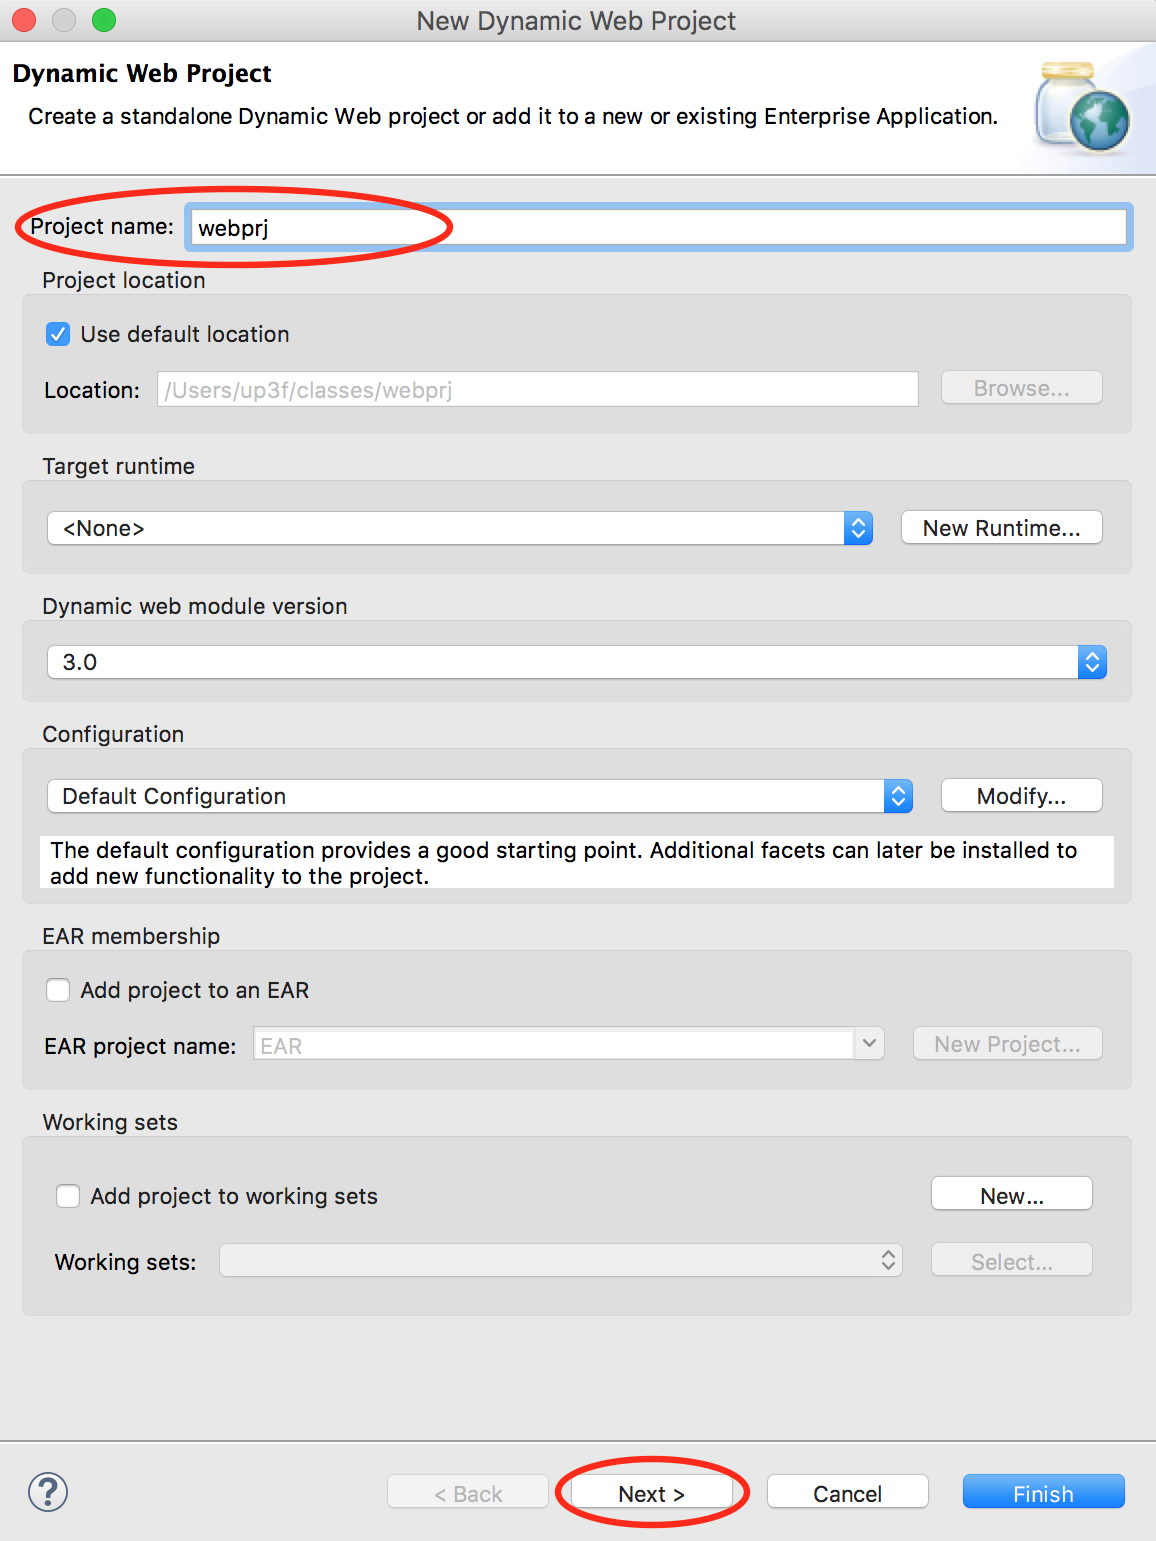
- Enter your project name (let's keep default configuration),
then click
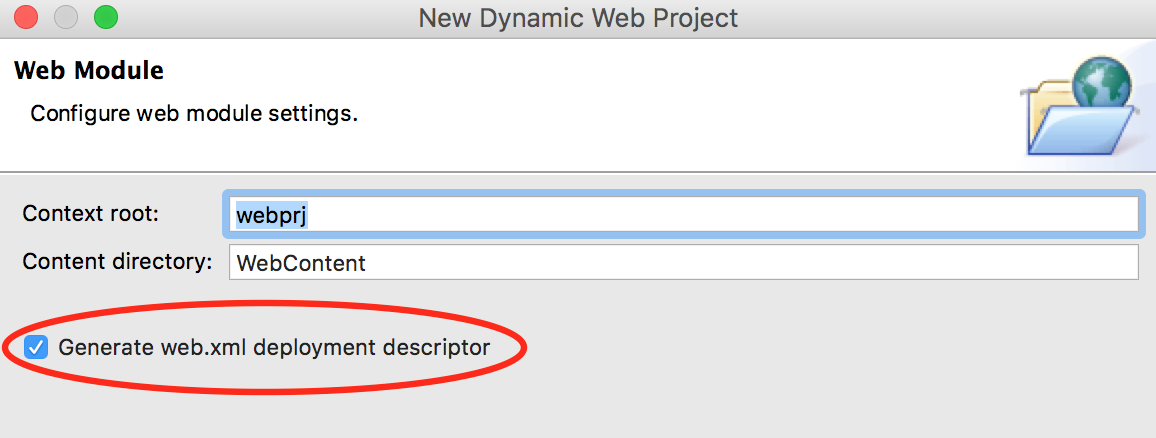
NextandNextto configureWeb Module. Note: You may choose to clickFinishand generateweb.xmlto configureWeb Modulelater.
On theWeb Modulewindow, selectGenerate web.xml deployment descriptor. Note: If you choose to manually createweb.xmllater, you may leave the checkbox blank.
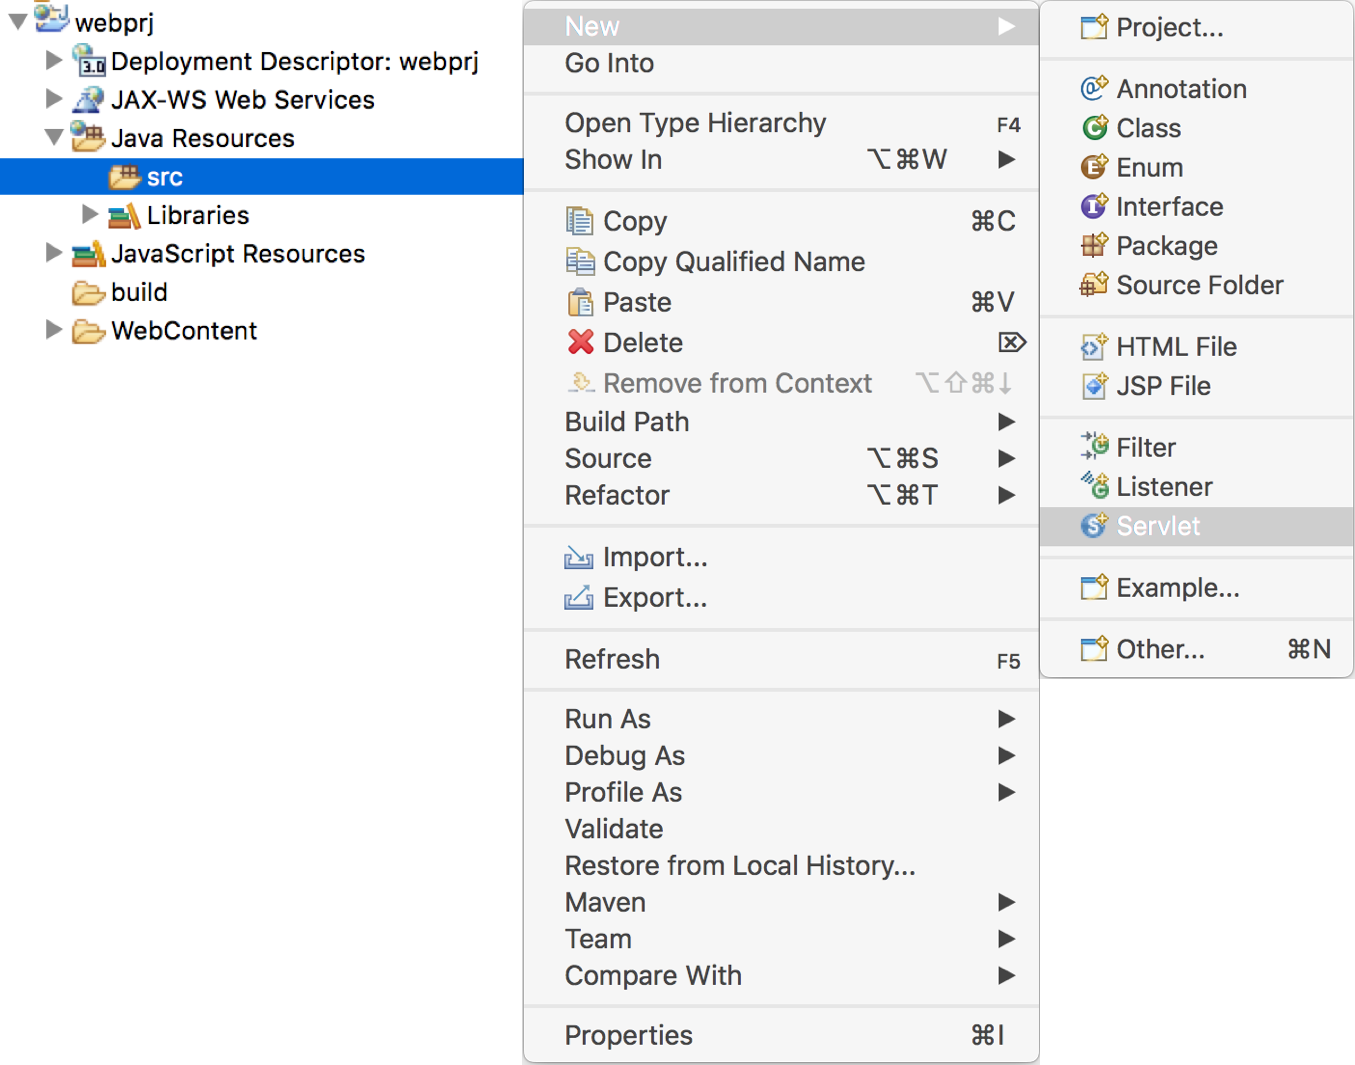
- Under your newly created project, open
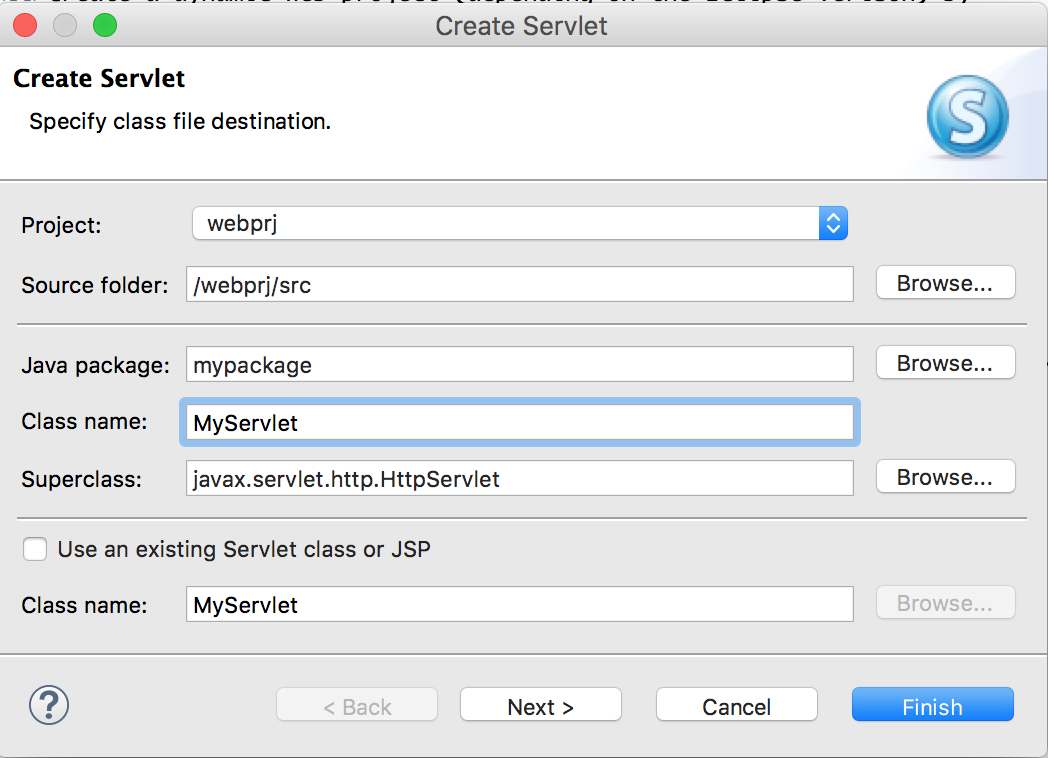
Java Resources, right click on thesrcfolder, selectNew > Servletto create a new Java servlet (.javafile).
Enter the name of your servlet inClass name. If you choose to have a package for your servlets, you may enter the package name inJava package.
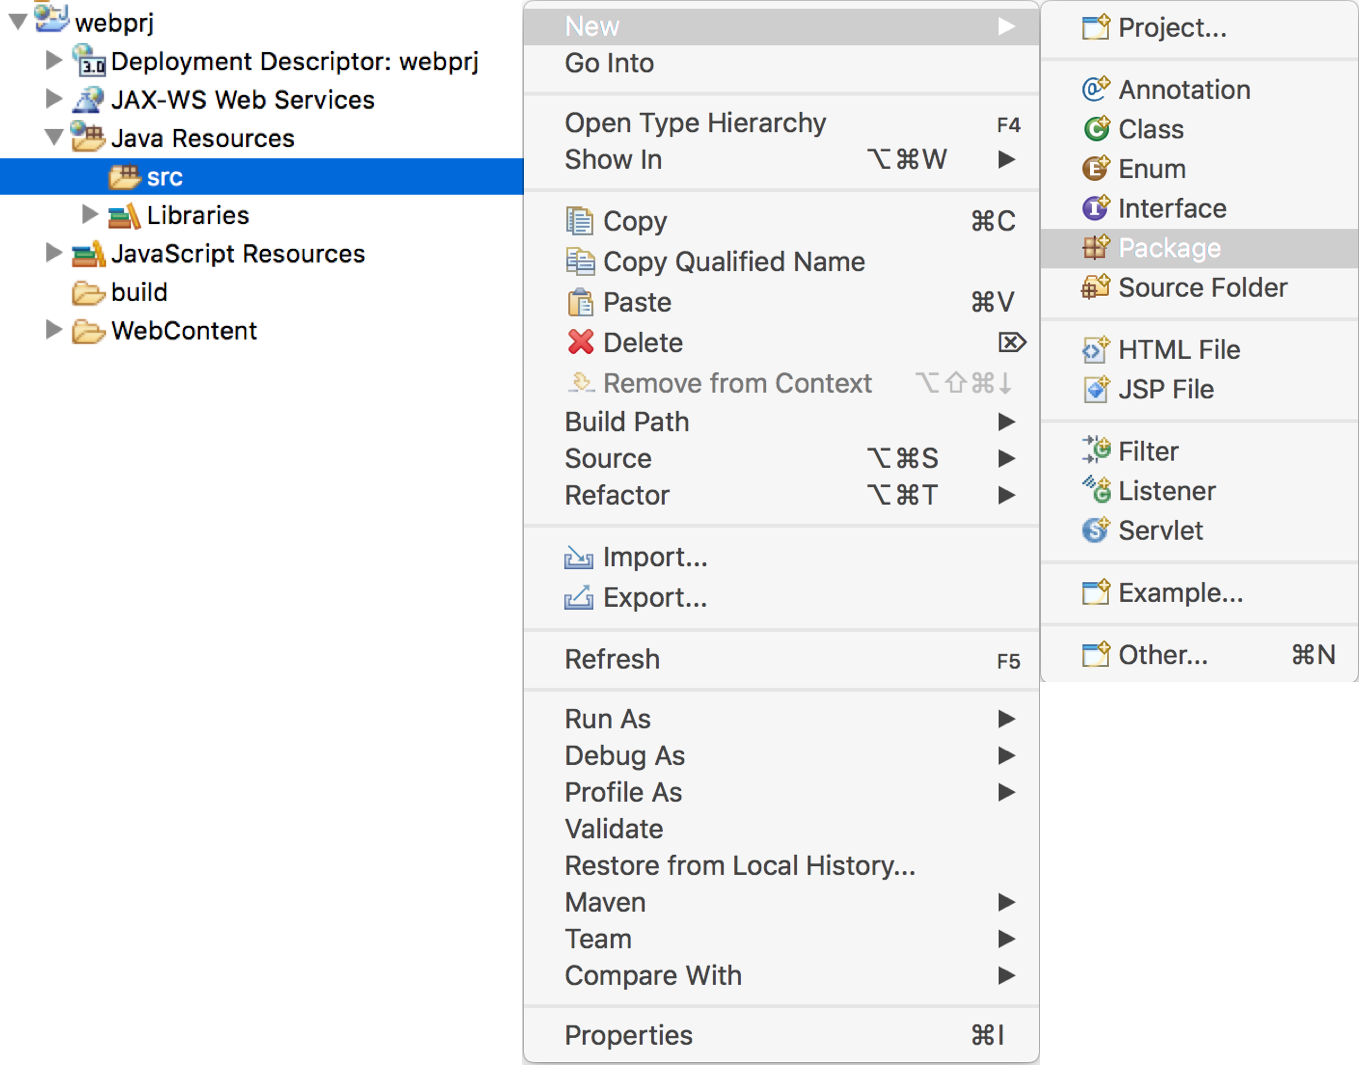
Note: If you prefer to create a package before creating a servlet, instead of selectingNew > Servlet(above), selectNew > Packageto create a package. Then, right click on the newly created package, selectNew > Servletto create a servlet.
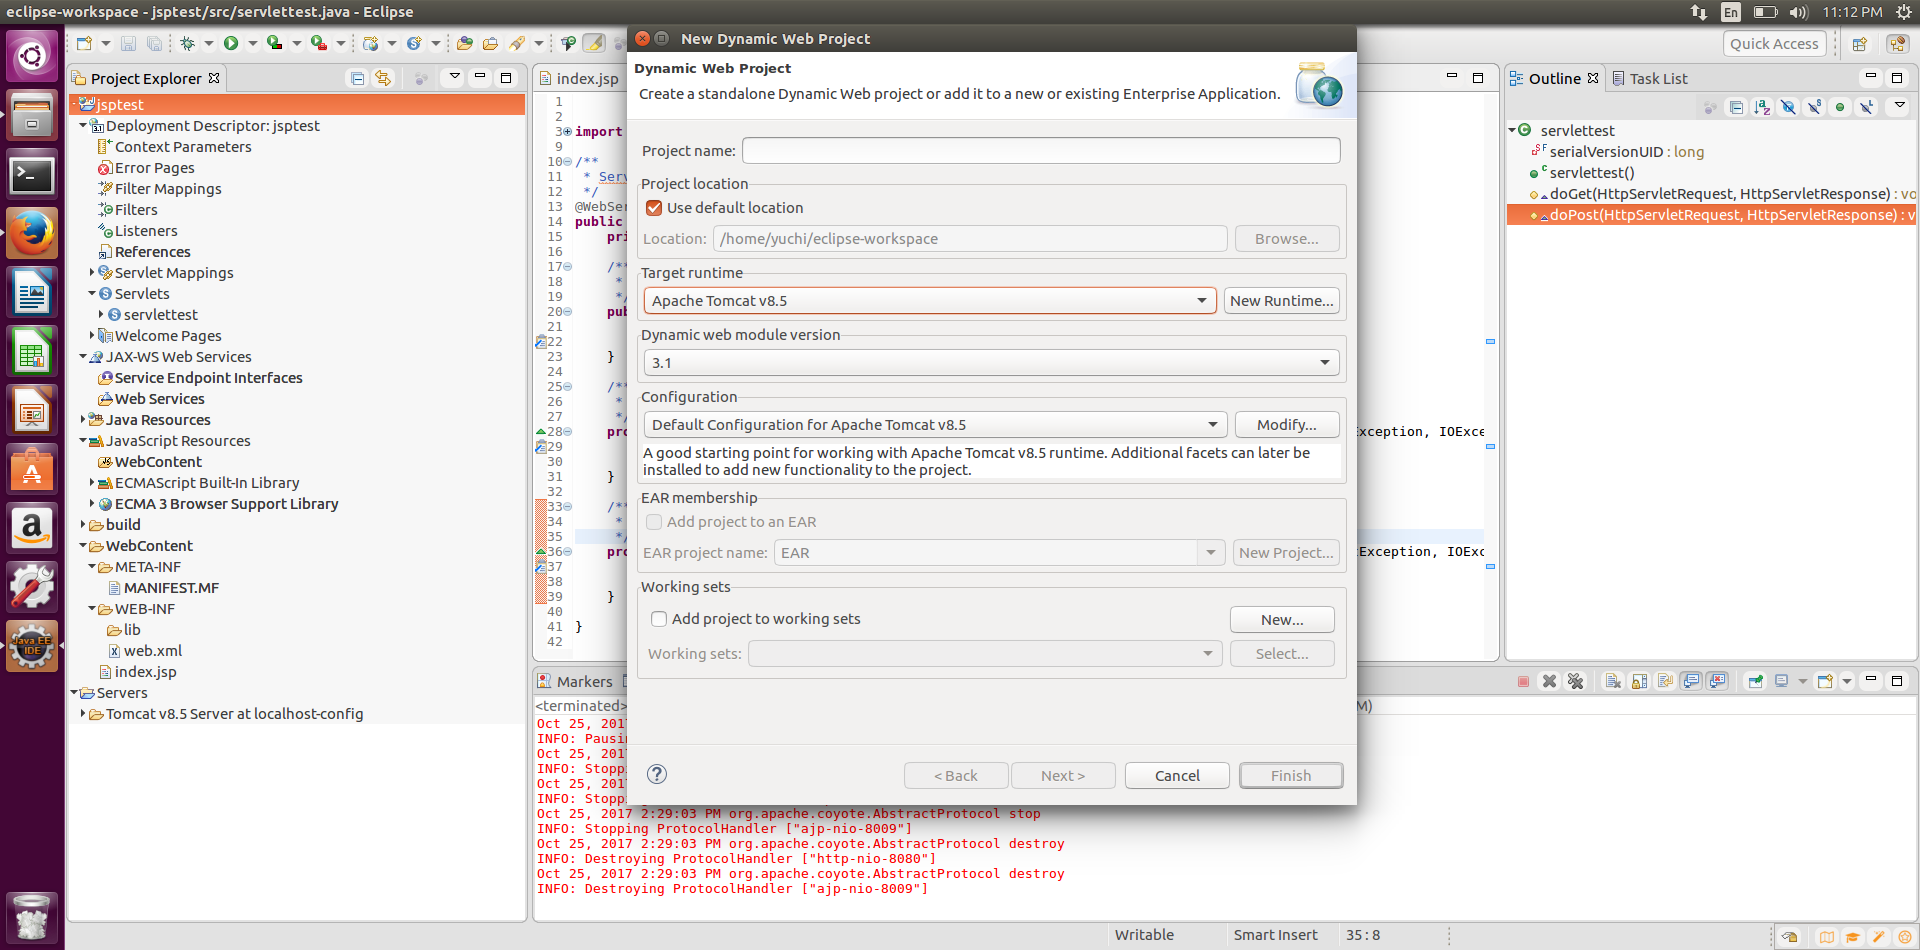
Open the newly create servlet, if there are errors (for example, as shown in the following figure), you need to addservlet-api.jarto your project.
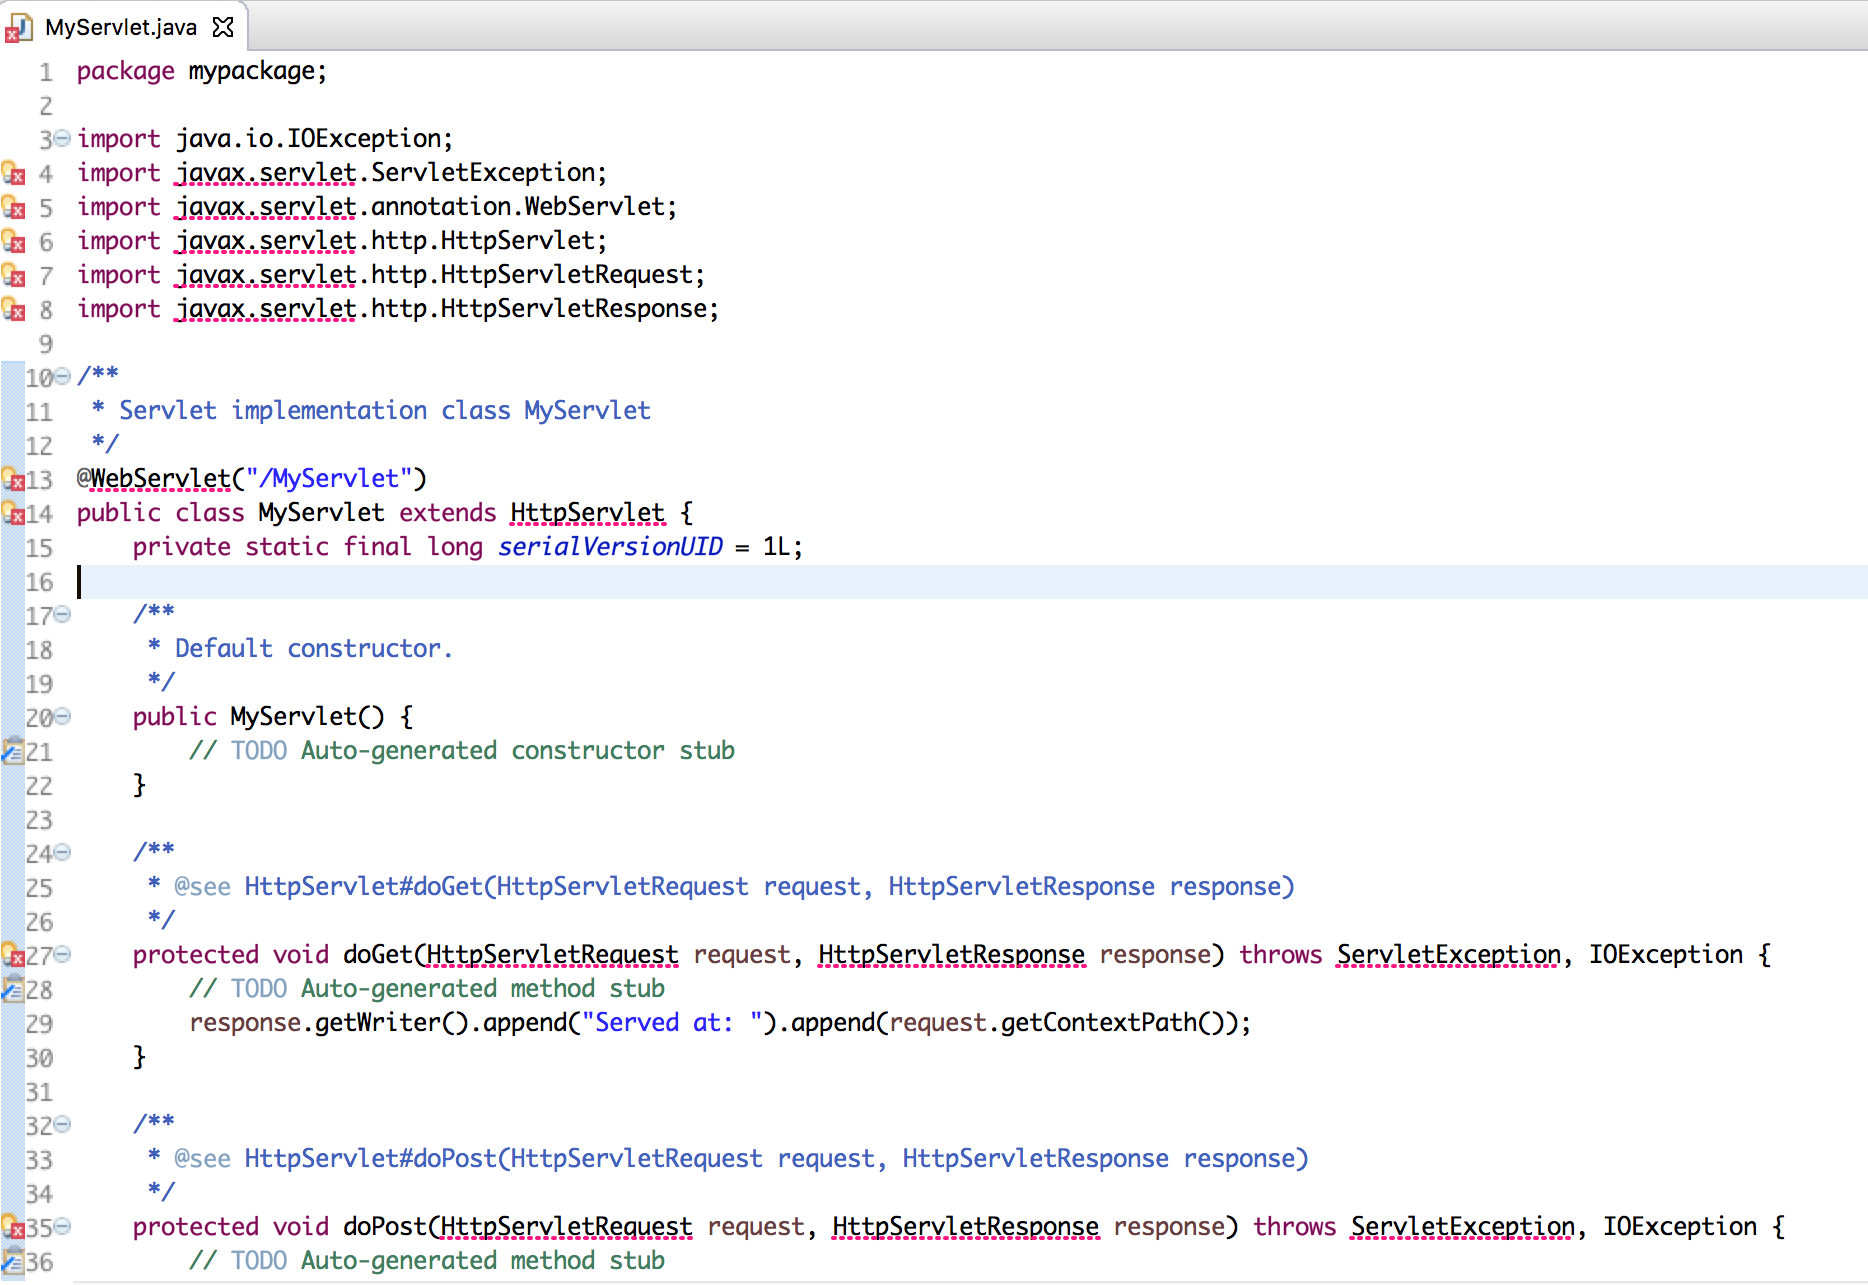
- To add
servlet-api.jarto your project- Open Project Properties by
- Right click on the project name and then
Properties, or - Use a menu bar
Project > Properties
- Right click on the project name and then
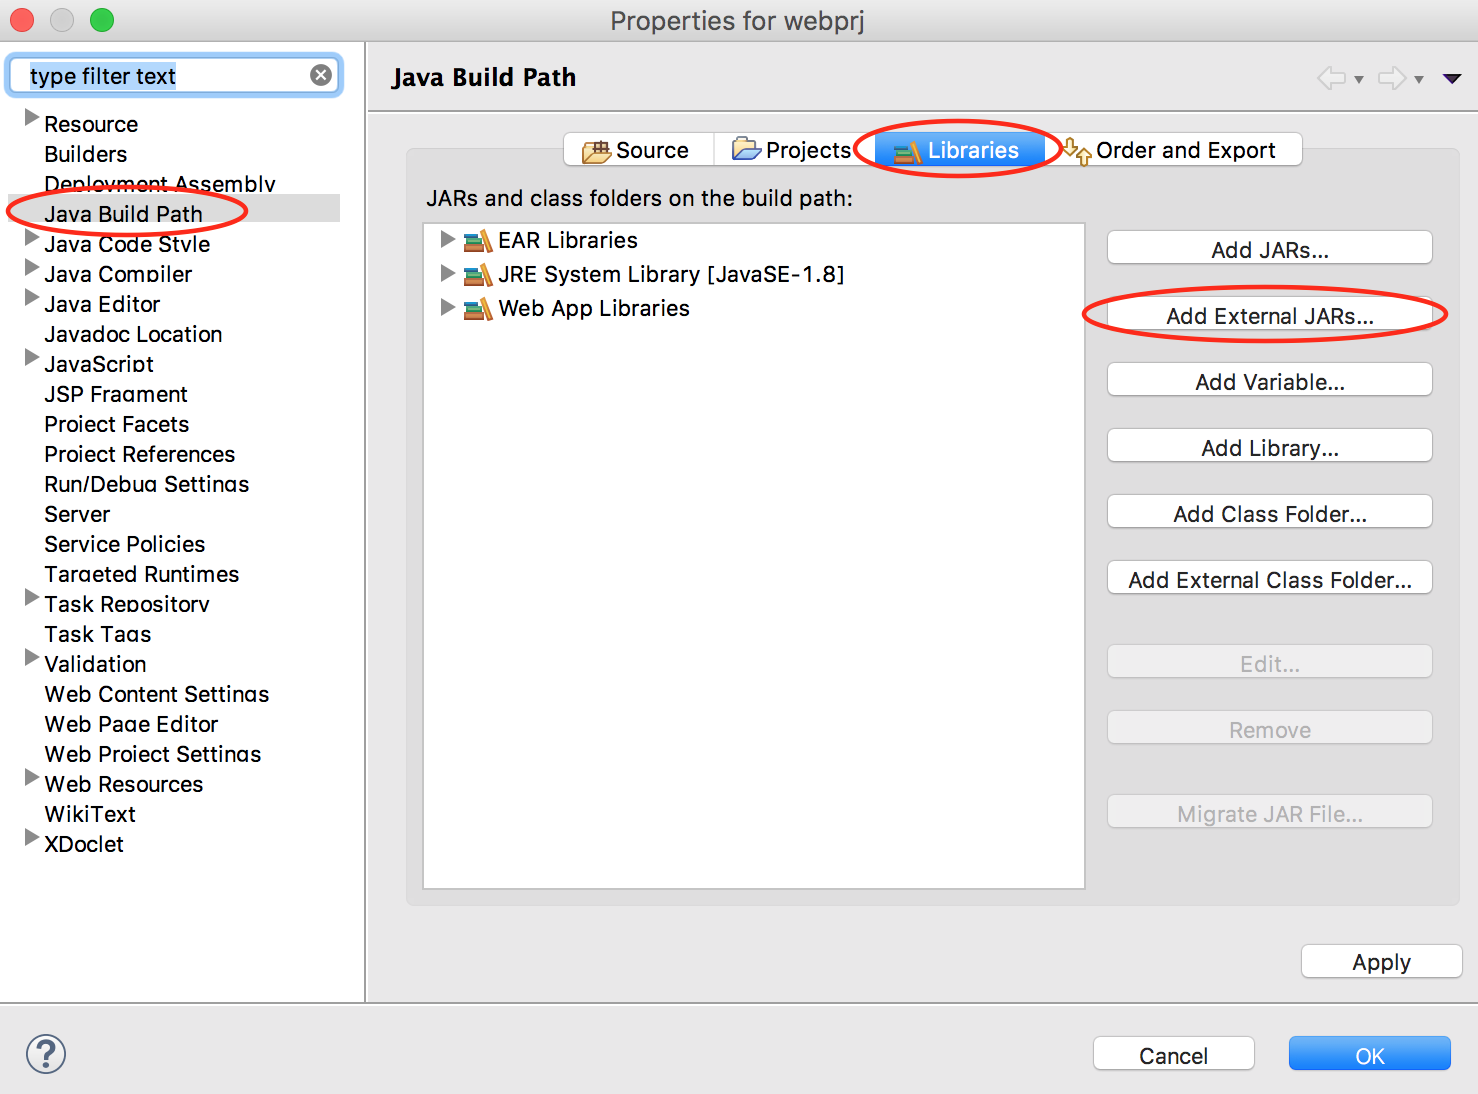
- Select
Java Build Path - Select
Librariestab - Press
Add External JARs...button
- Navigate to the location where you save
servlet-api.jar. Note: By default,servlet-api.jaris part of Apache Tomcat and is usually in- (for Window)
C:\apache-tomcat\lib - (for Mac)
Applications/apache-tomcat/lib
- (for Window)
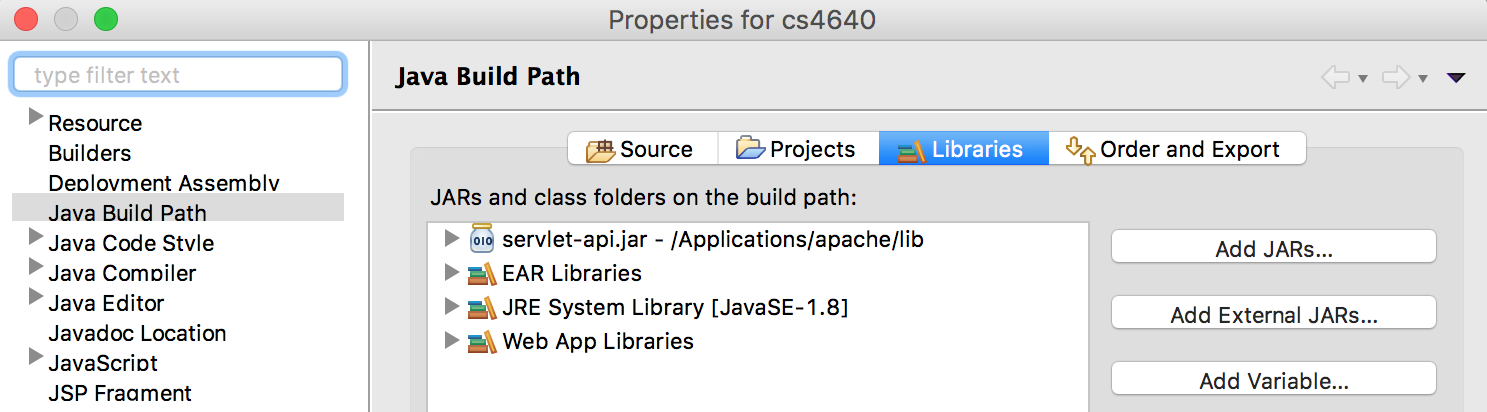
- Select
servlet-api.jar - Press
Openbutton.servlet-api.jarshould appear under JARs and class folders on the build path panel
- Open Project Properties by
- Create a dynamic web project (depending on the version of your Eclipse) by
selecting
- Write code / implement your servlet
- Implement a
doGet()method as needed - Implement a
doPost()method as needed - Implement additional Java functions as needed
- Implement a
- Compile a servlet. A Java servlet is a
.javafile and thus must be compiled before it can be run.- For Eclipse user, when you run a servlet (right click on the servlet
.javafile and selectRun as > Run on Server), Eclipse automatically compiles the file before running it.
- To manually compile a Java servlet, you may need to set a classpath
to include
servlet-api.jar(presumably inapache-tomcat/lib/folder).- You may set a classpath via your computer configuration
- This usually involves opening the
Control Panel > System > Advanced > Environment Variables.
- This usually involves opening the
- You may set the path while compiling the servlet Java file (using a command line). For example,
- (for Window)
javac -cp "C:\Applications\apache-tomcat\lib\servlet-api.jar" servlet-name.java - (for Mac)
javac -classpath "/Applications/apache-tomcat/lib/servlet-api.jar" servlet-name.java
Note: The syntax may be different depending on your computer configuration. Based on CS4640-S17 students, the above Mac-syntax worked for some Mac users but not for some; similarly, the above Window-syntax worked for some Window users but not for some. Please let me know if you have any suggestion on syntax (either for Mac or for Window).
- (for Window)
javac, you need to compile the servlet from "above" the directory:
For example,javac package-name/Hello.java(assumingservlet-api.jarhas already been included in the classpath)
- You may set a classpath via your computer configuration
- For Eclipse user, when you run a servlet (right click on the servlet
- Map servlet
- Every Java servlet needs a servlet mapping.
There are two options. (Note: use either one of these options)
- Option 1: Use a
servlet.annotation.WebServlet- Import a
servlet.annotation.WebServletto your Java file by including the following line
import javax.servlet.annotation.WebServlet; - Then, include the following line before a class declaration
@WebServlet("/your-servlet-name")
- Import a
- Option 2: Use a
web.xmlfile- If you do not use Tomcat in Eclipse environment,
create a default
web.xmlfile under your project directory (so-called "context") in apache-tomcat folder. Then, add the<servlet>and<servlet-mapping>tags toweb.xmlfile.- (for Window)
C:\apache-tomcat\your-project-name\WEB-INF\web.xml - (for Mac)
Applications/apache-tomcat/your-project-name/WEB-INF/web.xml
Here is a sample web.xml file<?xml version="1.0" encoding="UTF-8"?> <web-app xmlns:xsi="http://www.w3.org/2001/XMLSchema-instance" xmlns="http://java.sun.com/xml/ns/javaee" xsi:schemaLocation="http://java.sun.com/xml/ns/javaee http://java.sun.com/xml/ns/javaee/web-app_3_0.xsd" id="WebApp_ID" version="3.0"> <servlet> <servlet-name>YourServletName</servlet-name> <servlet-class>YourServletClass</servlet-class> </servlet> <servlet-mapping> <servlet-name>YourServletName</servlet-name> <url-pattern>/YourURLMapping</url-pattern> </servlet-mapping> </web-app>
Assume the project's name is cs4640 and the servlet isHelloServlet.java(HelloServlet.class, after compiled):<?xml version="1.0" encoding="UTF-8"?> <web-app xmlns:xsi="http://www.w3.org/2001/XMLSchema-instance" xmlns="http://java.sun.com/xml/ns/javaee" xsi:schemaLocation="http://java.sun.com/xml/ns/javaee http://java.sun.com/xml/ns/javaee/web-app_3_0.xsd" id="WebApp_ID" version="3.0"> <servlet> <servlet-name>Hello</servlet-name> <servlet-class>HelloServlet</servlet-class> </servlet> <servlet-mapping> <servlet-name>Hello</servlet-name> <url-pattern>/Hello</url-pattern> </servlet-mapping> </web-app>With the above servlet mapping, to access the servlet,
the URL would behttp://localhost:8080/cs4640/Hello.
If the servlet is in a package, the servlet mapping must also include the package name.
For example, a servlet name isQAselectorand package name isjeopardy<servlet> <servlet-name>QAselector</servlet-name> <servlet-class>jeopardy.QAselector</servlet-class> </servlet> <servlet-mapping> <servlet-name>QAselector</servlet-name> <url-pattern>/QAselector</url-pattern> </servlet-mapping>The URL would behttp://localhost:8080/cs4640/QAselector.
Alternatively, you may choose to use a package name in the URL pattern<servlet> <servlet-name>QAselector</servlet-name> <servlet-class>jeopardy.QAselector</servlet-class> </servlet> <servlet-mapping> <servlet-name>QAselector</servlet-name> <url-pattern>/jeopardy.QAselector</url-pattern> </servlet-mapping>The URL would behttp://localhost:8080/cs4640/jeopardy.QAselector. - (for Window)
- If you do not use Tomcat in Eclipse environment,
create a default
- Option 1: Use a
- Every Java servlet needs a servlet mapping.
There are two options. (Note: use either one of these options)
- Deploy a servlet.
The server can accept many different formats, including
.warand.class. The rest of these instructions assume you are deploying a simple.classfile.
To deploy your servlet, follow these steps:- (for Window) Go to
C:\apache-tomcat\webapps - (for Mac) Go to
Applications/apache-tomcat/webapps -
You might need to create a project directory ("context") under
webappsfolder. Assume you give your project name ascs4640:
Directory Contains \cs4640This is the root directory of the web application. All JSP and HTML files are stored here. \cs4640\WEB-INF\classesThis directory is where servlet and utility classes are located. \cs4640\WEB-INFThis directory contains all resources related to the application that are not in the document root of the application. This is where your web application deployment descriptor ( web.xml) is located. Note that the WEB-INF directory is not part of the public document. No files contained in this directory can be served directly to a client.\cs4640\WEB-INF\libThis directory contains Java Archive (JAR) files that the web application depends upon. For example, this is where you would place a JAR file that contains a JDBC driver.
- Copy your class files to the
classesdirectory. Note that when you replace a class in theclassesdirectory, the files do not get reloaded dynamically. You must restart the server (shutdown tomcat, start it again). - Note: In reality, if you use a shared server, do not put your
.javasource files in the public directory!
- (for Window) Go to
- Setting permission. Make sure that your files are readable and executable
- Go to
apache-tomcat/webapps/project-name/WEB-INF/classes/package-name - Run a command
chmod 755 *
- Go to
- Running / accessing a servlet
- To access via a web browser
- Enter a URL similar to
http://localhost:8080/project-name/servlet-name
- Enter a URL similar to
- To access through Eclipse
- Right click on the Java servlet name (
.javafile), selectRun As > Run on Server. Eclipse will access the servlet using a virtual browser.
- Right click on the Java servlet name (
- To access via a web browser
- Tomcat keeps its log files in the director
apache-tomcat/logs/. The filescatalina.outandlocal_access_log.2018-MM-DD.txtaccumulate log entries from Tomcat (MMis a 2-digit indicator of the month andDDis a 2-digit indicator of the day). You can look here to find error messages from your servlets.
- Caution!!
Never ever do this, especially if you use a shared server:
      try
      {
         ... ...
      } catch (Exception e) {
         System.out.println(e.getMessage());
         System.exit(0);
      }
The servlet is running inside Tomcat.
System.exit(0);will cause Tomcat to exit. Everyone who shares the server with you will be very angry!