Database setup using CS server
(Please tell me if you find any errors or omissions in the document —Upsorn Praphamontripong, 4-February-2024)
phpMyAdmin is a free and open-source software written in PHP intended to handle the administration of MySQL with the use of a web browser. It supports a wide range of operations such as creating, modifying or deleting databases, tables, fields or rows; executing SQL statements; or managing users and permissions. For more information, please refer to https://www.phpmyadmin.net/.
VPN requirement
If you are using the CS MySQL on Grounds, with UVA WiFi / network, you do not need VPN.
If you are using the CS MySQL off Grounds, with non-UVA WiFi / network, you need VPN. Please follow the instructions on the Information Technology Service's VPN page to install and connect to VPN.
Access phpMyAdmin
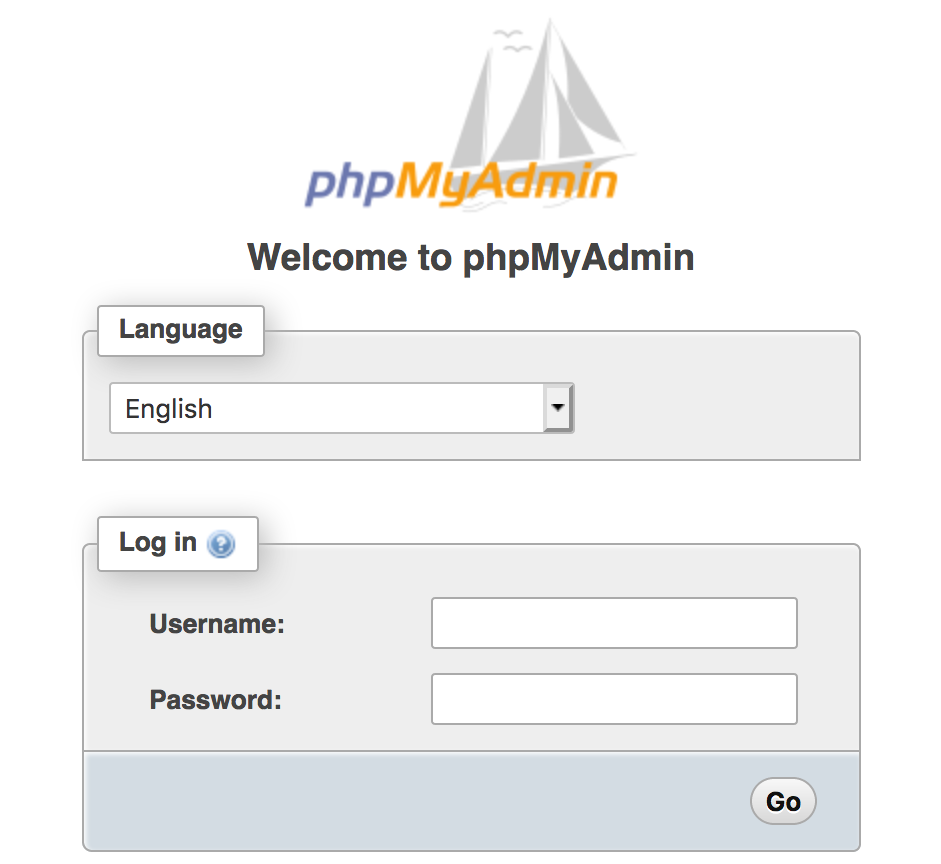
- Open a web browser, enter a URL http://mysql01.cs.virginia.edu/phpmyadmin/ to access phpMyAdmin dashboard
- Enter your UVA computingID for a username.
Password will be sent through Collab announcement and also distributed in class.
Then,
click the Go button to log in
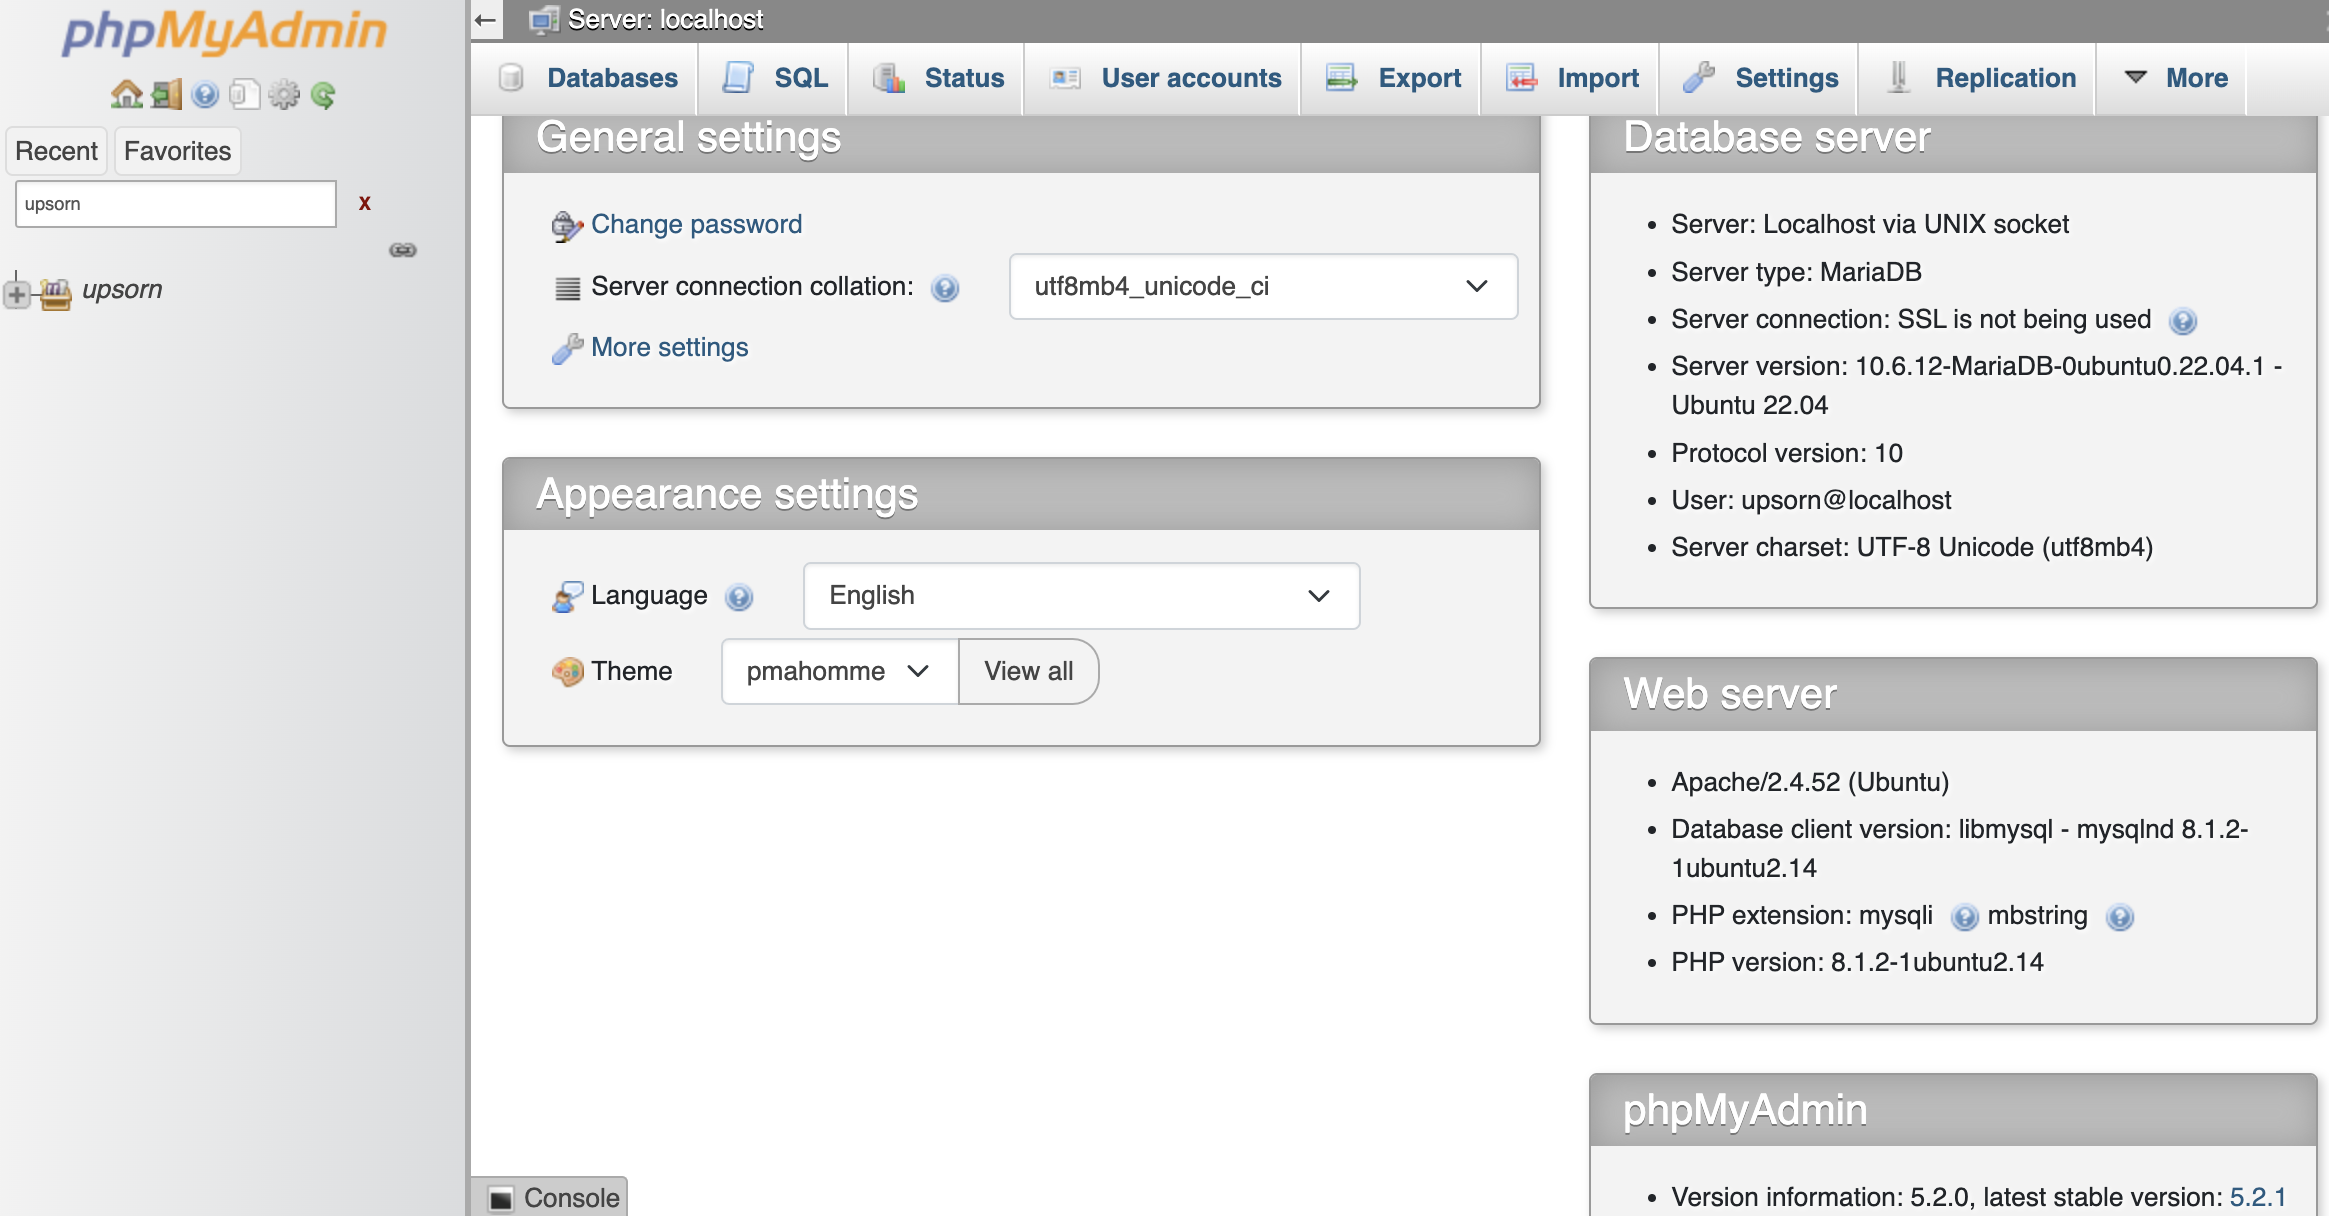
Once you have successfully connected to phpMyAdmin, you should see a screen similar to the following
Change password
- On the phpMyAdmin screen,
click the Home icon, then
click on Change Password link

- Enter your new password and click the Go button

Do NOT use your Netbadge or any official password
Create a database
Per the CS configuration, you are required to use your computingID as your database name. To create a database, there are several options.
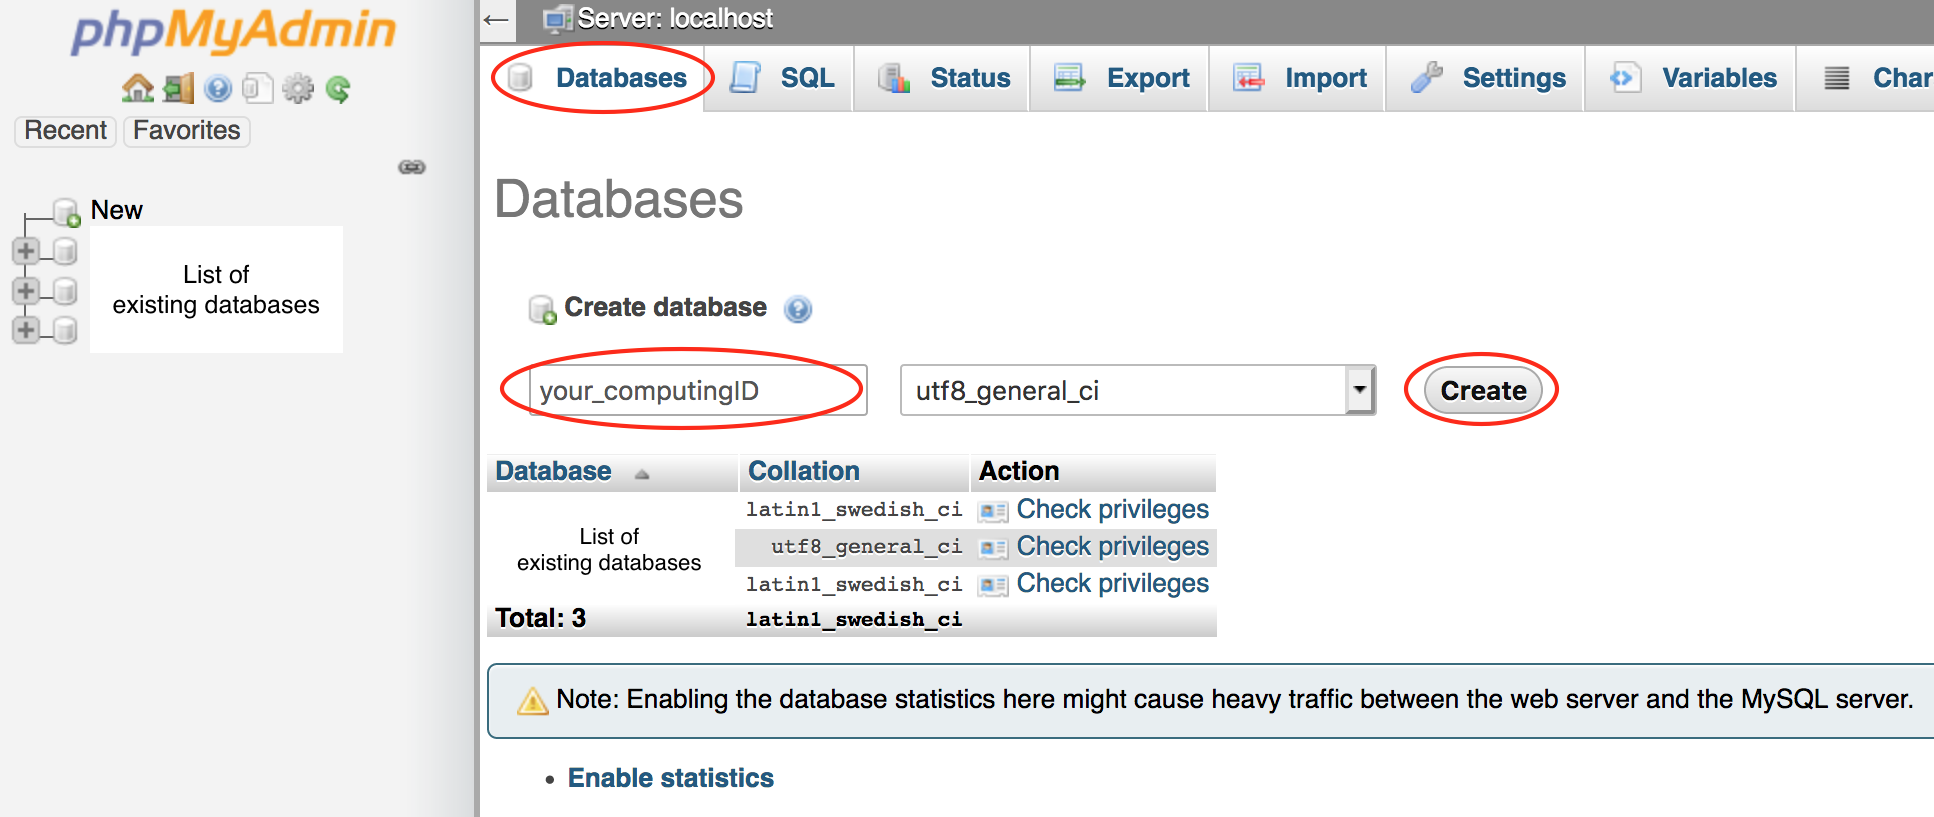
You may use the Create database feature.- On the phpMyAdmin screen, select the Databases tab. Alternatively, you may click the New link on the left panel.
- Under the Create database, enter your computingID for a Database name
- Click the Create button
You may run the SQL command to create a database.
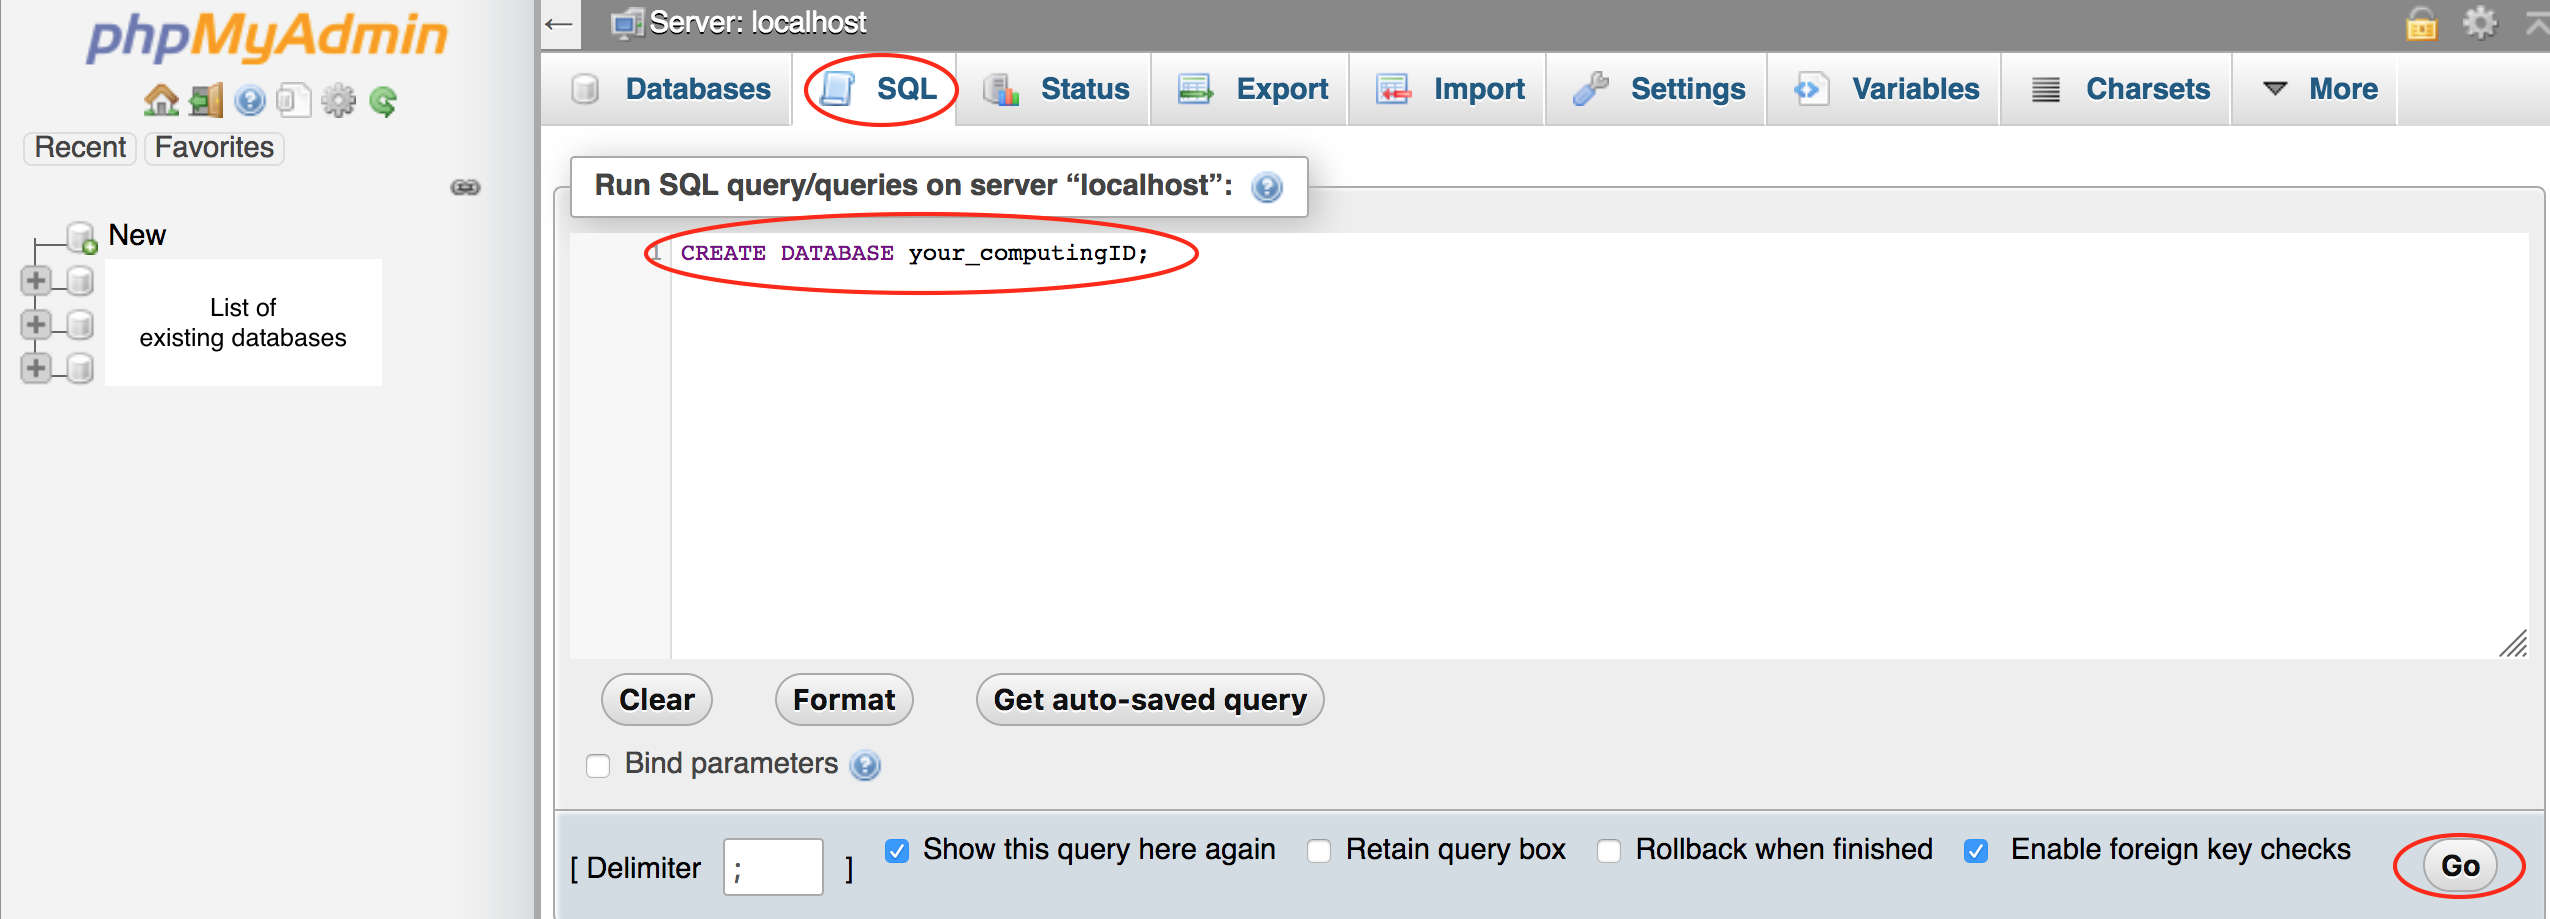
- On the phpMyAdmin screen, select the SQL tab
- Enter
CREATE DATABASE your_computingID;
Note: SQL commands are not case sensitive. This example uses uppercase and lowercase simply to make it easy to read. - Click the Go button to run the command.
- For Mac users, you may press Control+Enter to run
- For Windows users, you may press Control+Enter to run
Create a table
Let's create a table named entries. To create a table, there are several options.
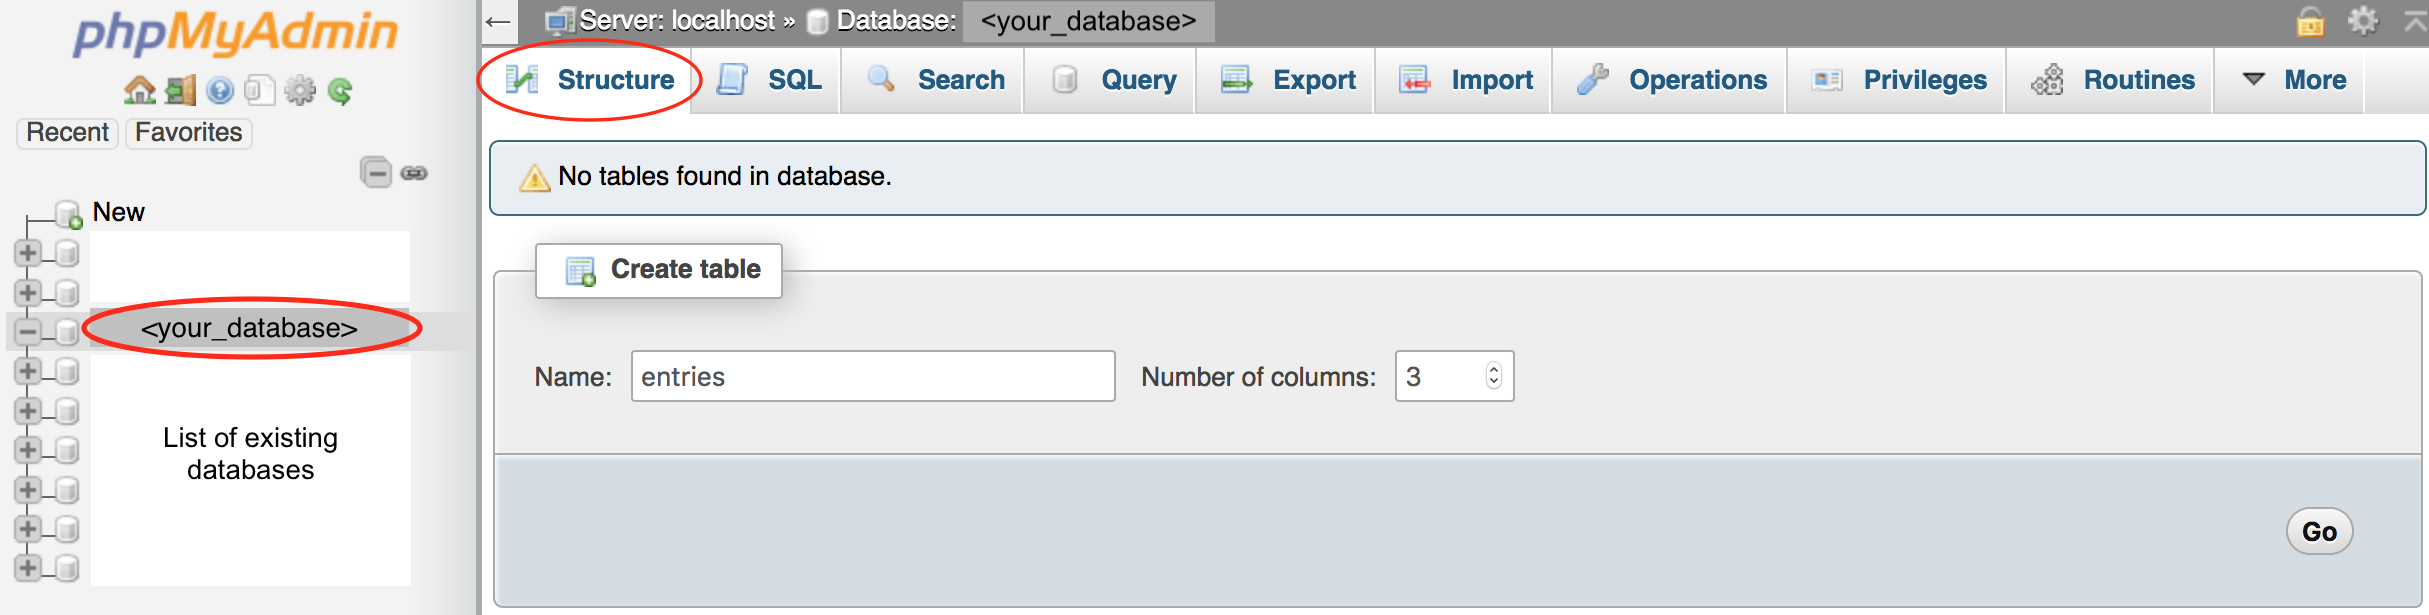
You may use the Create table feature.- On the phpMyAdmin screen, select your database.
- Select the Structure tab.
- Under the Create table, enter a table name and the number of columns.
- Click the Go button. This will prompt you to enter the column information.
You may run the SQL command to create a table.
- On the phpMyAdmin screen, select the SQL tab
- Enter the following code
USE your_database_name;
CREATE TABLE entries (guestName VARCHAR(255), content VARCHAR(255),
    entryID INT NOT NULL AUTO_INCREMENT, PRIMARY KEY(entryID));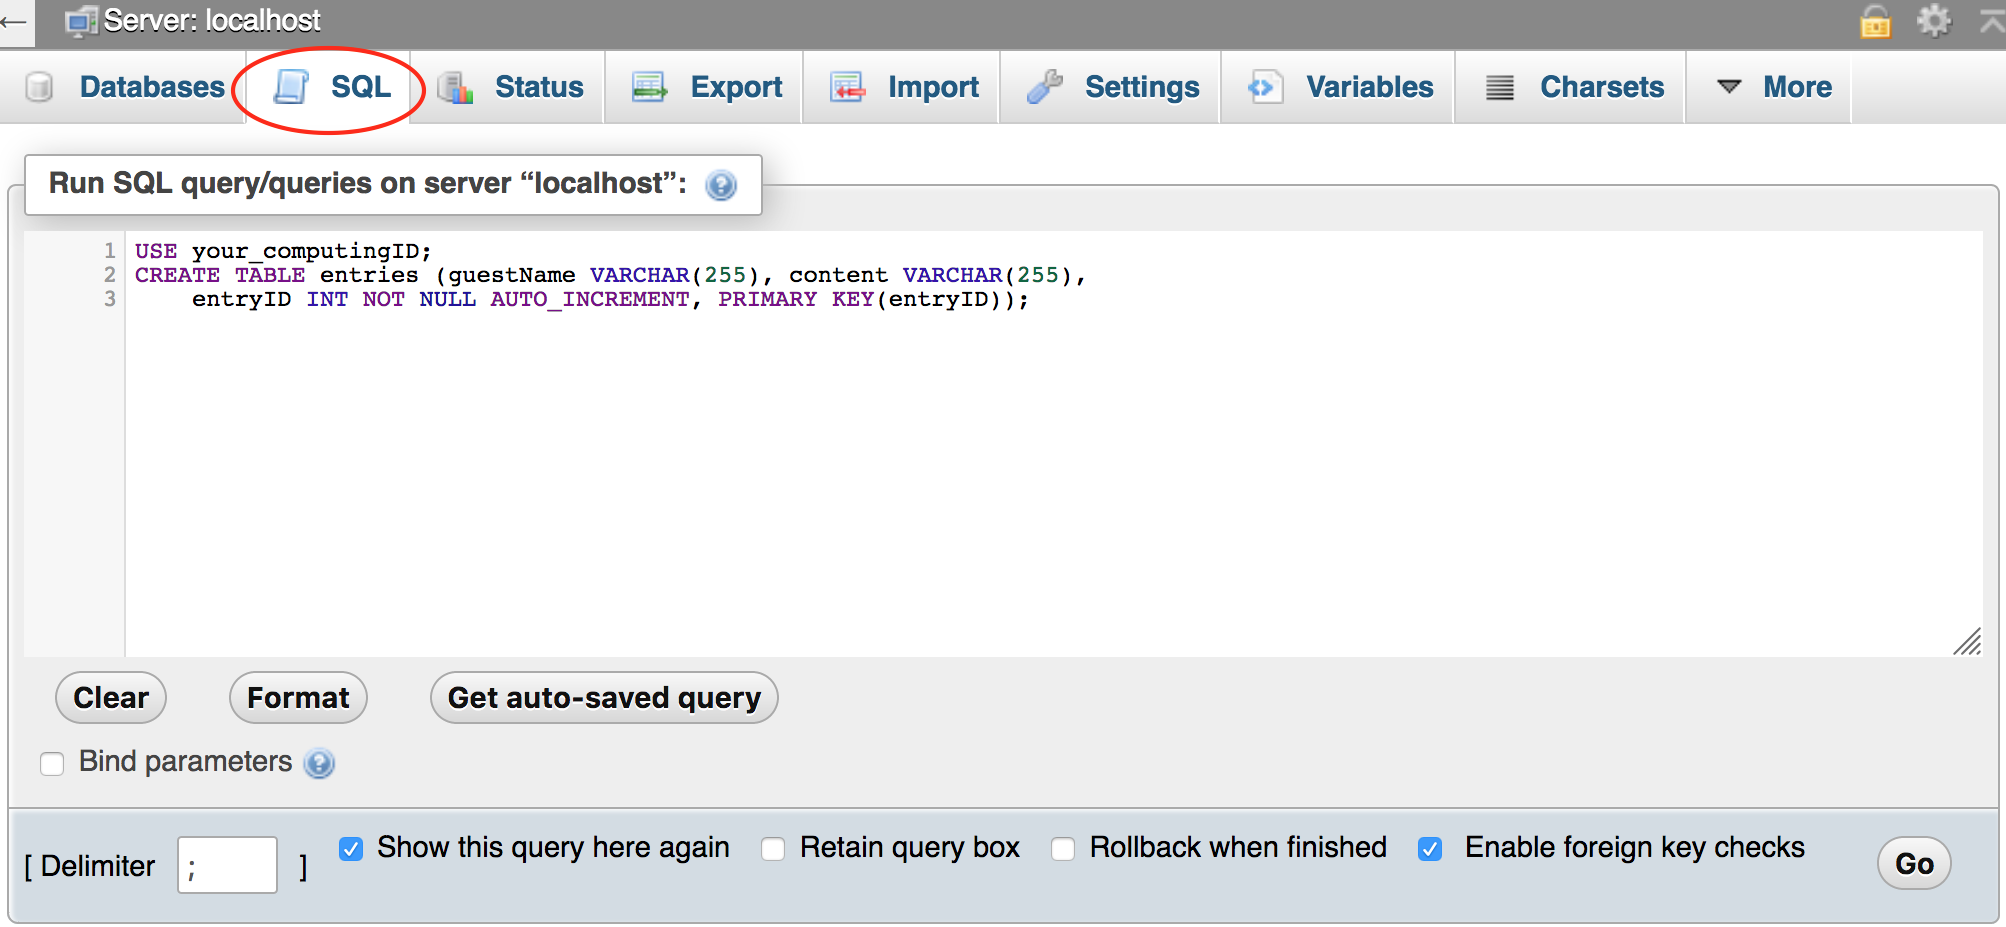
If you already selected the your_computingID database (on the left panel), no need to include
USE your_database_namein your SQL to run. - Click the Go button to run the command.
- For Mac users, you may press Control+Enter to run
- For Windows users, you may press Control+Enter to run
Insert data
To insert data into a table, there are several options.
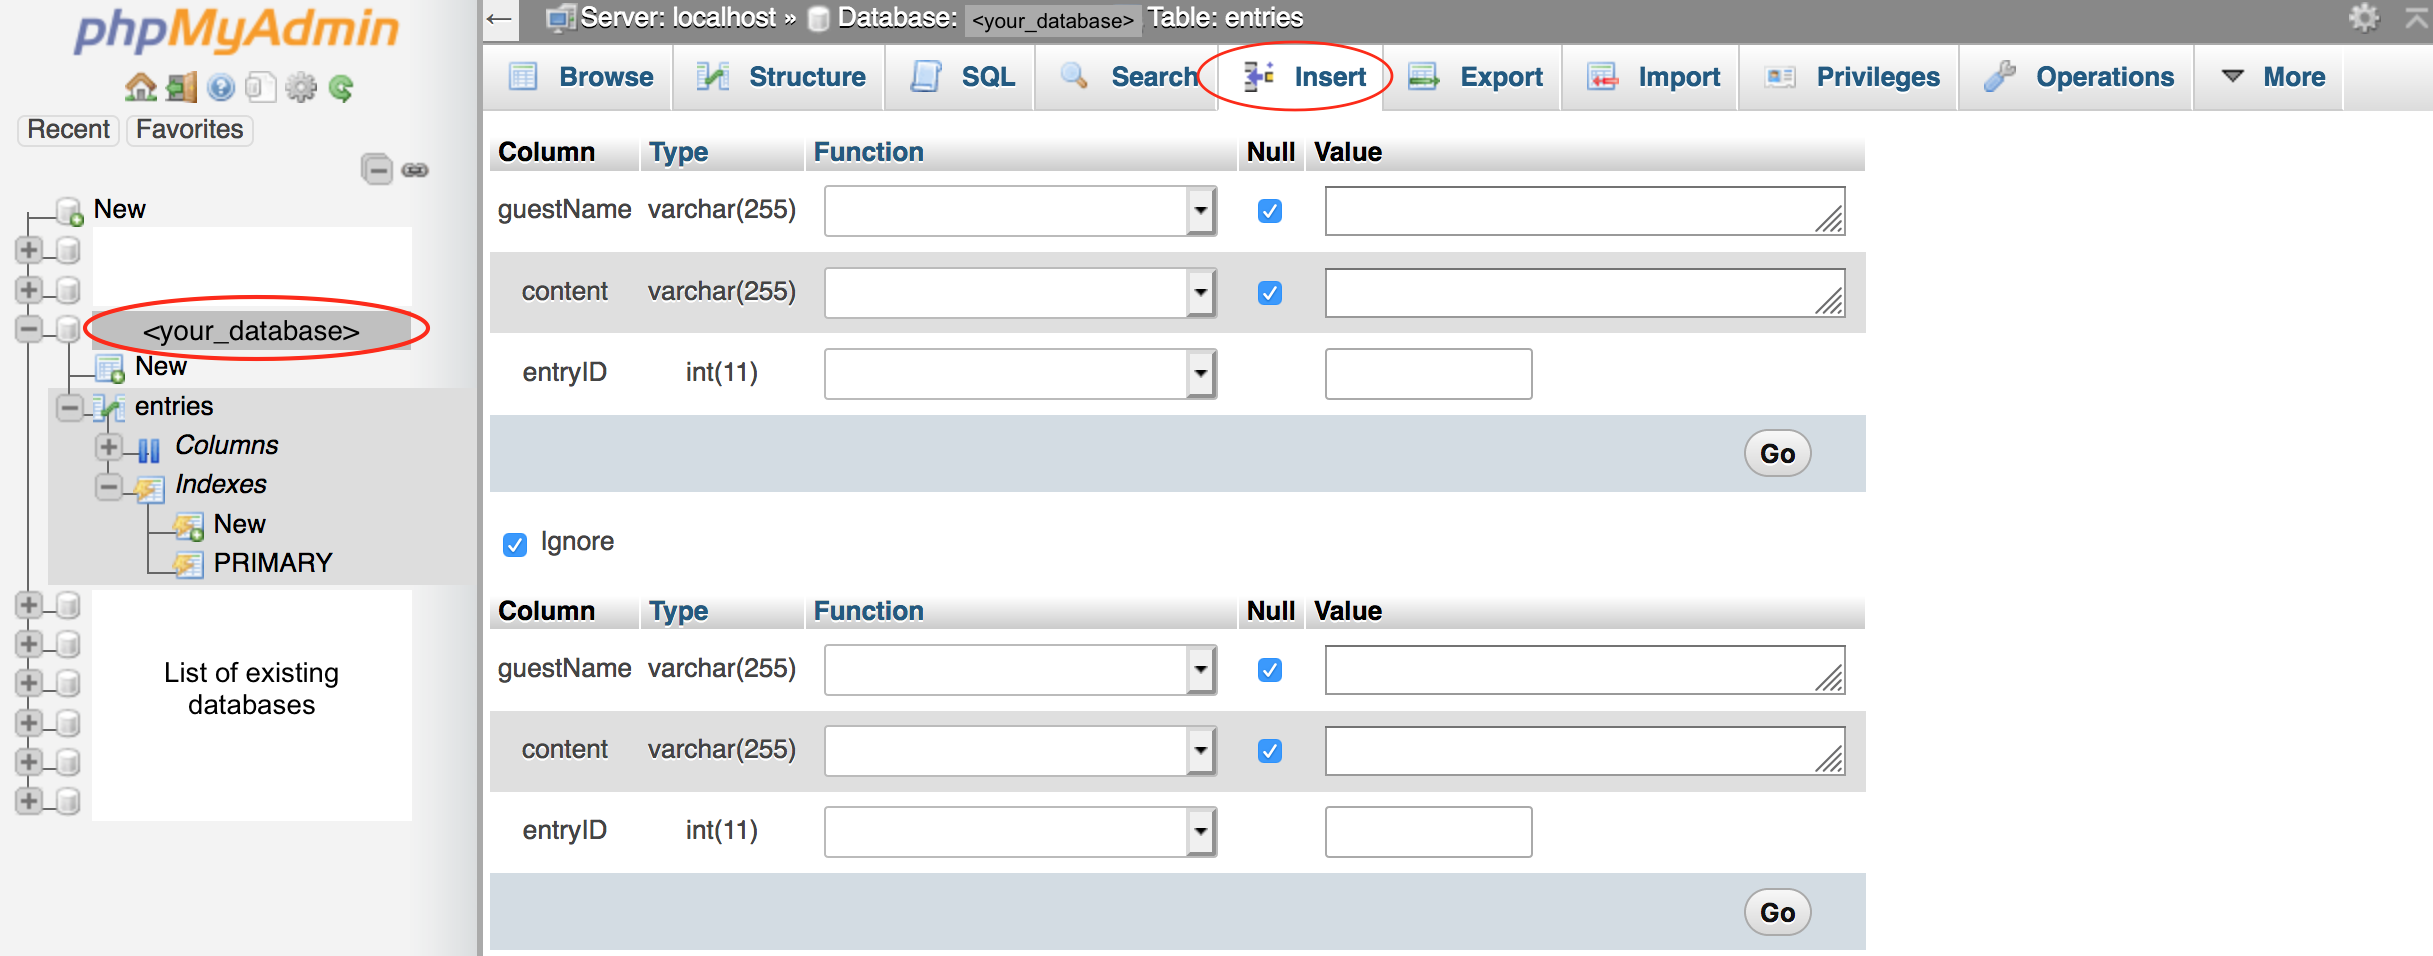
You may use the Insert feature.- On the phpMyAdmin screen, select the your_computingID database, select the entries table.
- Select the Insert tab.
- For each record of data to be inserted, enter the value for each column.
- Click the Go button.
You may run the SQL command to insert data.
- On the phpMyAdmin screen, select the your_computingID database, select the entries table.
- Select the SQL tab
- Enter the following code
INSERT INTO entries (guestName, content) values ("Humpty", "Humpty's here!");
INSERT INTO entries (guestName, content) values ("Dumpty", "Dumpty's here too!");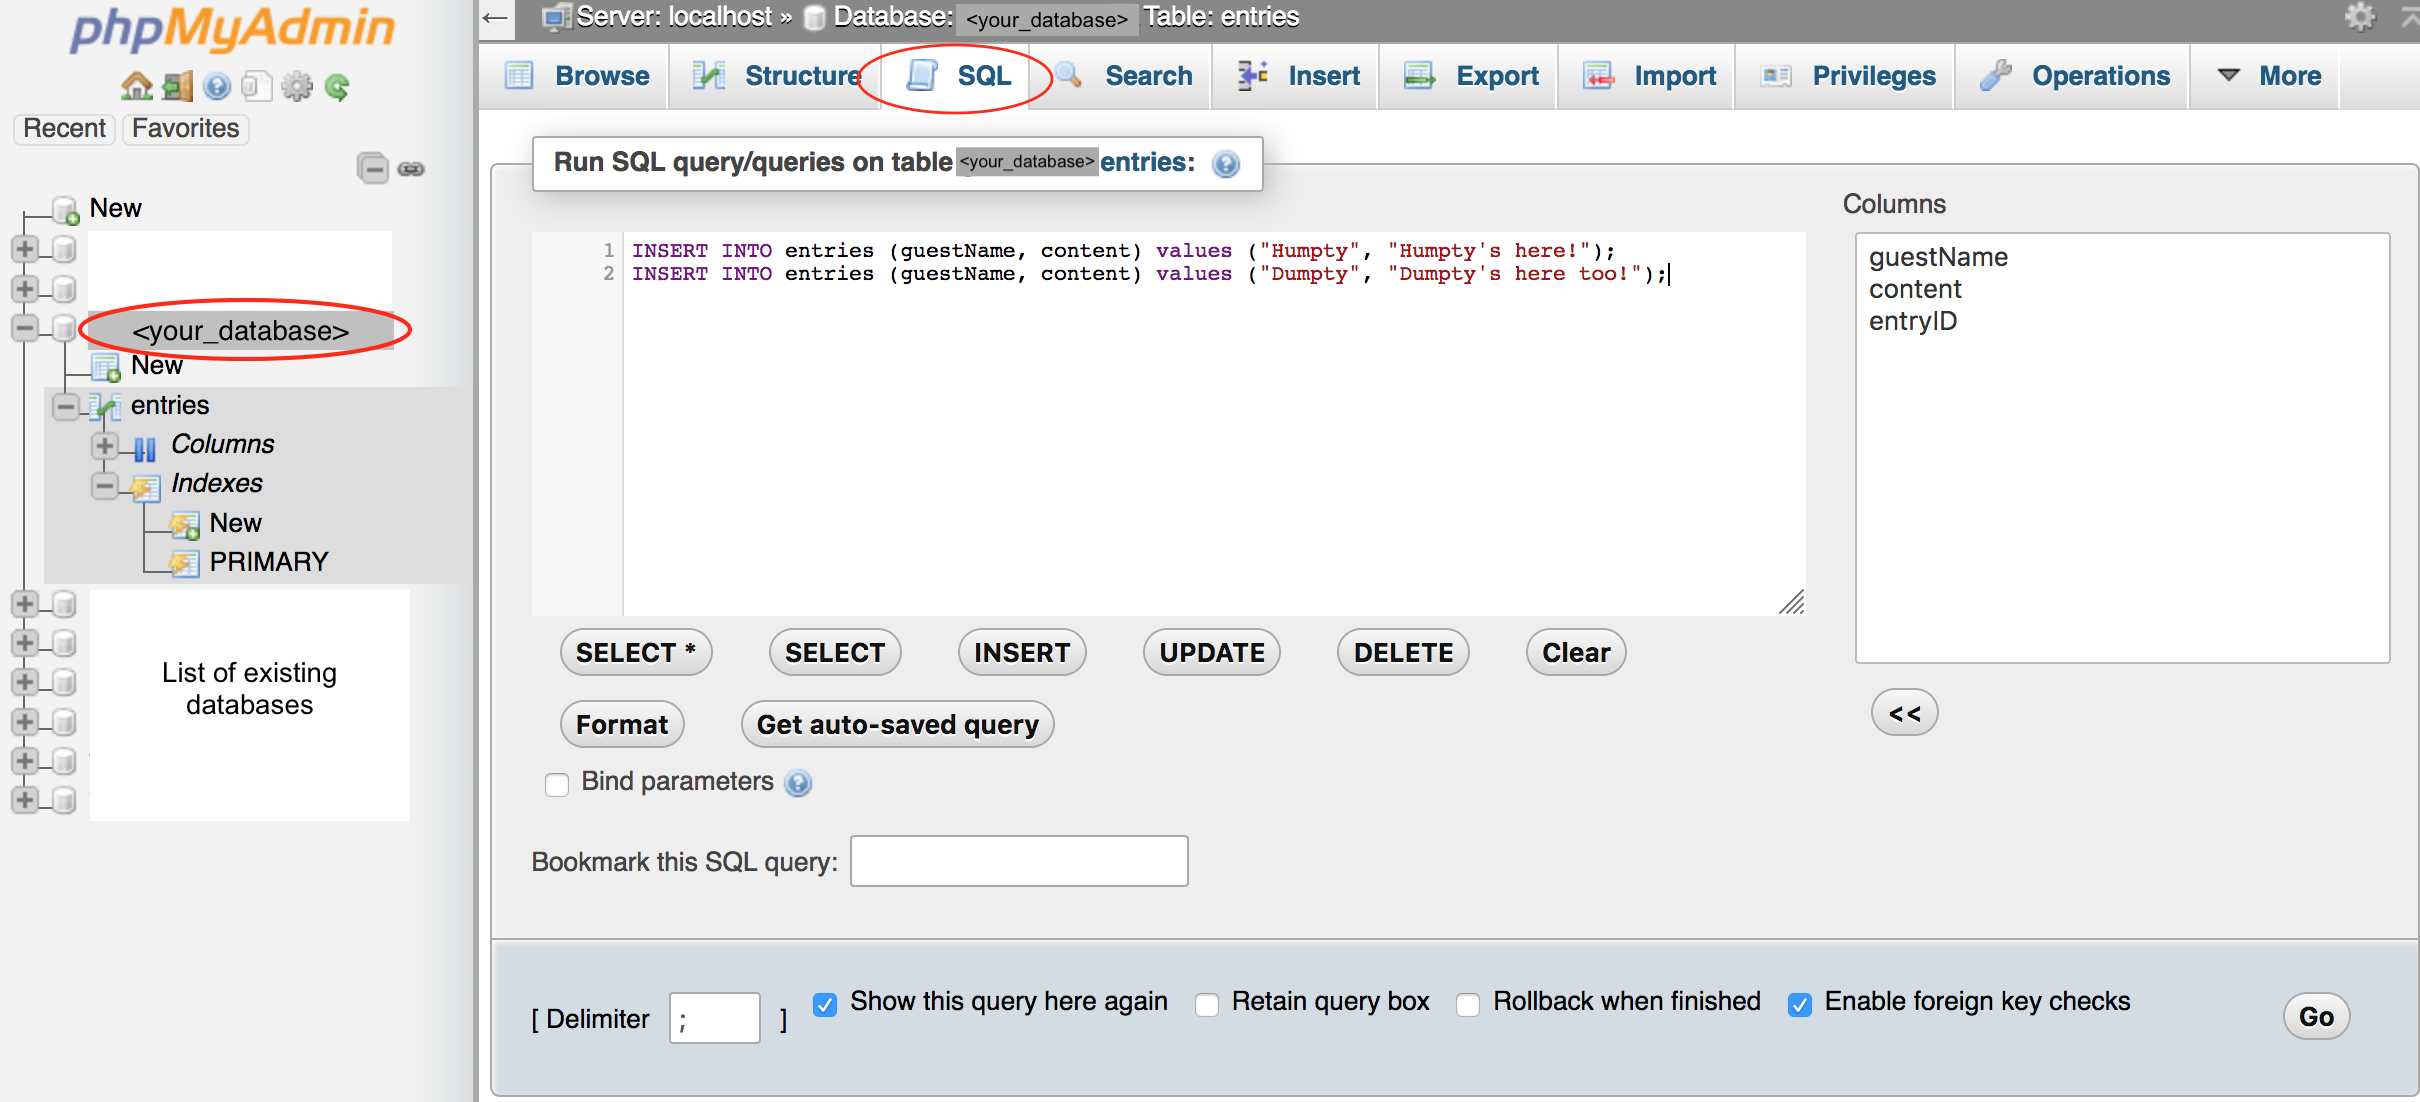
- Click the Go button to run the command.
- For Mac users, you may press Control+Enter to run
- For Windows users, you may press Control+Enter to run
Retrieve data
To retrieve data from a table, there are several options.
You may use the Browse feature.- On the phpMyAdmin screen, select the your_computingID database, select the entries table.
- Select the Browse tab. This will display all existing records of the table.
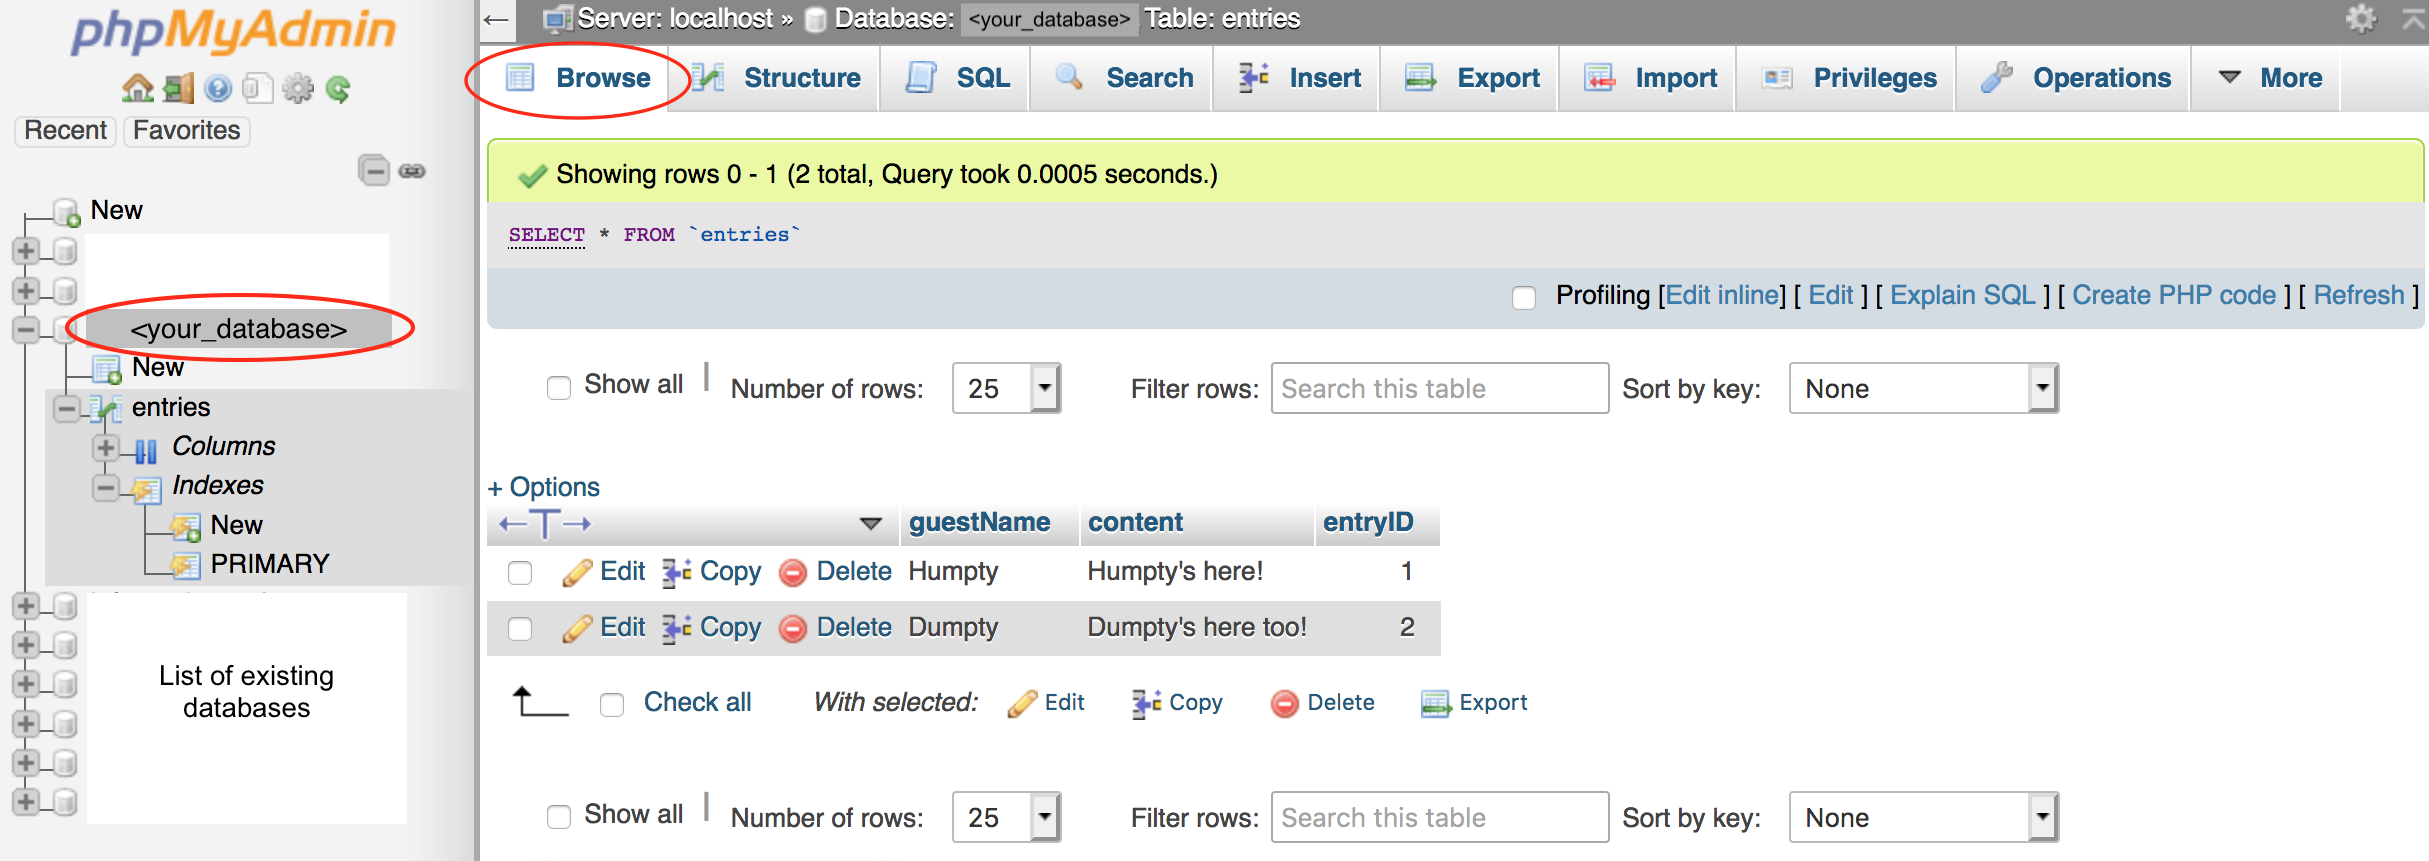
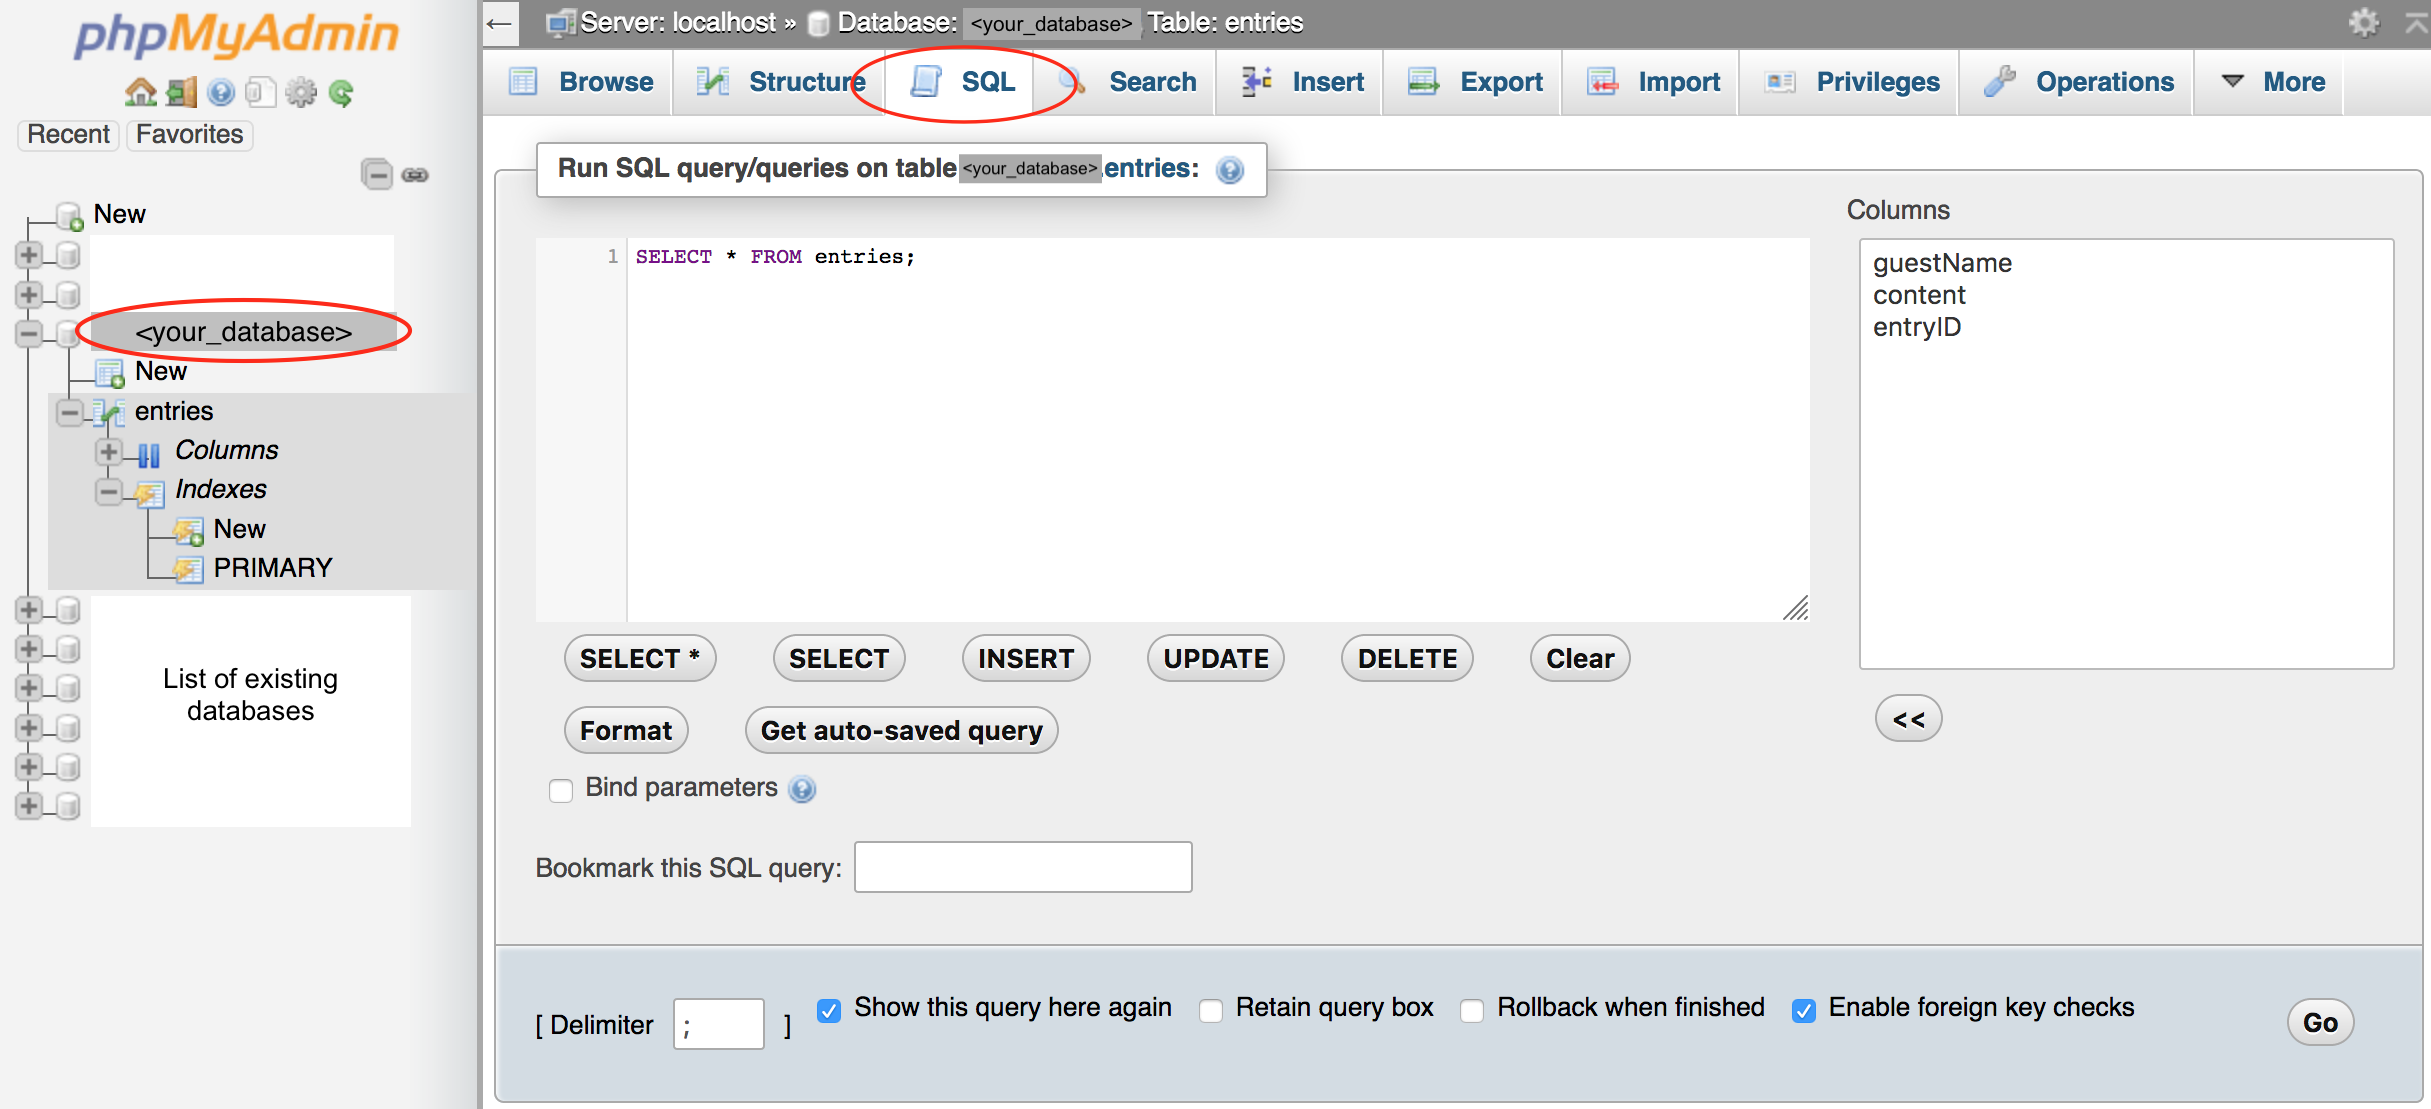
You may run the SQL command to retrieve data.
- On the phpMyAdmin screen, select the your_computingID database, select the entries table.
- Select the SQL tab
- Enter the following code
SELECT * FROM entries;
- Click the Go button to run the command.
- For Mac users, you may press Control+Enter to run
- For Windows users, you may press Control+Enter to run
Import SQL file
- Create a blank file named friendbook.sql.
Paste the following content in the file
CREATE TABLE friends (friendName VARCHAR(255), phone VARCHAR(255), entryID INT NOT NULL AUTO_INCREMENT, PRIMARY KEY(entryID)); INSERT INTO friends (friendName, phone) values ("Humpty", "111-111-1111"); INSERT INTO friends (friendName, phone) values ("Dumpty", "222-222-2222"); - On the phpMyAdmin screen, select the your_computingID database
- Select the Import tab
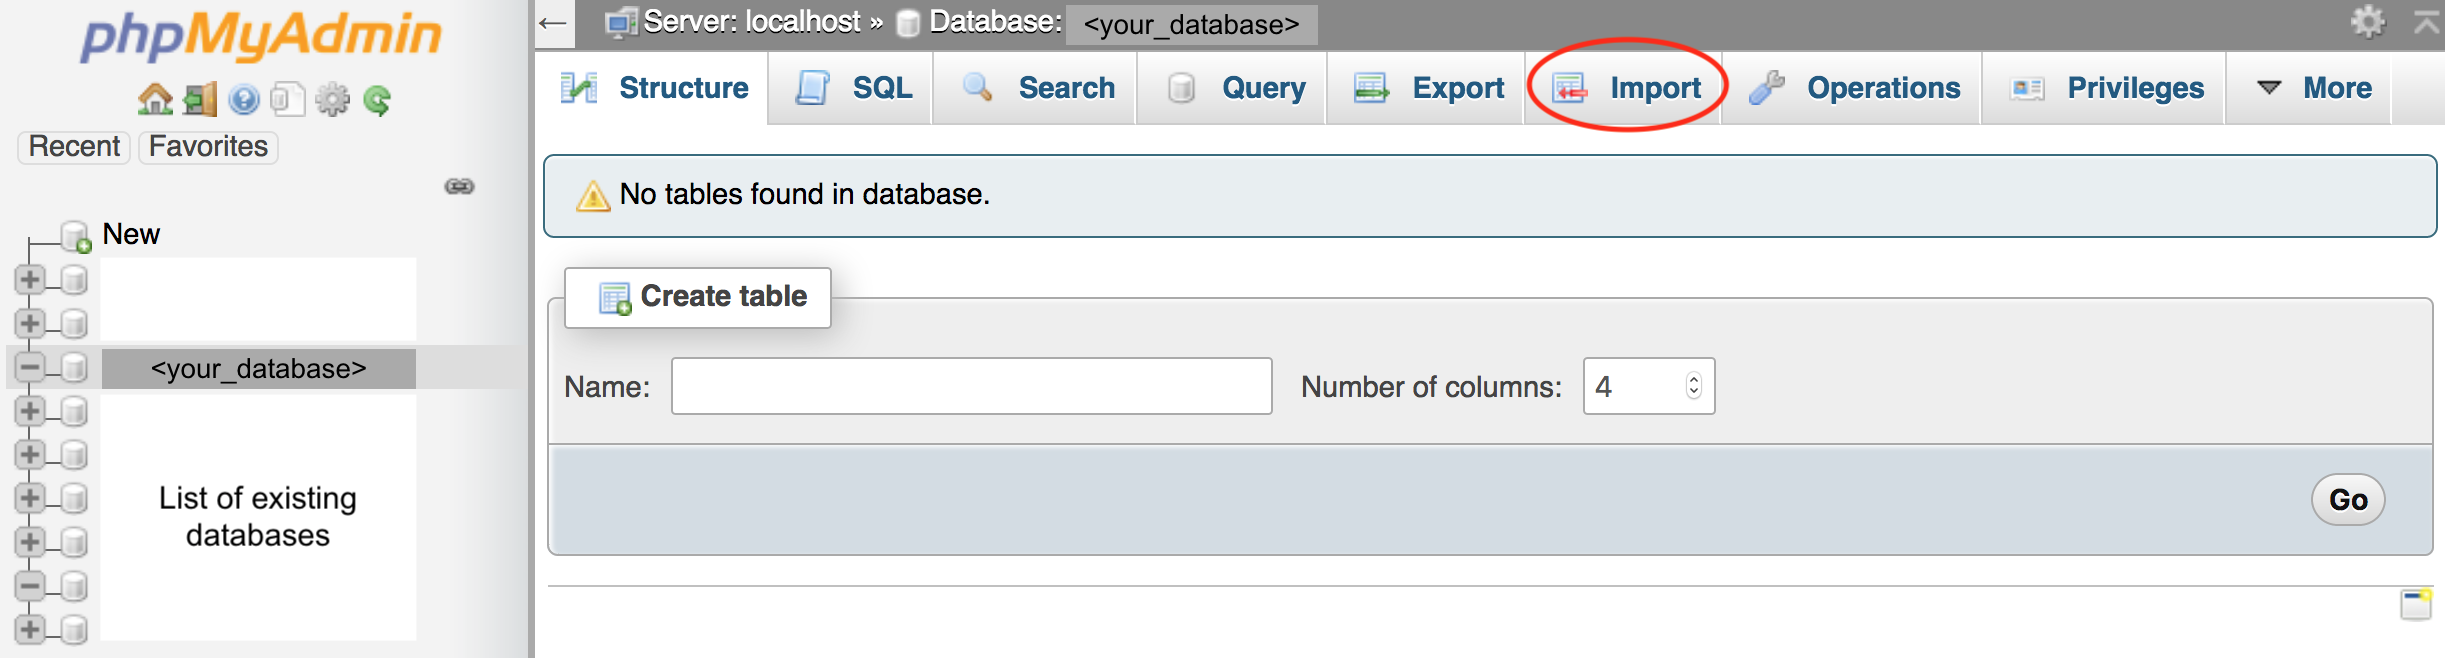
- Choose the .sql file to import

- Click the Go button to run the command.
- For Mac users, you may press Control+Enter to run
- For Windows users, you may press Control+Enter to run
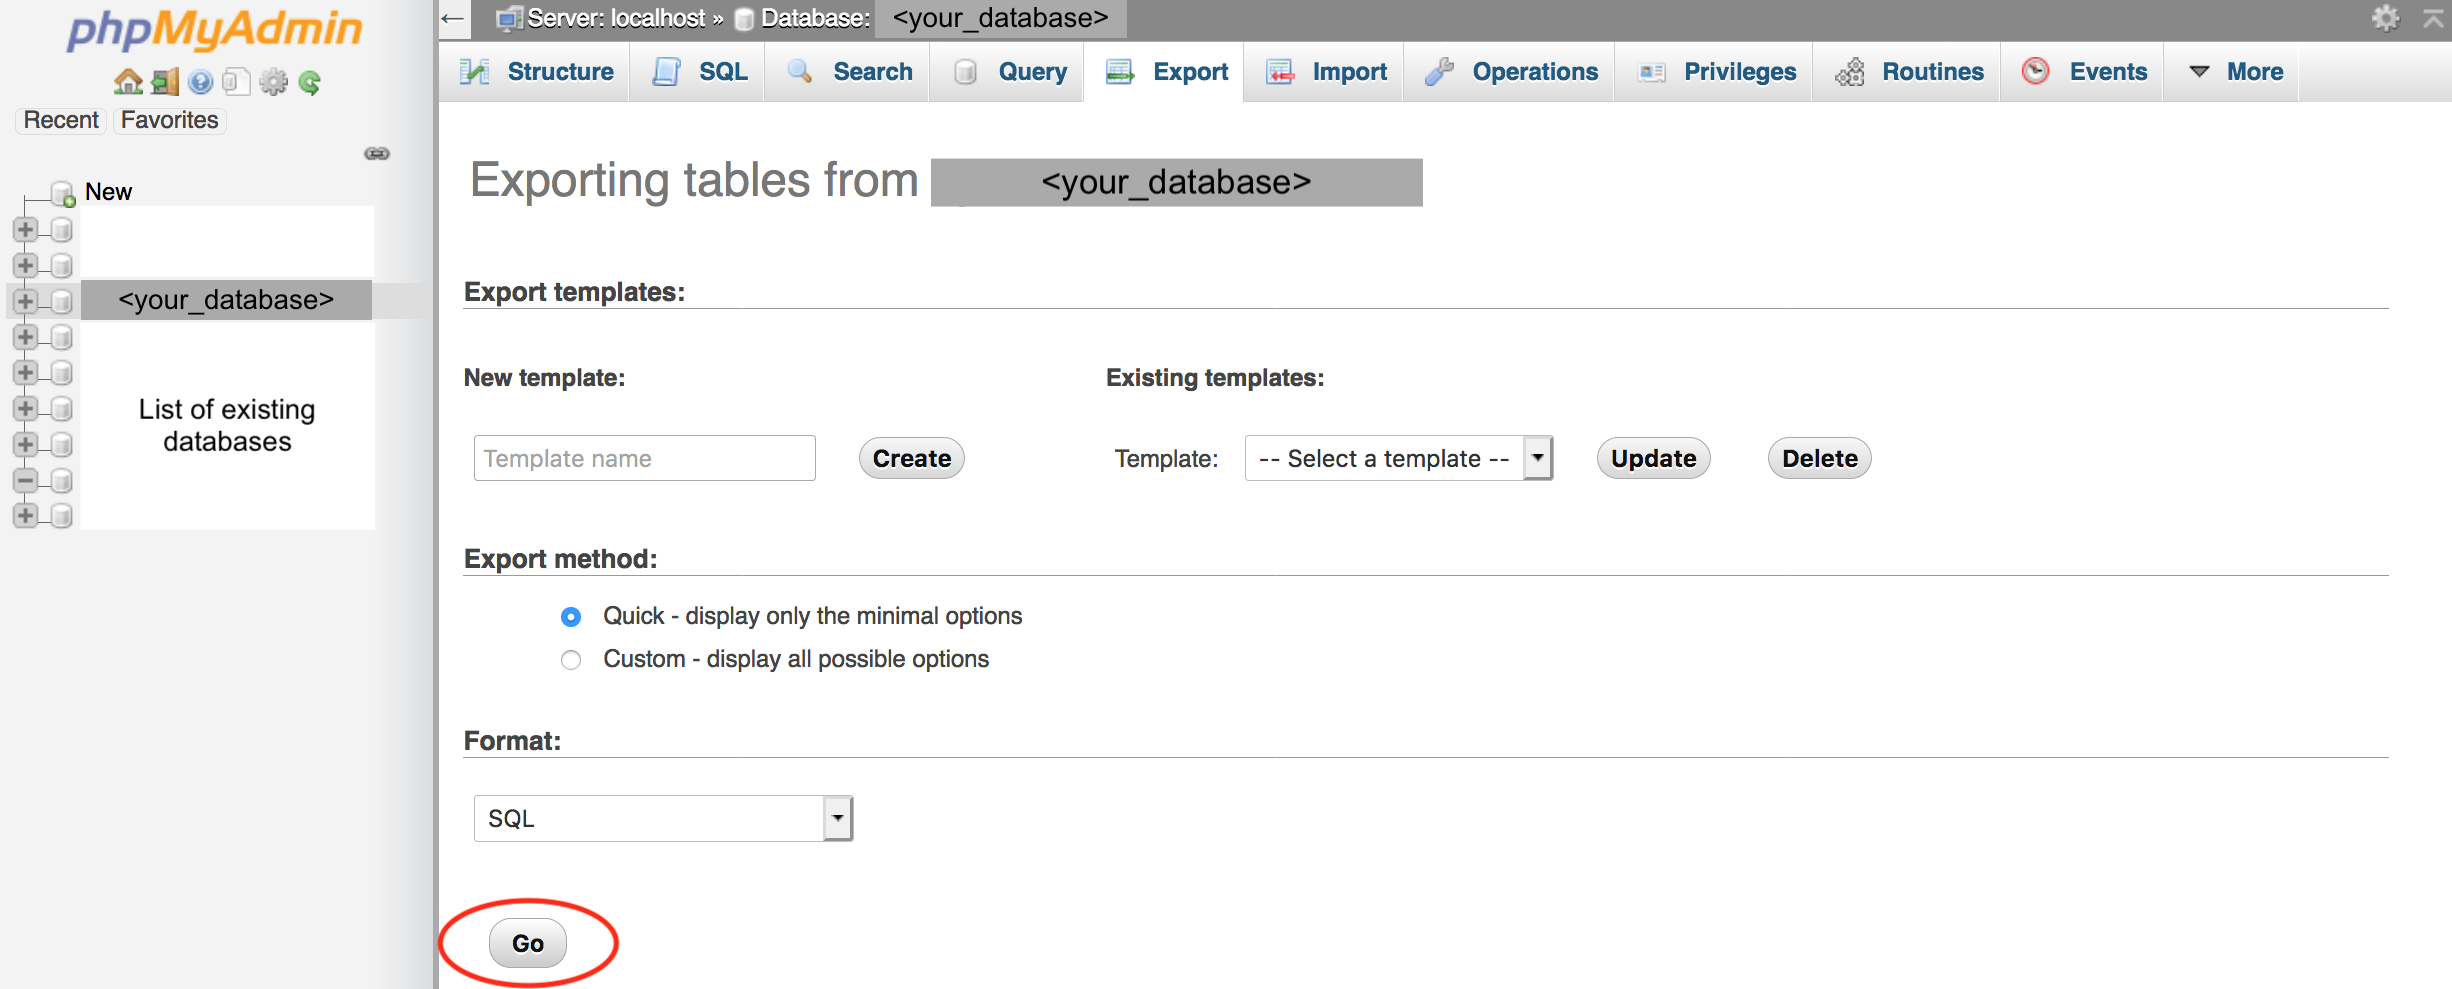
Export SQL file (back up your database)
- On the phpMyAdmin screen, select the your_computingID database
- Select the Export tab
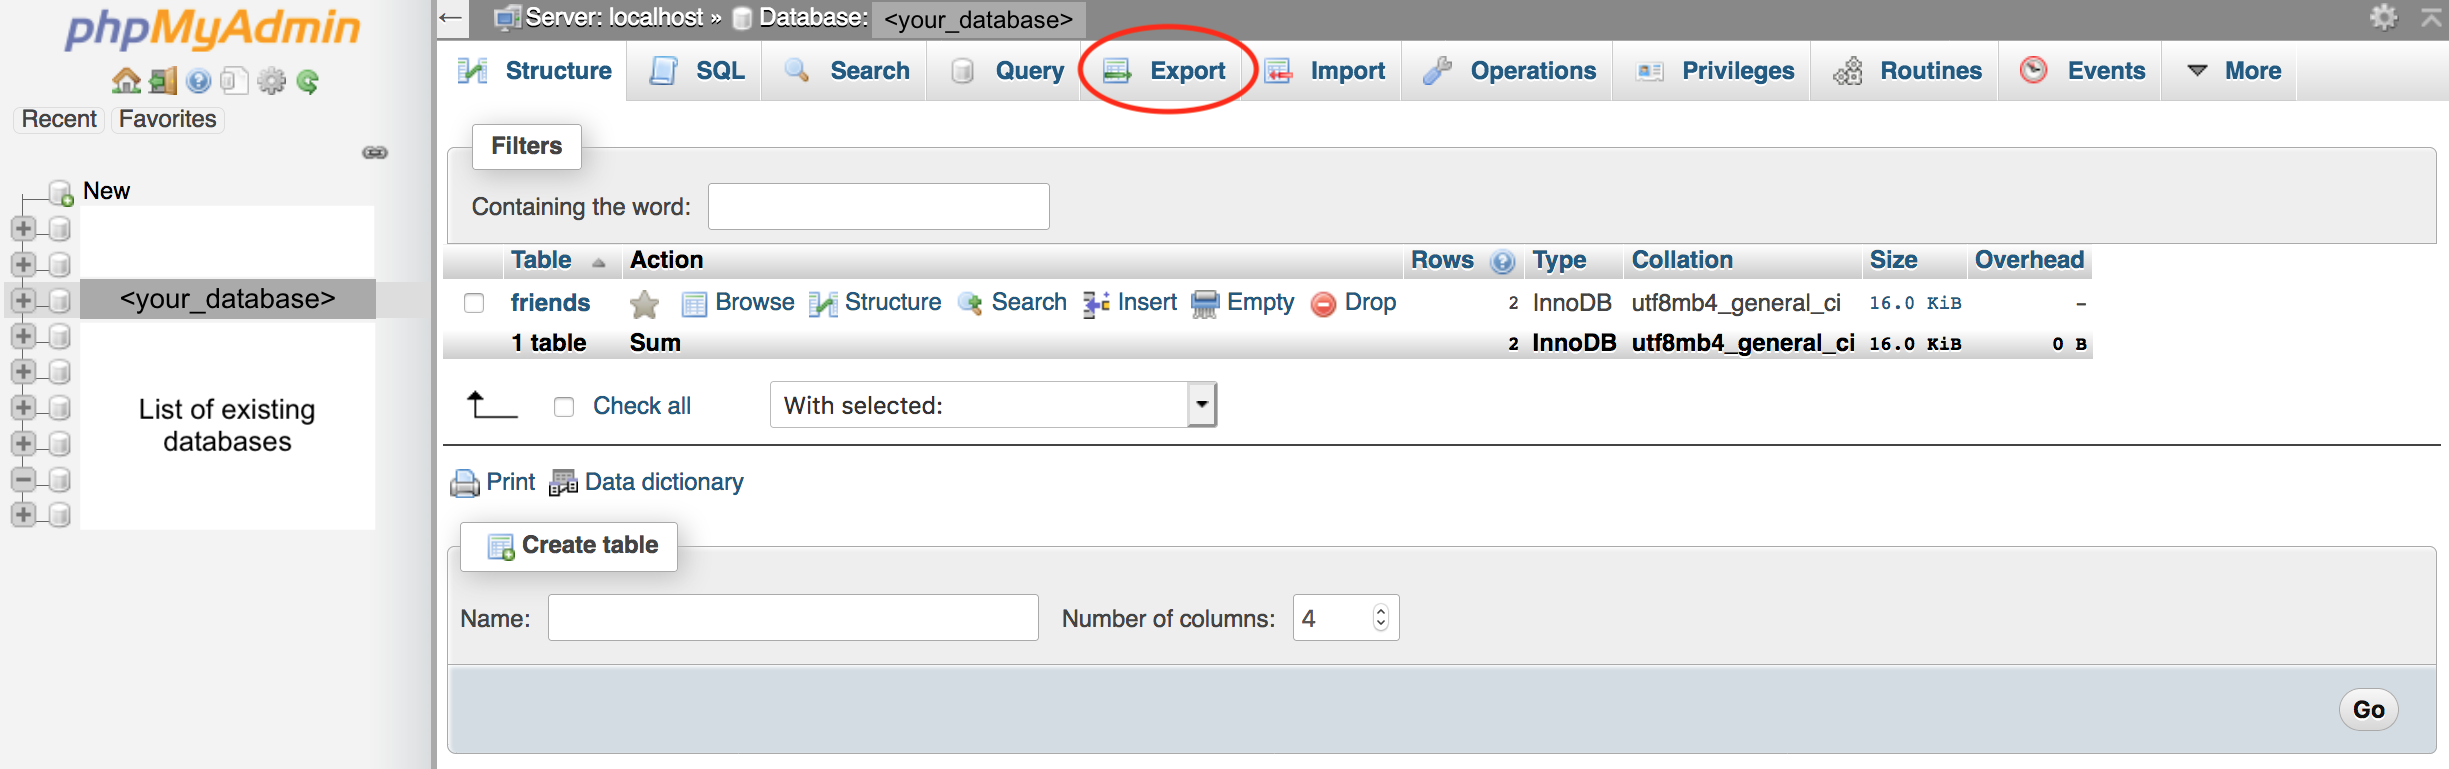
- Click the Go button to run the command.
- For Mac users, you may press Control+Enter to run
- For Windows users, you may press Control+Enter to run
Copyright © 2024 Upsorn Praphamontripong
Released under the
 CC-BY-NC-SA 4.0 license.