| Problem Set 1: Mosaics |
Out: 16 January 2002 Due: 25 January 2002, before class |
Turn-in Checklist:
On January 25th, bring to class a stapled turn in containing:
|
Collaboration Policy - Read Carefully
You are required to work on this problem set with your assigned partner. Each pair of students will turn in one problem set, and both students receive the same grade.PurposeYou should read the whole problem set yourself and answer questions 1 and 2, before meeting with your partner to do the problem set together.
You may consult any outside resources you wish including books, papers, web sites and people. If you use resources other than the class materials, indicate what you used along with your answer.
You are encouraged to accept and provide aid to other students in the course. You should only turn in you and your partner's own work.
- Introduce divide and conquer problem solving.
- Provide exposure to recursive definitions and functions as parameters.
- Provide experience reading a Scheme program.
- Learn to use and create functions.
- Introduce the DrScheme environment and Scheme programming language.
- Make a pretty picture.
| Warning: This problem set is different from typical assignments. It touches on lots of new concepts, but you are not expected to understand everything in this assignment yet. It is recommended that you skim through the whole problem set before trying to answer the questions so you have a clear idea on what you need to do. You should attempt to understand as much of the rest as possible, but don't worry if it doesn't all make sense yet. We won't cover everything you need to understand all the provided code until Problem Set 7. |
Background
| Pre-Lab: Do this individually, then discuss your answers with your partner. Before string the lab part of this assignment, you and your partner should agree on answers to turn in for questions 1 and 2. Everyone will get full credit for these questions, as long as you turn in answers. |
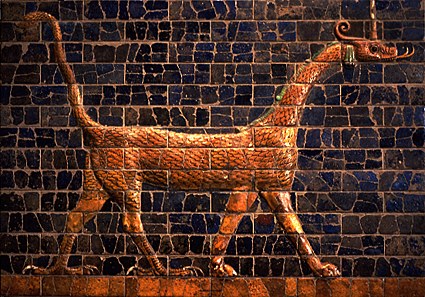 A mosaic is a picture made up of lots of smaller pieces. The ancient
Babylonians constructed elaborate mosaics using colored tiles.
A mosaic is a picture made up of lots of smaller pieces. The ancient
Babylonians constructed elaborate mosaics using colored tiles.
A photomosaic is a mosaic, except instead of using single color tiles for the picture pieces, it uses photographs for the picture pieces. For some example photomosaics, see http://www.photomosaic.com/.
Making a photomosaic is a big task. The way computer scientists (and most other people) solve big problems, is to break them into a few smaller sub-problems whose solutions can be combined to solve the original problem. This approach is sometimes called divide and conquer.
Note that for a big problem like making a photomosaic, doing this once is probably not enough. The sub-problems are still too big to solve easily. So, we need to use divide-and-conquer again to break each sub-problem into several sub-sub-problems. We do this recursively, until we get to sub-sub-sub-...-sub problems that are small enough that we can solve them easily.
We can describe this process with pseudocode (that is, not real Scheme, but made to look like it):
(define (solve-big-problem problem)
  (if (easy-to-solve? problem)             ; if the problem is easy to solve,
      (solve problem)                      ;    just solve it!
      (combine-solutions                   ; otherwise, combine the solutions
        (map solve-big-problem             ;    of solving
              (divide-problem problem))))) ;       the sub-problems you
                                           ;       get by dividing the
                                           ;  original problem
Here, map is a function that applies another function to every
item in a list. The (divide-problem problem) evaluates to a
list of sub-problems. The value of (map solve-big-problem
(divide-problem problem)) is the result of applying
solve-big-problem to every sub-problem in that list.
Implementing solve, combine-solutions and divide-problem for a real problem is the difficult part. There is a real art to figuring out how to divide a big problem into a suitable set of smaller problems. Being able to do this well is the main thing that separates good problem solvers from mediocre ones.
| Question 1: Consider the problem of making a photomosaic without using a computer. Describe two different ways of dividing that problem into subproblems. Continue dividing those sub-problems until you have steps simple enough that a none-too-brilliant kindergartner could follow them to create a photomosaic. |
| Reading: Before going further, you should have finished reading Structure and Interpretation of Computer Programs, p. 1-21. |
Scheme Expressions
Question 2:
For each fragment below, either:
|
- 200
- (+ 100 100)
- +
- (100 + 100)
- (> 200 101)
- (and (> 200 101) (> 200 588))
- (if (> 200 101) "good move" "try again")
- (if (not "cookies") "eat" "starve")
| Lab: These questions involve using a computer. For all the computer parts of this assignment, you should work with your partner. Take turns driving (who is typing on the keyboard). You and your partner should switch positions every few minutes. Although only one partner can type at a time, both partners should be thinking all the time! |
|
Question 3:
Try evaluating all the expressions from Question 2 using DrScheme.
Switch drivers after Question 2e. If any expression evaluates to
something different from what you expected, figure out why. (Don't
change your answers to Question 2, but write down explanations of why
you think the value is different from what you expected. You don't lose
points on Question 2 if your answers are wrong.)
DrScheme is installed on all the ITC lab computers. You can run it by by choosing S.E.A.S. | PLT Scheme | DrScheme from the Start button. If you are not using an ITC lab computer, you will need to install DrScheme from http://www.cs.rice.edu/CS/PLT/packages/drscheme/download.html. The bottom window is the Interactions Window. You can enter Scheme expressions directly in at the > prompt. When you press return, DrScheme will evaluate the expression and display the result on the next line. Turn in a print out of your interactions buffer with your explanations either as handwritten notes or as Scheme comments (everything after ;) in your printout. You can generate this by selecting File | Print Interactions from the DrScheme menu. |
Photomosaics
One way to answer question 1 is:
- Collect pictures to use as the tiles
- Ask your parents for some old magazines and scissors. (Note: it is important that you let your parents know you will cut up the magazines!)
- Repeat many times until you have enough pictures:
- Pick one of the magazines.
- Look through it until you find a good picture. A good picture is pretty small and colorful.
- Cut out the picture using the scissors.
- Break for milk and cookies.
- Find a really big picture you want to use as the master for the photomosaic.
- Put a thin piece of tracing paper on top of the master picture.
- Draw a grid on the tracing paper:
- Get a ruler and crayon.
- Repeat until the whole paper is covered with lines, starting at the
left edge:
- Line up the ruler parallel (Note: you might have to explain what this means to the kindergartener, but you can always give her a copy of Euclid's Elements) to the long edge of the paper.
- Draw a line using the ruler.
- Move the ruler a little bit to the right.
- Repeat until the whole paper is covered with lines, starting at the
top:
- Line up the ruler parallel to the top edge of the paper.
- Draw a line using the ruler.
- Move the ruler a little bit down the page.
- Naptime.
- Put on the tiles:
- For each rectangle on the grid that you drew on the tracing paper:
- Look through the tile pictures to find one that best matches the color on the master picture under that rectangle.
- Glue that tile picture onto the rectangle.
- For each rectangle on the grid that you drew on the tracing paper:
- Clean up the glue you split on the floor before Mommy gets home.
We will create a photomosaic using Scheme in almost the same way — except the computer is much dumber than our kindergartener, so we need to break the steps into even smaller problems before it can perform them.
In step 7.a.i. the kindergartner has to look through the tile pictures to find one that best matches the color on the master picture under that rectangle. Your task for this problem set will be to define a function that does that.
First, we explain how the rest of the photomosaic program works. We show lots of code here, but don't worry if you don't understand all of it. You should attempt to understand how it works, but it is not necessary to completely understand all the code shown here to complete this assignment.
Creating a Photomosaic
We can divide the photomosaic problem into three big steps:
- Get images for the tiles and master.
- Select the tile images that best match the colors on the master.
- Display the tile images.
Images
A computer represents an image by a bitmap. A bitmap is a two-dimensional array of picture elements (pixels). Each pixel is just one dot on your screen. A bitmap is actually a mosaic, where the tiles are individual colored dots on the display.
The color of a pixel is given by three numbers representing how much red, green and blue is in the pixel. All colors can be created by mixing different amounts of red, green and blue — if you look closely at a television, you will see the whole image is made up of red, green and blue dots. The bitmap uses three values between 0 and 255 to represent the amount of red, green, and blue in a pixel. For example, (0 0 0) is black, (255 255 255) is white, (255 0 0) is red, (0 0 255) is blue, and (255 255 0) is yellow (yes, red and green do make yellow!)
Instead of storing images as bitmaps, we usually store them using a compressed format such as a GIF or a JPG. Compressed images take up less memory on the disk or to download, but are harder to manipulate. Fortunately, the DrScheme environment includes functions for converting them to bitmaps so we don't need to worry about it. We can store our images in compressed formats and use library functions to convert them into bitmaps when we use them in our program.
The pixels in a bitmap are numbered on a grid. The top left corner is (0, 0). If the bitmap is w pixels wide and h pixels high, the bottom right corner is (w - 1, h - 1).
Loading the Tiles and Master
Suppose we start with a list of filenames of images and want to turn that into a list of bitmaps to use as the tiles. How can we break that into simpler problems?
If we have a function that can load one tile image, then all we need to do is apply that function to every filename in the list of image filenames.
We can do that with:
(map get-one-image image-names)The function map applies a function (the first parameter) to every element in a list. We use this to define a function that takes a list of image filenames, and produces a list of the corresponding bitmaps:
    (define (load-bitmaps image-names)
       (map get-one-image image-names))
Now, all we need are functions for getting a list of image filenames and
for getting one image. We could just create the list of images by hand,
but for a good photomosaic we need several hundred images. So, we
instead put all the tile images in a directory and use a function that
gets a list of all files in a directory. DrScheme provides
directory-list to do that. So, (load-bitmaps
(directory-list)) would evaluate to a list of bitmaps for every
file in the current directory.
The actual code provided is a bit more complicated since we want to handle directories that contain files that are not images and we want the name of the directory to be a parameter (instead of using the current directory). You can see the code in mosaic.ss, but it is not necessary or expected for you to understand how these details work.
Displaying the Photomosaic
Let's assume we can do the hard part of picking the right tiles for the photomosaic, and next try and solve the easier problem of how we will display the photomosaic.
Suppose the result of the second step is a ordered list of all the tile images in the photomosaic. That would need to actually be a list of lists since like a bitmap, the photomosaic is two-dimensional.
For example, suppose the best tiling for a 3x3 photomosaic (for now, we are just using names of colors for the tiles) is:
Then, we would represent the photomosaic as
red red red white white white blue blue blue
     (("red" "red" "red")
      ("white" "white" "white")
      ("blue" "blue" "blue"))
We can display this using the divide-and-conquer approach: paint the display the first row of images at the top, and then display the rest of the images below it. Displaying one row of images is similar: put the first image at the left of the screen, and then put the rest of the images to its right.
We will generate a web page that displays the photomosaic.
Our rough code is:
(define (display-tiles output-file tiles)
  (map display-one-row tiles))
This doesn't quite work — the problem is display-one-row needs to see the output file also.
The solution is to create a new function with the output-file already in it. In Scheme we can do that using lambda. The lambda special form is one of the things that makes Scheme so expressive. It is introduced in SICP 1.3 and will be covered in class soon, so don't worry if this isn't complete clear yet.
Hence, display-tiles looks like:
(define (display-tiles output-file tiles)
  (map
   (lambda (row) ; make a new procedure with one parameter
                 ; that evaluates to the value of applying display-one-row to the
                 ; output-file and row parameter
     (display-one-row output-file row))
   tiles))
We define rough code for display-one-row similarly:
(define (display-one-row output-file row)
    (map (lambda (tile) (display-one-tile output-file tile)) row))
The display-one-tile takes an output-file and a
tile and produces the HTML code for displaying one image.
To produce good photomosaics, we need something a bit more complicated. mosaic.ss defines display-tiles to take some additional parameters:
;;; display-tiles takes:
;;;    output-file         - output file
;;;    tiles               - the tiles for the mosaic
;;;                          (a list of image filenames for each row)
;;;    tile-width          - display width of each tile
;;;    tile-height         - display height of each tile
;;;

(define (display-tiles output-file tiles tile-width tile-height)
  (map
   ;;; We use lambda to make a procedure using this row.  That procedure
   ;;; applies display-one-row to this row and the other parameters.
   (lambda (row) (display-one-row output-file row tile-width tile-height))
   tiles
   )
 )
To produce web pages, we need to put some formatting codes before and after the tiles. (You shouldn't need to look at these codes.) So, we define functions that print the necessary codes before and after the tiles (print-page-header and print-page-footer).
We also need to turn the name of a file, into an open file we can print to. This can be done using call-with-output-file.
Here are the definitions of produce-tiles-page and display-tiles-page. The only really important line is in bold.
;;;
;;; Creates an open file for displaying tiles
;;;

(define (produce-tiles-page output-filename image-list tile-width tile-height)
  (call-with-output-file output-filename
    (lambda (output-file)
      (printf "Creating photomosaic in ~a...~n" output-filename)
      (display-tiles-page output-file image-list tile-width tile-height))))

(define (display-tiles-page output-file tiles tile-width tile-height)
  ;;; Print out some html formatting commands
  (print-page-header output-file)

  ;;; Print out the tiles
  (display-tiles output-file tiles tile-width tile-height)

  ;;; Print out some html formatting commands and close the output file.
  (print-page-footer output-file)
  )
Testing Load and Display
Before writing the tile-choosing code, it is wise to check that the display code works and you understand how to apply it.
Downloads: You will need to download these files to your machine:
If you double-click on mosaic.ss, it should open in DrScheme. Make sure the Language is set to Full Scheme by selecting Language | Choose Language from the DrScheme menu. A dialog box will appear. Select Full Scheme in the Language choice menu and Graphical (MrEd) in the right radio box. Click the Execute button (or use ctrl+T) to interpret the definitions. DrScheme will split into two windows, with an Interaction Window on the bottom. If the language is set correctly, you should see: Welcome to DrScheme, version 103.in your Interactions Window. The > is a prompt. You can enter Scheme expressions directly into the Interactions Window. |
|
Question 4:
Define a Scheme function that tests produce-tiles-page. Your test
function should produce a .html file that displays some images.
The file images.zip contains some
images you can use once you have unziped this file. Look at the
.html file you produce both in a web browser and in a text
editor.
Create a new definitions file by selecting File | New. Put, (load "mosaic.ss") at the beginning of that file. This loads all the definitions from the mosaic.ss file. Edit your definitions after that. Click Save frequently to save your work (remember that Execute does not save your definitions). The first time you Save, DrScheme will ask you for a filename. At the end of this problem set, you will print out and turn in this definitions file. |
Selecting Tiles
To select tile images for our photomosaic we follow steps 5 through 7 from the kindergartener description:
- Divide the master image into rectangles.
- Naptime.
- For each rectangle, find the tile image that best matches that rectangle.
To find a tile image that matches a rectangle of the master image, we need to know the colors of both the tile images and rectanges in the master image.
Finding the Average Color of a Bitmap
To find a matching tile image, we need to know the "color" of each tile. One way would be to calculated the average color of each pixel in the tile image by adding the red, green and blue values for each pixel and dividing by the number of points. For example, if we wanted the average color of red (255 0 0) and blue (0 0 255) would would sum the colors to get (255 0 255), and divide by two to get (127.5 0 127.5). This looks like purple, which is what you might expect:
| (255 0 0) | + | (0 0 255) | = | (255 0 255) | / 2 = | (127 0 127) |
(define (add-color color1 color2)
  (make-color (+ (get-red color1) (get-red color2))
              (+ (get-green color1) (get-green color2))
              (+ (get-blue color1) (get-blue color2))))
To average many colors, we need to add all the colors together and
then divide by the number of colors. One way to add a list of values
together is to divide it into two simpler problems: add the first
value to the sum of all the other values. That is,
SUM (a, b, c, d, e) = a + SUM (b, c, d, e)We can do the same thing for the remaning values:
SUM (b, c, d, e) = b + SUM (c, d, e)
                       c + SUM (d, e)
                           d + SUM (e)
                               e
The only tricky part is knowing what to do at the end when there are
no colors left. Here we define sum-colors:
(define (sum-colors color-list)
  (if (null? color-list) ;;; If there are no more colors in the list,
      (make-color 0 0 0) ;;;    evaluate to the 0-color (black)

      ;;; Otherwise, add the first color to the sum of all the other colors:

      (add-color (first color-list)
                 (sum-colors (rest color-list)))))
To calculate the average color of a bitmap, we just calculate the sum
of all the colors of the pixels in the bitmap, and divide by the
number of pixels.
For the photomosaic code, we don't want to look at every single pixel though since there are millions of pixels in a large image. Instead, we sample points from the image by selecting points at regular intervals. We do this by defining generate-sample-points a function that selects the points to sample, and applying average-colors to the result of mapping every sample point to the color of the bitmap point.
We define generate-sample-points to take 5 parameters: startx and starty are the starting location for the sampling (usually 0 0 for the top left corner of the image); width and height are the size of the region to sample; and num-points is the number of points to use (the actual number of points will not be exactly the value passed as num-points). The code is show below, but its fairly complicated --- don't worry if you don't understand everything.
(define (generate-sample-points startx starty width height num-points)
  ;;; Generate list (((x0 y0) (x1 y0) ... (xn y0))
  ;;;                ((x0 y1) ...               ))
  ;;;                ...
  ;;;                (((x_0 y_m)) ...     (x_n y_m)))
  ;;; of points to sample in a region from (startx, starty) to
  ;;; (startx + width, starty + height).

  ;;; num-points is a rough guide to the number of points to sample, but
  ;;; generate-sample-points may return more or fewer.

  (let* ((spacing (max 1 (/ width (sqrt num-points)))) ;;; can't be less than 1
         (height-spacing (max 1 (/ (* spacing height) width))))
    (generate-sample-points-worker startx starty startx starty
                                   width height spacing spacing '())))

(define (generate-sample-points-worker
         startx starty                   ;;; Where we started
         curx cury                       ;;; Where we are now
         width height                    ;;; Area to sample
         xspacing yspacing               ;;; Space between samples
         points)                         ;;; List of sample points so far
  (if (>= (round cury) (+ height starty))
      points ;;; done
      (if (>= (round curx) (+ width startx))
          ;;; move down to the next row
          (cons points
                (generate-sample-points-worker startx starty startx (+ cury yspacing)
                                               width height xspacing yspacing '()))
          ;;; else, add the current point to the list, and move right
          (generate-sample-points-worker
           startx starty (+ curx xspacing)
           cury width height xspacing yspacing
           (append points (list (make-point (round curx) (round cury))))))))
|
Question 5:
Try calling generate-sample-points in the interaction window
with different parameters. Are the results what you expect?
Print out your interactions buffer with notes on any surprising results. |
Dividing the Master Image
We need to divide the master image into tile-sized regions and calculate the average color of each region. This is almost the same as calculating the average color of a bitmap, except here we want the average color of lots of different regions within a single image.
Luckily we've already written a function that does almost what we need! We can use the generate-sample-points function to do this:
(define (generate-regions master-width master-height sample-width sample-height)
  (generate-sample-points-worker 0 0 0 0
                                 (- master-width sample-width)
                                 (- master-height sample-height)
                                 sample-width sample-height '()))
Selecting the Tiles
We now know how to:
- Load the tile images
- Calculate the average color of each tile image
- Divide the master image into tile size regions
Suppose we know how to find the best tile for one region. All we need to do is to that for every region in the photomosaic.
So, we define select-mosaic-tiles to take: a list of lists of color samples for regions in the master image (one list for each row) and a list of the tiles (where each tile is a list of a image name and the average color for that tile) and evaluate to a list of lists of images that describes the photomosaic.
Here's the rough code:
(define (select-mosaic-tiles samples tiles)
  (map2d find-best-match samples))
The map2d function is like map, except it works on lists of lists. It applies the function find-best-match to every inner element in a list of lists.
We need to pass the tiles to find-best-match, though, and we also want to pass a function for matching colors. So, the actual select-mosaic-tiles code is:
(define (select-mosaic-tiles samples tiles color-comparator)
  (map2d
   (lambda (sample)
     (tile-name (find-best-match sample (car tiles) (cdr tiles) color-comparator)))
   samples)
  )
The find-best-match function goes through the list of tiles,
and selects the tile that best matches the sample color for this
rectangle.
Finding the best match is like summing a list of colors — we can break it down into checking if the first one is better than the best one of the rest of the list. That is, if we had a function better-match that can determine which one of two possible tiles is a better match of a particular sample, we can use it like add-colors to find the best match from a list of tiles.
Here's the code:
(define (find-best-match sample remaining-tiles color-comparator)
  (if (null? remaining-tiles)
      #f
      (pick-better-match
       sample
       (first remaining-tiles)
       (find-best-match sample (rest remaining-tiles) color-comparator)
       color-comparator)))

(define (pick-better-match sample tile1 tile2 color-comparator)
  (if (not tile2)
      tile1
      (if (not tile1)
          tile2
          ;;; color-comparator returns true if the first one is better
          (if (color-comparator sample (tile-color tile1) (tile-color tile2))
              tile1
              tile2)
          )
      )
  )
Putting Everything Together
We need to combine all the steps now into one function that produces a photomosaic. Here is it:
;;;
;;; make-photomosaic
;;;

(define (make-photomosaic
         master-image               ;;; Filename for the "big" picture
         tiles-directory            ;;; Directory containing the tile images
         tile-width tile-height     ;;; Display width and height of the tiles
                                    ;;;    (doesn't have to match actual size)
         sample-width sample-height ;;; Sample width and height (each tile covers this size
                                    ;;;    area in master)
         output-filename            ;;; Name of file to generate (.html)
         color-comparator)          ;;; Function for comparing colors
  (let* ((tile-names (get-image-names tiles-directory))
         (tile-bitmaps (load-bitmaps tile-names)))
    (produce-tiles-page
     output-filename
     (choose-tiles (get-one-image master-image)
                   (merge-lists
                    (list tile-names
                          (calculate-average-colors (load-bitmaps tile-names))))
                   sample-width sample-height
                   color-comparator)
     tile-width tile-height)
    )
  )
We take parameters for the master image, directory containing the
tiles, tile width and height, sample width and height, the output
filename to generate, and the function to compare colors (which you
will write). First, we apply get-image-names to the
tiles-directory to get the names of all the image files in
that directory. The let* special form stores the result from
the get-image-names application in tile-names.
Then, we load bitmaps for all the tiles using load-bitmaps.
We then call produce-tiles-page with the output filename, the mosaic tiles (calculated using choose-tiles, and the tile width and height parameters.
Matching Colors
The only thing left is to figure out how to determine which of two colors is a better match for another color. That is your assignment:
|
Question 6:
Write a function that can be passed as color-comparator.
Define your function in the definitions file you created for Question 4. Use your function to create a photomosaic web page. |
Your function should look like,
(define (closer-color?  ; The name of your function.
        sample          ; The average color of the rectangle you want to match.
        color1          ; The average color of the first tile.
        color2)         ; The average color of the second tile.
   ;
   ; A Scheme expression that evaluates to #t if color1 is a better
   ; match for sample, and #f otherwise.
   )
First, write a bad matching function that always evaluates to
#t.
What do you expect the photomosaic this produces to look like?
You can try out your function by evaluating:
(make-rotundasaic output-filename closer-color?)
The value passed as output-filename should be the full pathnname of a file you can create that does not yet exist, for example to generate output in the file J:/cs200/ps1/output.html you would evaluate (make-rotundasaic "J:/cs200/ps1/output.html" closer-color?).
Try to write a closer-color? function that works well. The file produced should look like the original image. If you produce a good color matching function, your photomosaic should look at least as good as this one (http://www.cs.virginia.edu/cs200/problem-sets/ps1/ps1-example.html).
You should experiment with different ways of deciding which two colors are closest, but try simple things first.
Here are some functions you may find useful:
- (make-color red green blue) - evaluates to a color with red, green and blue components given by the parameters. The color values are between 0 and 255. For example, (make-color 255 0 0) is red.
- (get-red color) — evaluates to the red component of the color parameter. For example, (get-red (make-color 255 0 0)) ==> 255.
- (get-green color) — evaluates to the green component of the color parameter.
- (get-blue color) — evaluates to the blue component of the color parameter.
- (abs number) — evaluates to the absolute value of number parameter. For example, (abs -3) ==> 3.
- (square number) — evaluates to the square of the number parameter. For example, (square 2) ==> 4.
- (sqrt number) — evaluates to an approximation of the square root of the number parameter. For example, (sqrt 2) ==> 1.4142135623730951.
- (+ number number ...) - evaluates to the sum of all the numbers in the list. For example, (+ 2 2 5 1) ==> 10.
- (> number1 number2) — evaluates to true (#t) if the number1 parameter is greater than the number2 parameter. For example, (> 3 4) ==> #f and (> 4 3) ==> #t.
- (< number1 number2) — evaluates to true (#t) if the number1 parameter is less than the number2 parameter. For example, (< 3 4) ==> #t and (< 4 3) ==> #f.
Optional
Once you have the color matching code working, you may want to make a better photomosaic with your own pictures.Send me (evans@virginia.edu) the URL for your rotunda photomosaic, and I will send directions to make a photomosaic using your own pictures. If you are the first ones to ask, you can also borrow a digital camera to take pictures for it.
The best photomosaics will be printed as a large (3' x 4') posters.
Teasers
Mosaics touch on a number of computer science issues, some of which we will return to later in the course.Higher Order Functions. We used map to apply a function to every element of a list. map is an example of a higher order function — that means it is a function that takes other functions as parameters. Higher order functions can be very expressive. In Problem Set 2 (and throughout the course), we will explore higher order functions and recursion.
Lists. Many functions in this assignment operated on lists. In Problem Set 3, you will understand lists and implement functions that operate on lists (for example, you will be able to implement map).
Duplicate Images. Our program might use the same tile image over and over again. If there is a large section of the same color in our master image, the same tile image will be repeated for that whole section. This looks pretty bad. A real mosaic would never reuse the same tile. Producing a non-duplicating photomosaic is an extremely hard problem. In fact, it is such a hard problem that no one knows for sure whether or not there is a fast solution (we'll explain exactly what we mean by fast here later in the course) to finding the best photomosaic tiling. Computer scientists call this an NP-hard problem. If someone discovers a fast solution, then it means there are also fast solutions to many other seemingly unrelated problems (such as the "travelling salesperson problem" where the goal is to find the best route for a salesperson to visit a set of cities, and the "map coloring problem" where the goal is to find the smallest number of colors that can be used to color a map such that no two bordering countries have the same color). We will explore this later in the course.
Searching. Our program takes a long time to run for even small photomosaics. A really smart kindergartner wouldn't find a good match by looking through all the images scattered haphazardly on the floor; instead, she would sort the images into groups based on their color. Then she could easily see all the bluish images together, and pick the one that best matches a particular square. Our program has to consider every image for every rectangle. A better program would be able to quickly find the best image without having to consider every image every time. Computer scientists do a lot of work on finding better ways to search. Google's database has 2,073,418,204 web pages. If it searched them the same way we search for images and could consider 10000 pages per second, it would take
   > (exact->inexact ;;; try evaluating it without this to see why it is here
      (/ (/ 2073418204 10000)
         (* 60 60 24)))
   2.399789587962963
days just to find the first search result! We will look as some better
search algorithms in a later problem set.
Concurrency. One thing to note about our problem division solution, is that some of the steps can be done in different orders, but others can only be done after an earlier step is already complete. For example, we can do steps 3, 4 and 5 before step 1, but we cannot do step 7 before step 1. If we have a whole class of kindergartners to help make our photomosaic, we could give each of them a magazine and have them all collect tile pictures at the same time. One way to make computers solve a problem quicker is to divide the problem into pieces that can be done at the same time, and have different computers work on each piece.
Photomosaic-mosaics. A photomosaic is a mosaic made with photo tiles. We could also make a photomosaic-mosaic, a mosaic made with photomosaic tiles. Of course, why stop there? We could make a photomosaic-mosaic-mosaic, a mosaic where the tiles are photomosaic-mosaics. If we have a lot of computing power, we could make a photomosaic-movie, a movie where the frames are photomosaics, or a moviemosaic-photo, a still image where the tiles are movies instead of still images. There is one moviemosaic-movie (or perhaps more accurately, moviemosaic-mosaic-mosaic-movie) that has been seen by several billion people! Identifying it is worth a T-shirt reward.
Software Patents. Runaway Technology claims to have a patent (United States Patent 6,137,498: Digital composition of a mosaic image) on Photomosaics. We're not sure what the ancient Babylonians have to say about this, but software patents raise lots of complex legal issues. One would have to check with a lawyer to determine if you can redistribute your code from this problem set, but we encourage you to do so and would be happy to defend a test case against this patent.
Feedback
Your answers to these questions are optional and will not effect your grade in any way, but may help us improve the rest of the course.
|
Question 7: a. How long did you spend on this problem set? b. Did any problem seem unfairly hard? c. Did any problem seem like too much tedious work? d. What should we have done differently so far? (anything about the course, including this assignment) |
ITC Directions
The following are instructions for setting up the necessary files for on the ITC machines. If you are doing this lab from a home computer you may need to change the location of the images in the code.- Log in to home directory service.
- Run Programs->Home Directory Login from the Start button or double-click the Home Directory link on the desktop
- Enter your username (your e-mail address without the @virginia.edu) and password (your e-mail password).
- Choose J under Drive Letter to Use box.
- Press Connect. A window should appear with your home directory files.
- Create the necessary directories.
- From the File menu select New->Folder
- Name the folder cs200
- Double click the folder you just created to enter it
- Create a new folder called ps1.
- Download the images to your ps1 folder.
- Click on images.zip.
- Click on save when a dialog box appears asking what you would like to do with the file.
- Navigate to the ps1 directory you just created and click save.
- Unzip the images.
- Go back to the ps1 directory. You should see the file images.zip. Double click on images.zip to open it.
- Click the Extract button and navigate to your ps1 directory.
- Click the Extract button to extract the files. (This may take a few minutes since there are a lot of images!)
- After the files have finished being extracted you can delete the images.zip file to free up some space.
- Download the file mosaic.ss to your ps1 directory. (follow the steps for downloading described above.)
- Open mosaic.ss in DrScheme by double clicking on its
icon.
Alternately,- Start Dr. Scheme by choosing S.E.A.S.->PLT Scheme->DrScheme from the Start button.
- From the File menu select Open.
- Navigate to the ps1 folder and select mosaic.ss.
