Angular App Deployment
This is a short introduction to help you set up and deploy Angular apps.
For more information, please refer to
Angular.io.
(Please let me know if you find any errors or omissions in the document —Upsorn Praphamontripong, 5-June-2022)
(Please let me know if you find any errors or omissions in the document —Upsorn Praphamontripong, 5-June-2022)
Deploy locally (using Node.js)
- Build your Angular project
- Assume your Angular app is named
your-angular-app
Therefore, the folder is namedyour-angular-app. This is your project root directory.
- Assume your Angular app is named
- Go to your Angular app directory, using a terminal
cd your-angular-app
- Start the server, using the following command
ng serve
This command will compiles and builds all files, and then starts the server.
- To access the app, open a web browser, enter a URL
http://localhost:4200
Note: Node.js server runs on port 4200, by default.
- To shutdown the server, use a terminal,
press keyboard
Ctrl+c
Deploy on Google Cloud Platform (GCP)
- Build your Angular project
- Assume your Angular app is named
your-angular-app
Therefore, the folder is namedyour-angular-app. This is your project root directory.
- Assume your Angular app is named
- Build your app production
- Go to your Angular app directory, using a terminal
cd your-angular-app - Run the following command to make your app production ready
ng build
This will create adistfolder in your project root directory. Thedistfolder contains ayour-angular-appfolder; theyour-angular-appfolder should basically contain the following files
 3rdpartylicenses.txt
 favicon.ico
 index.html
 main.9e187e65c1681375.js
 polyfills.c96eac4dbe535b22.js
 runtime.c60b955f0b7642f8.js
 styles.ef46db3751d8e999.css
- Go to your Angular app directory, using a terminal
- Create Config file that will be used
by GCP App Engine to deploy the project
- In your project root directory, create a blank file named
app.yaml - Paste the following contents in the file
runtime: nodejs16

instance_class: F2

env_variables:
  BUCKET_NAME: "your-ng-app-bucket"

handlers:
- url: /
  static_files: dist/your-angular-app/index.html
  upload: dist/your-angular-app/index.html

- url: /
  static_dir: dist/your-angular-app
- In your project root directory, create a blank file named
- Setting up GCP
- Assume that you already have a Google account and
you already created a project (named
angular-app-gcp) and a bucket (namedng-app-bucket). - If you have not set up your project and bucket on GCP, please refer to GCP set up and deployment.
- Assume that you already have a Google account and
you already created a project (named
- Deploying the Application using Google Cloud Shell
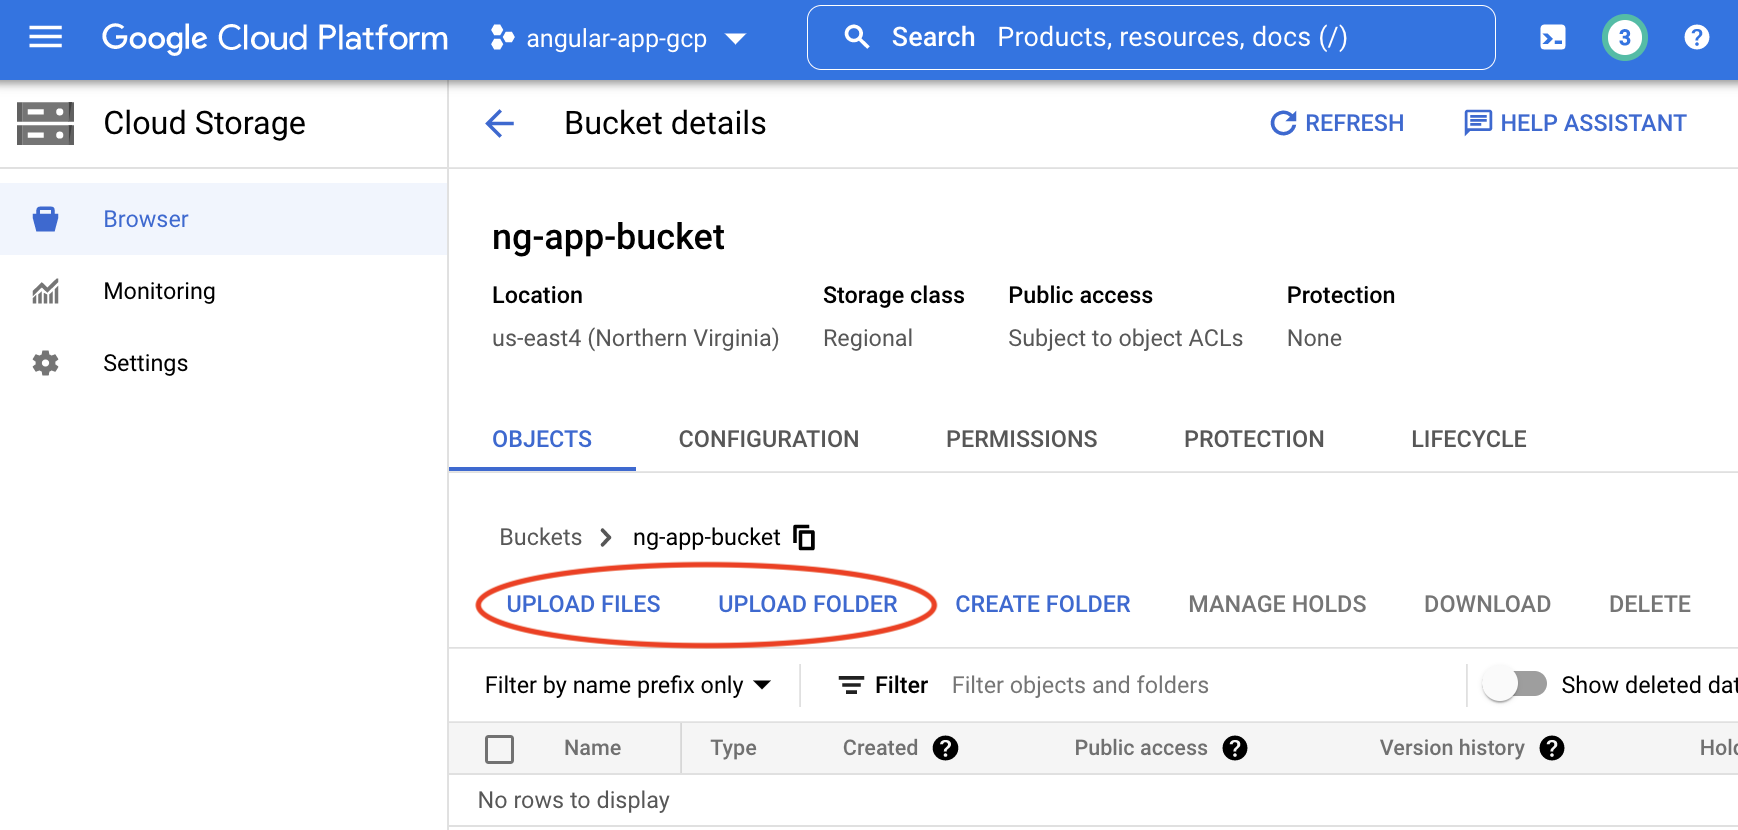
- Open Google Cloud Console
- Go to your bucket (
ng-app-bucket) - Select the Upload Files option to upload your
app.yamlfile and the Upload folder option to upload yourdistfolder.
The folder structure inside your bucket should be as follows
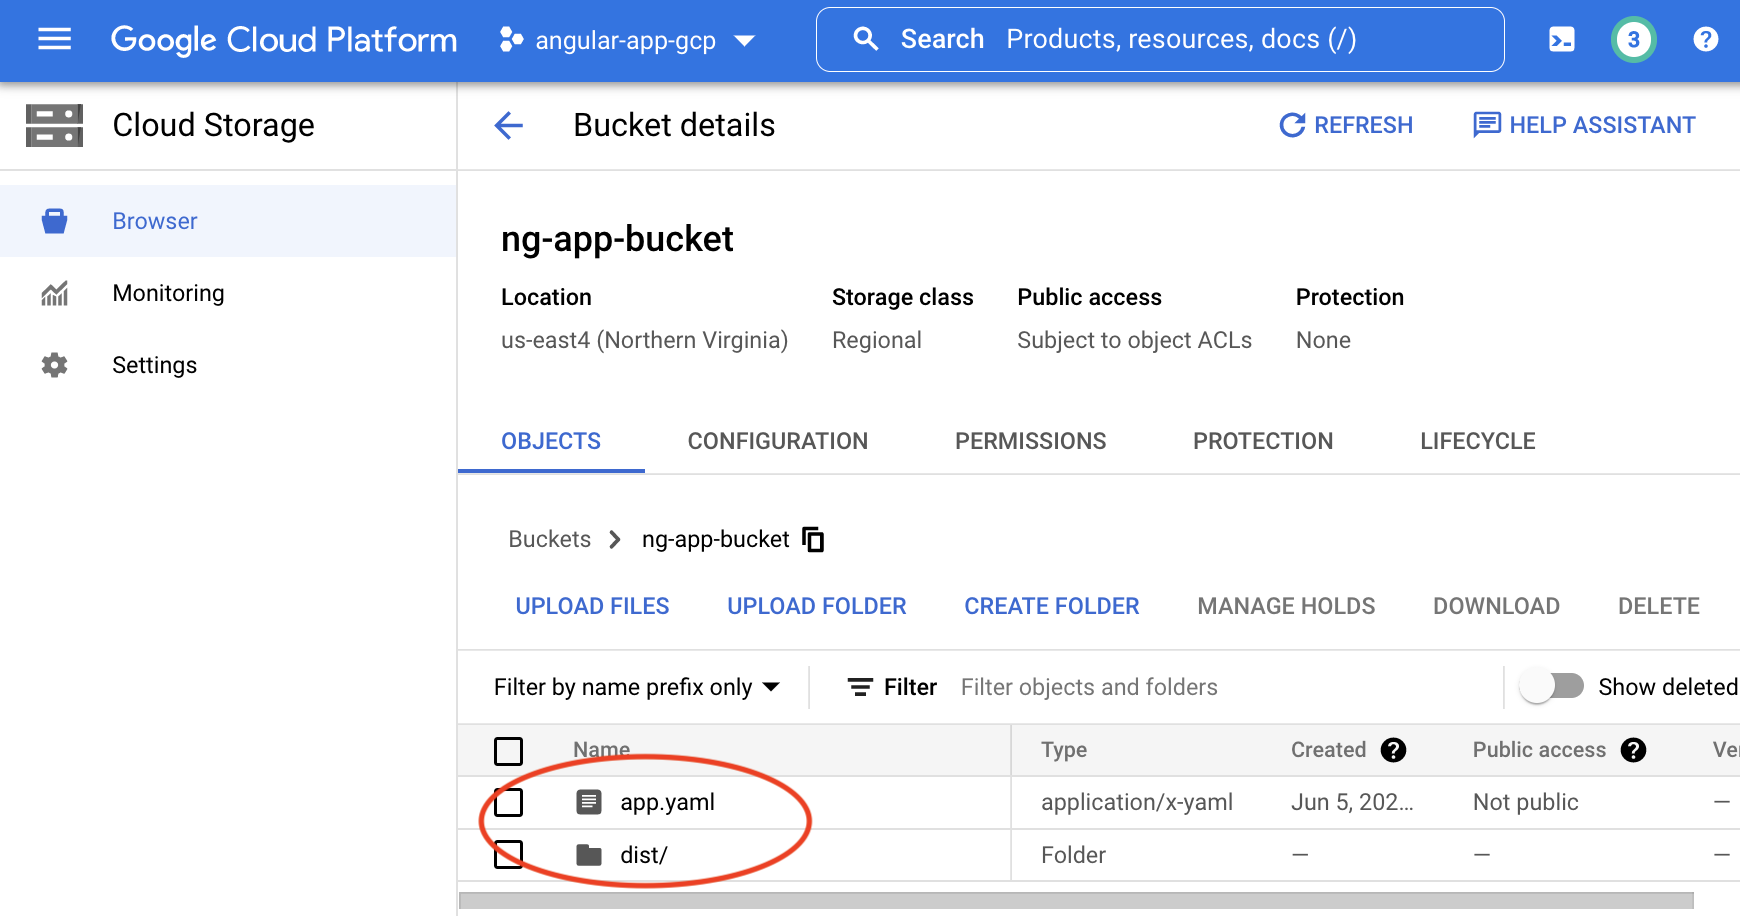
Note: You may create a folder for your Angular application, and then upload your
app.yamlfile anddistfolder to it. You will later include this newly created folder's name when runninggsutilto sync the data. - Open the Google Cloud Interactive Shell
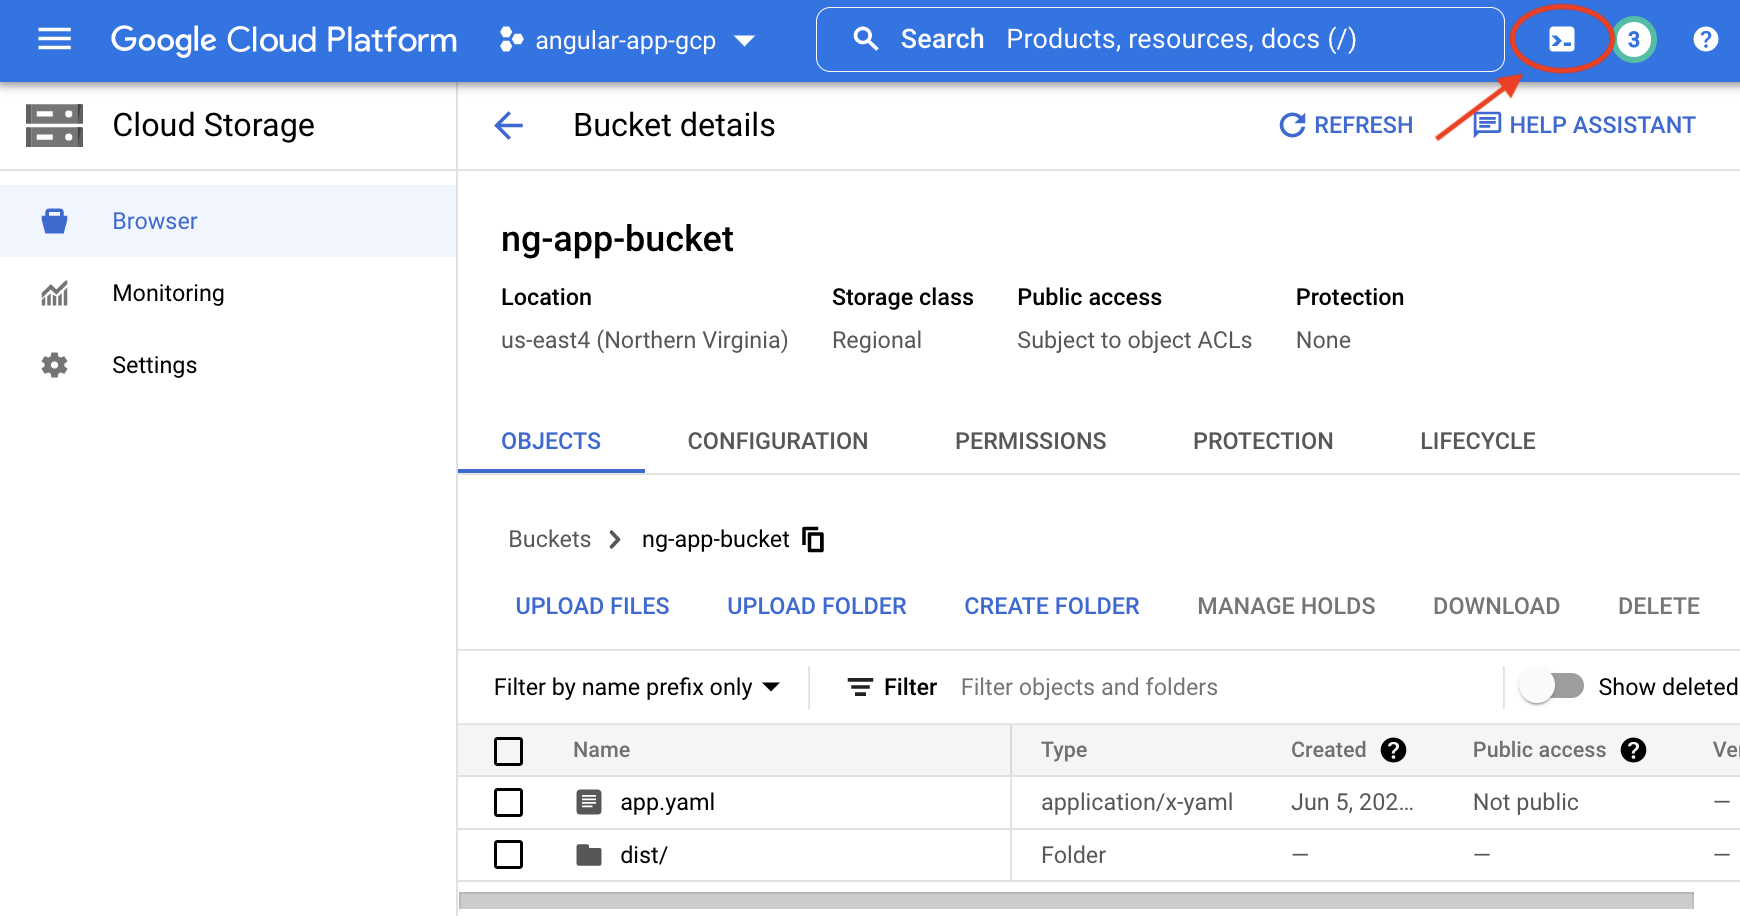
It may take a few seconds to activate the Cloud Shell.
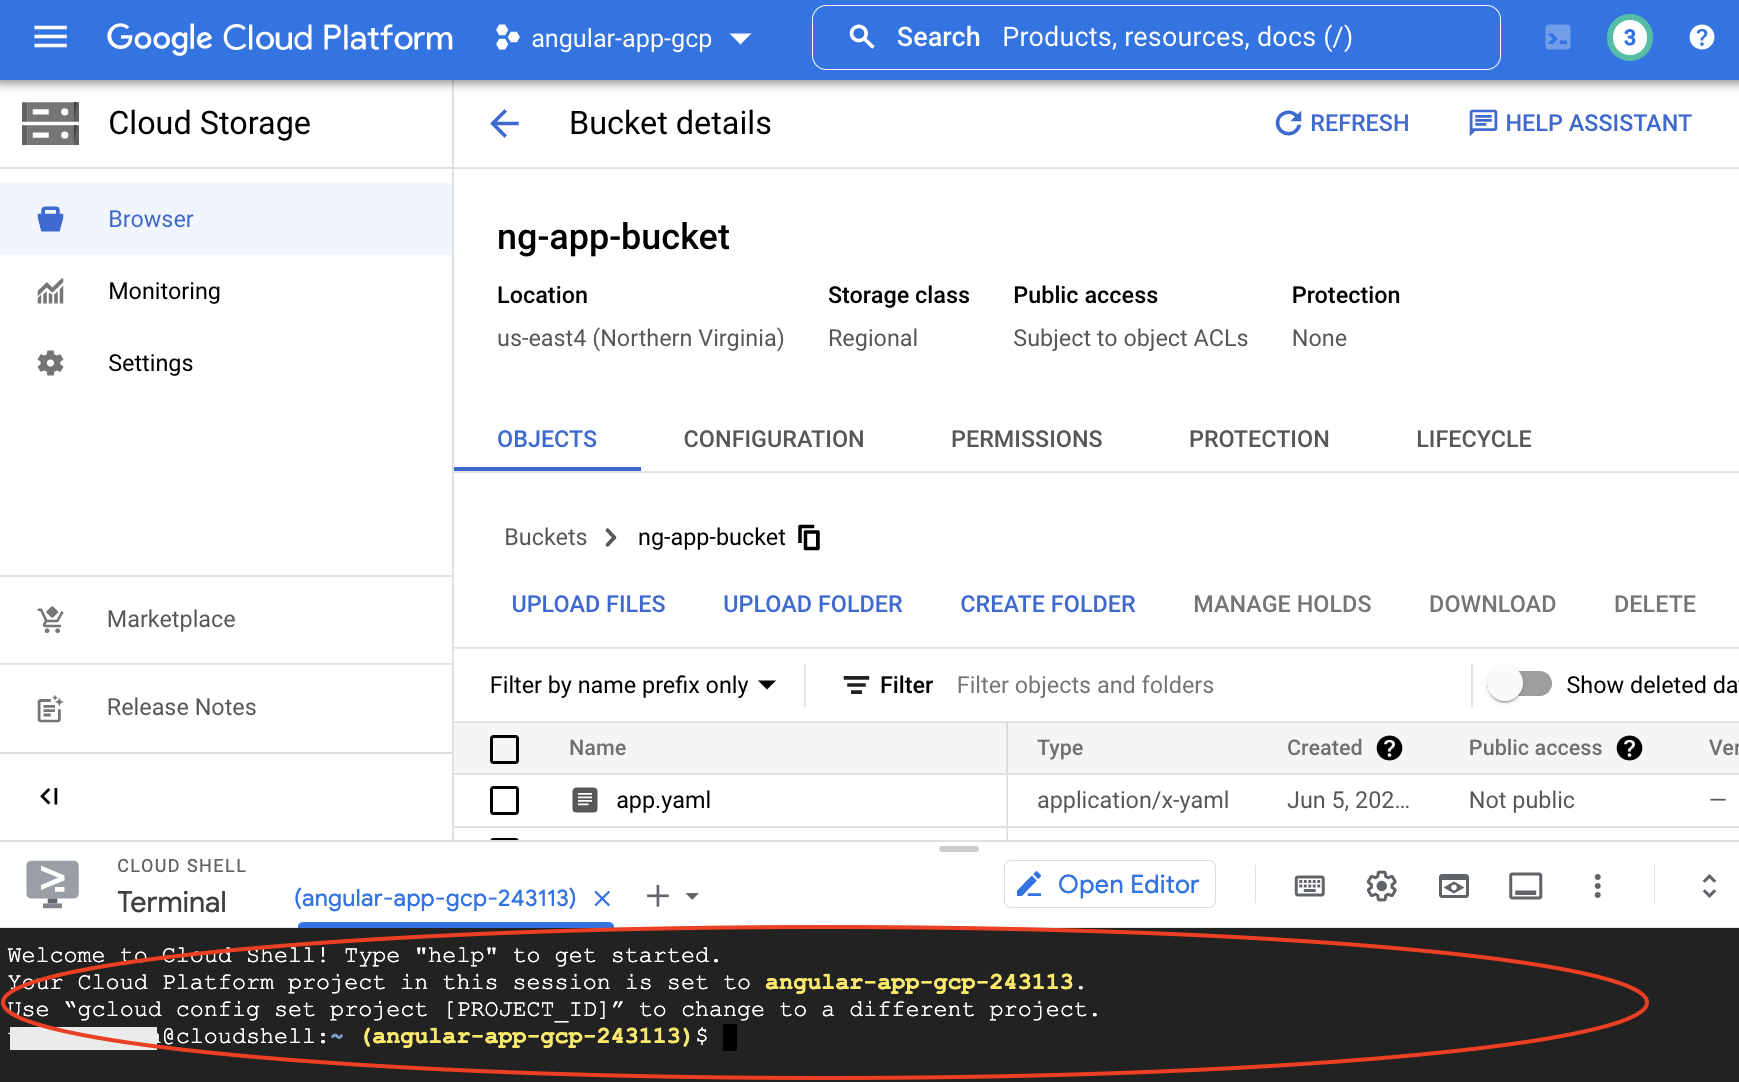
- Once you are connected to the Cloud Shell,
create a directory for your app (for example, let's name it
angular-app-gcp) using the command
mkdir angular-app-gcp

- Sync your data from your bucket into the directory you just created,
using the following command.
gsutil rsync -r gs://ng-app-bucket ./angular-app-gcp
Note: you may be asked to authorize Cloud shell, please click the Authorize button.
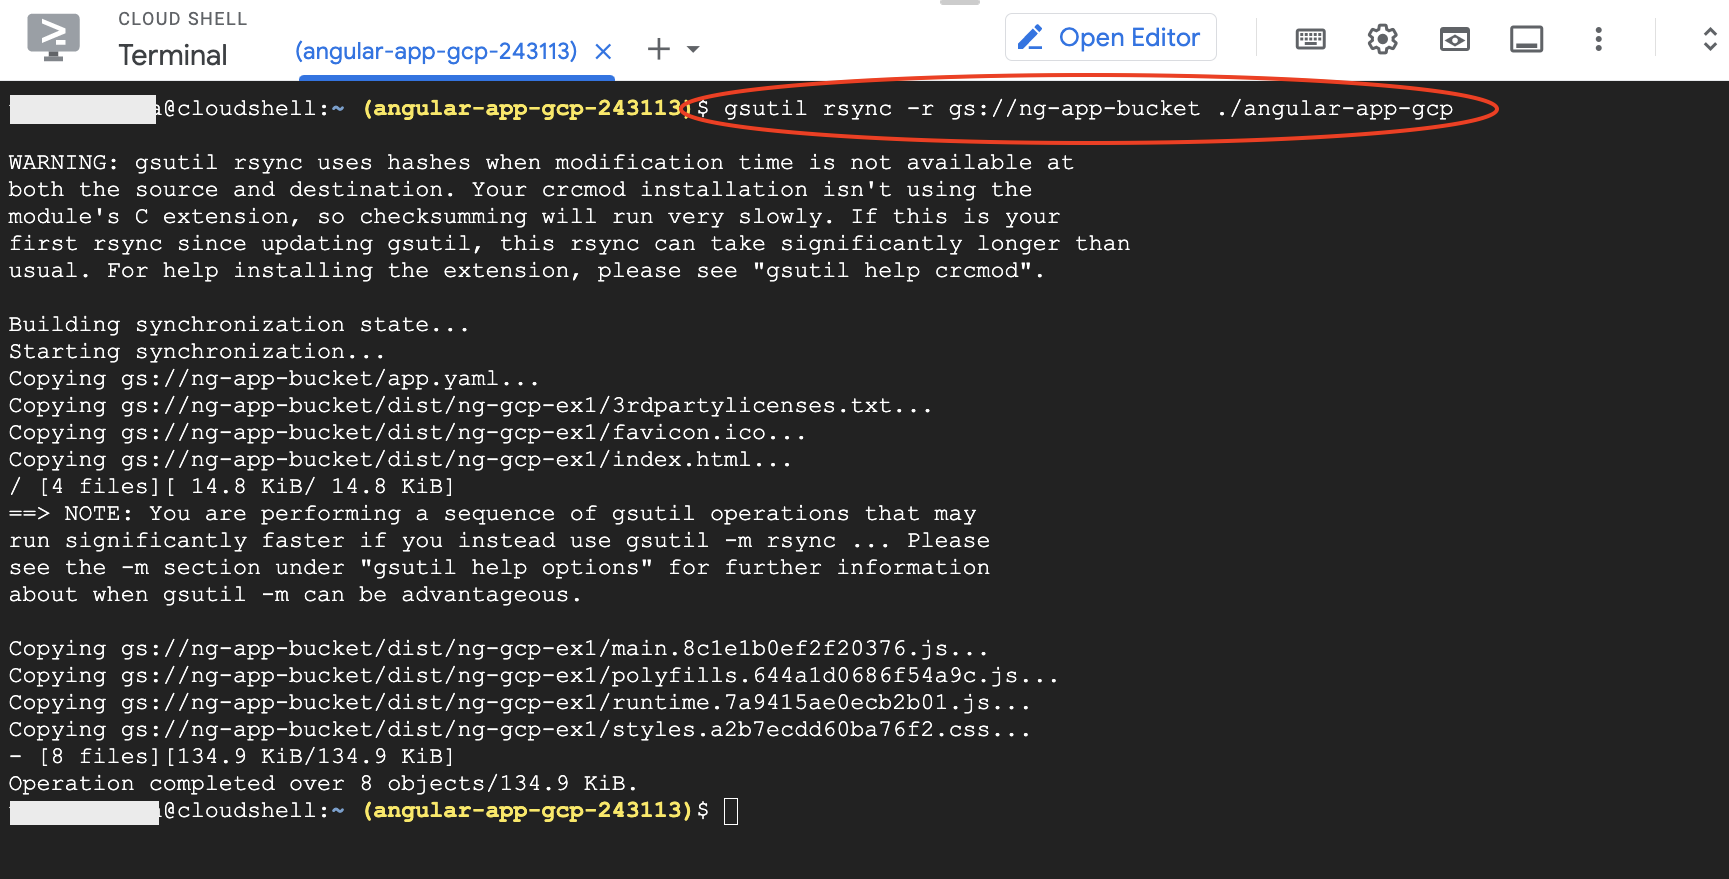
Note: If you put your
app.yamlfile anddistfolder in a folder (previously created in your bucket), include the folder's name. For example, if your folder's name isng-example, the command would be
gsutil rsync -r gs://ng-app-bucket/ng-example ./angular-app-gcp - Go to
angular-app-gcpfolder, using the command
cd angular-app-gcp
Run the following command to deploy the app
gcloud app deploy
Note: for the first time deployment, you will need to configure your project. Choose14(for us-east4) for the region where you want your App Engine application located
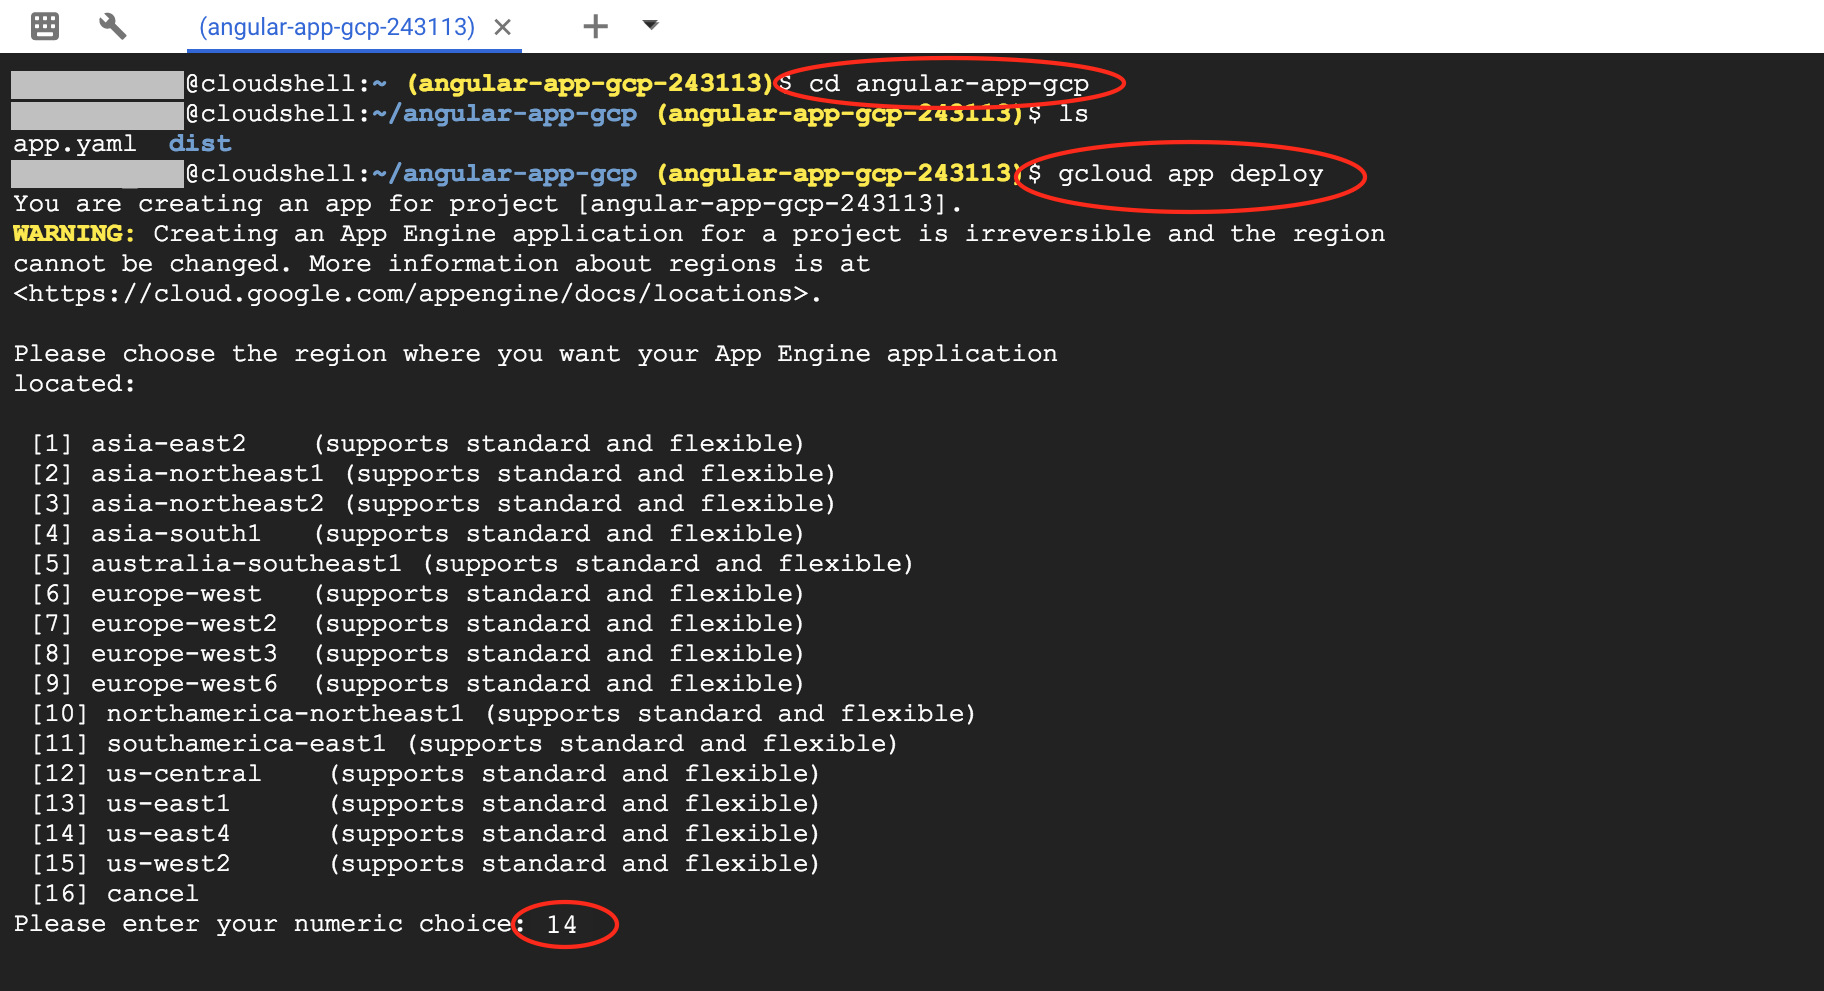
Answeryto continue

Once the deployment is completed, your Shell should look like
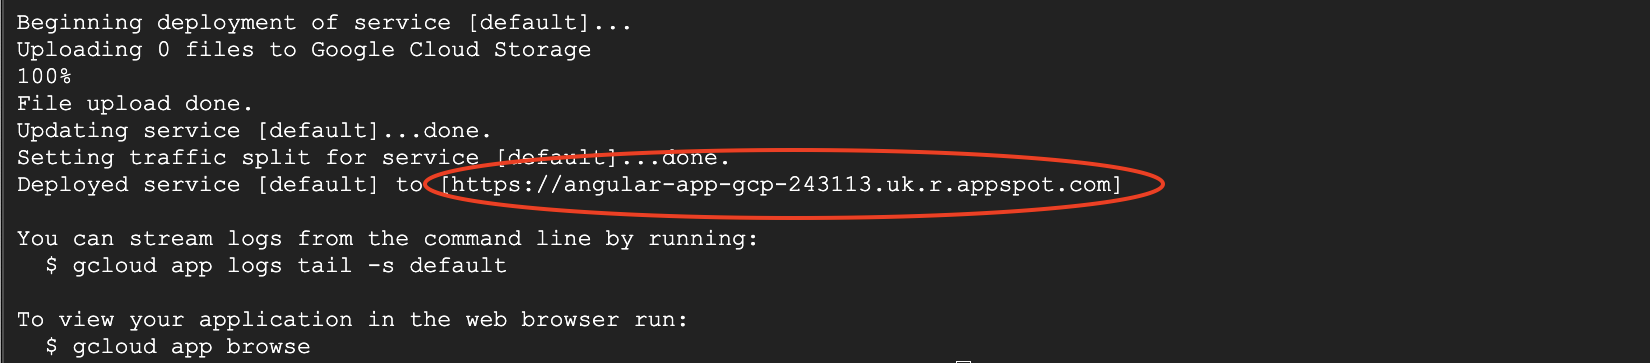
To access your app, you may run the command
gcloud app browse
Or open a web browser and access the URL directly. In this example, the target URL is
https://angular-app-gcp-243113.uk.r.appspot.com
 CC-BY-NC-SA 4.0